Posts mit dem Label MAC OS Lion werden angezeigt. Alle Posts anzeigen

Montag, 3. Oktober 2011

AirDrop auf jedem Lion-Mac per Terminal-Befehl aktivieren


Mit der neuen Katze, dem Mac OS X 10.7 Lion, kamen große Neuerungen, aber auch kleine und unterschätzte neue Funktionen. Dateien über das Netzwerk übertragen kann man zwar schon länger, mit der Einführung von AirDrop macht Apple diese Möglichkeit aber endlich so einfach wie möglich.
Die Sache hat nur einen Haken: Wer seinen Mac vor 2009 gekauft hat, kann AirDrop standardmäßig nicht nutzen. Eine Liste der von Werk aus unterstützten Macs findet sich auf Apples Lion-Seite unter dem Punkt “AirDrop”.
Für alle Besitzer älterer Lion-Macs, die die praktische Funktion trotzdem einmal ausprobieren wollen, hat Mac OS X Hints gute Nachrichten!
Durch einen einfachen Terminal-Befehl lässt sich AirDrop anscheinend auf quasi jedem Mac mit Lion aktivieren. Einzige Bedingung ist, dass der Befehl dafür auf allen Macs, mit denen Daten übertragen werden sollen, einmal ausgeführt wird – auch auf solchen, die AirDrop schon nativ unterstützen.
Öffnet einfach das “Terminal” (mit Spotlight lässt es sich direkt finden), gebt folgenden Befehl exakt so ein…
defaults write com.apple.NetworkBrowser BrowseAllInterfaces 1
… und drückt danach die Enter-Taste.
Um den Finder danach einmal neuzustarten gebt ihr anschließend noch den Code…
killall Finder
… ein und bestätigt wieder mit Enter.
Der Code muss dabei exakt so übernommen werden – am besten kopieren und einfügen!
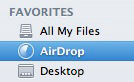
Nun sollte die Schaltfläche “AirDrop” links im Finder angezeigt werden. Ruft man diese auf, erscheinen im Radar alle anderen Benutzer, die das AirDrop-Fenster ebenfalls gerade geöffnet haben (und den Terminal-Trick benutzt haben), und man kann per Drag & Drop ganz einfach Daten übertragen.
Leider funktioniert das Ganze natürlich nur, wenn ihr Lion auf eurem Mac installiert habt. Für alle anderen bleibt nur der normale, etwas umständlichere Weg über die Netzwerkfreigaben – oder ein Update ;)

Freitag, 12. August 2011

Mac OS X Lion: create a bootable USB or DVD support with one click


A new open-source application called Lion DiskMaker will let you create that with just one click.
Lion DiskMaker is a very simple to use and fast application.
After launching the app, it will locate your Mac OS X Lion installer in the ~/Applications folder, or tries to find it usingSpotlight.
Once located you can create your own bootable OS X Lion Installer on a DVD or on a USB key or SD-Card.
Great tool, highly recommended.
This is the developer’s site where you can find more info and the download link.

Donnerstag, 4. August 2011

Druckprobleme mit MAC OS 10.6.8 und Xerox WorkCentre

Hatte heute bei einem Kunden folgendes Problem:

Seit dem Update 10.6.8 vom Snow Leopard (MAc OS 10.6) funktioniert das Drucken auf Xerox WorkCentre nicht mehr. Der Drucker ist angehalten!!! siehe Bild


DIE LÖSUNG
Ladet euch folgende Datei herunter - Installieren - Drucken

Freitag, 22. Juli 2011

How to Make a Bootable Mac OS X Lion USB Install Key

Step One
Connect a 8GB or larger USB key to your computer then launch the Mac App Store from your dock.


Step Two
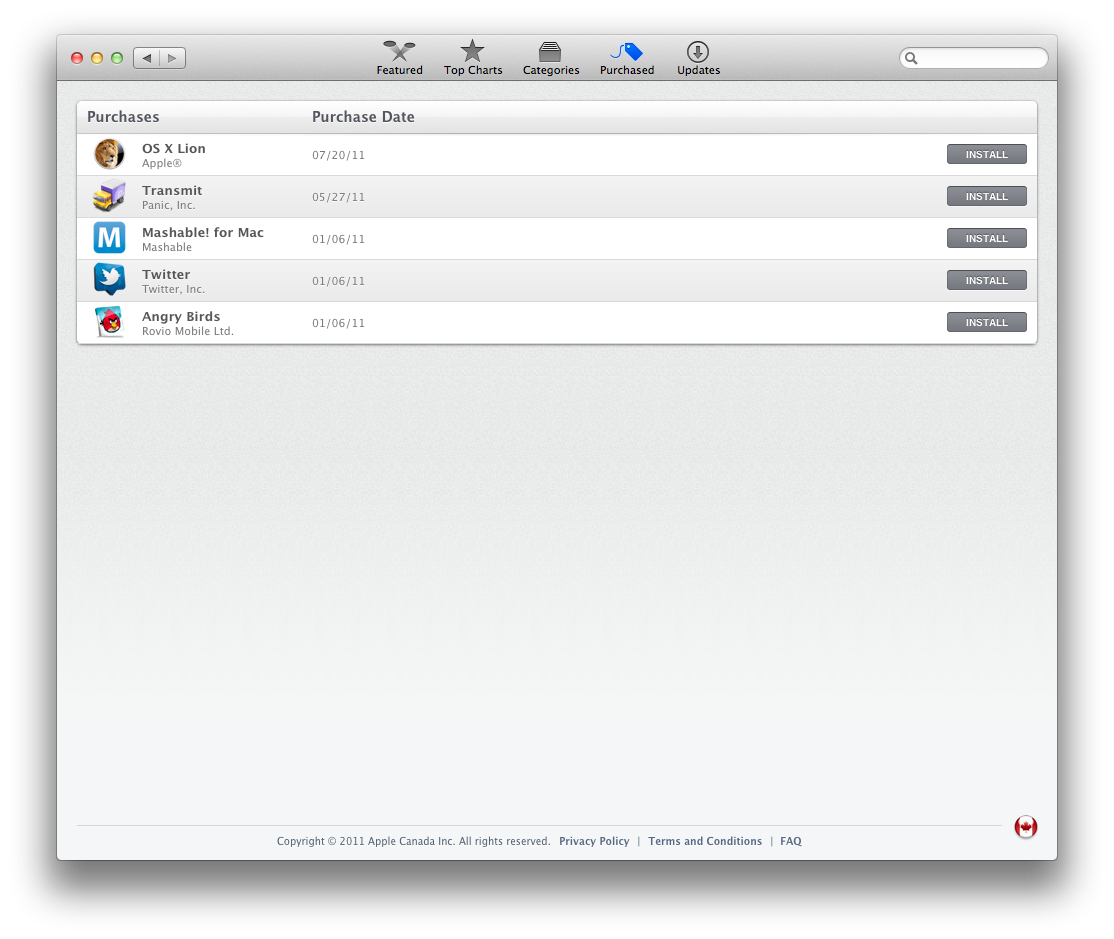
Click the Purchased tab at top of the window the hold down the Option key and click the Purchased tab again.


**If you have not yet installed Lion then you can follow these instructions to buy it and begin downloading.

Step Three
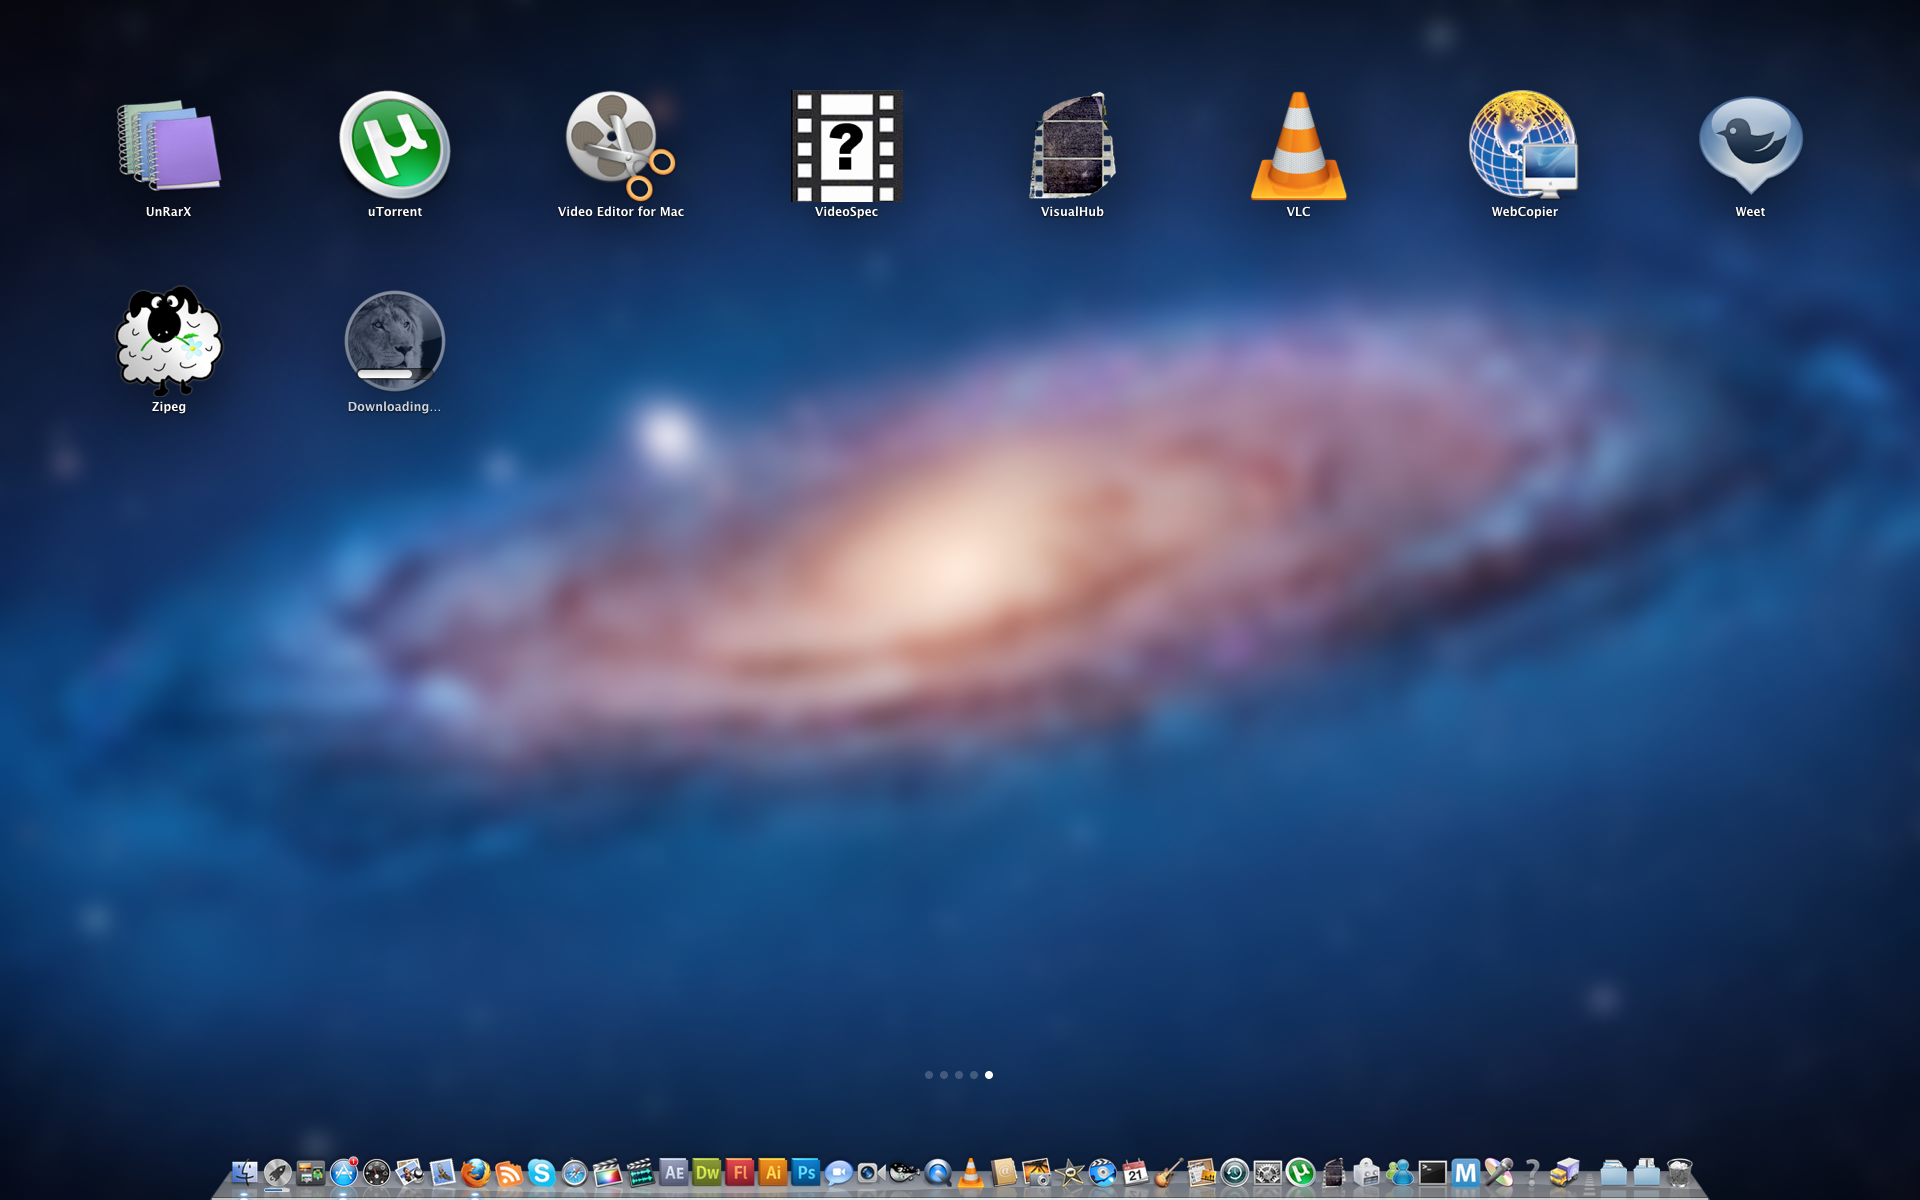
Press the Install button for OS X Lion and wait while the operating system downloads. If the LaunchPad appears press the Escape key.


Step Four
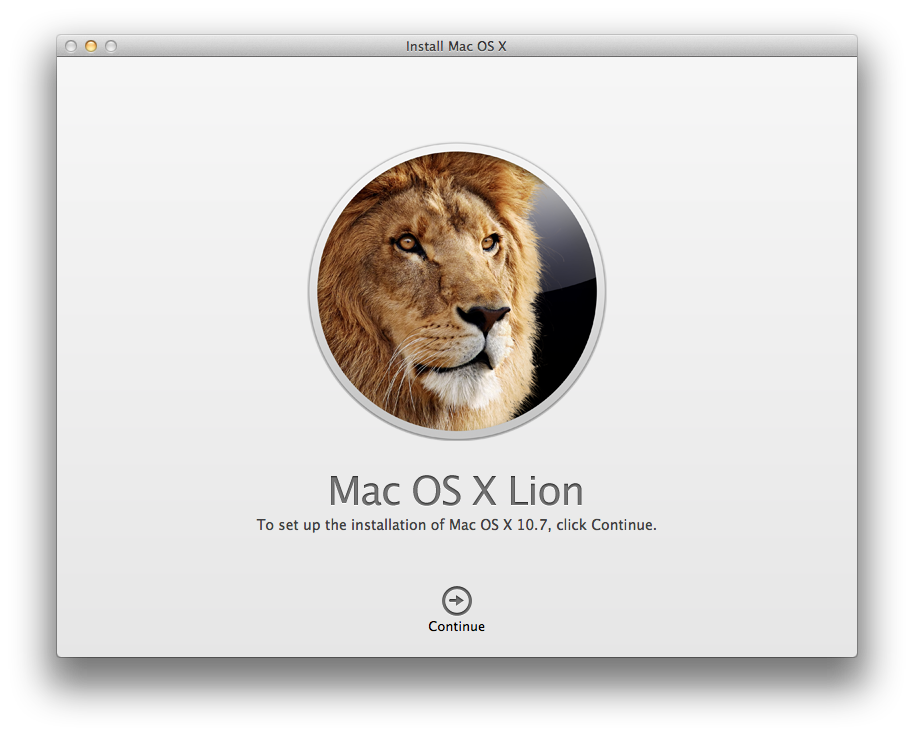
Once the download has completed the Mac OS X Lion Installer will launch. Select Quit from the Install Mac OS X Lion to exit the installer.


Step Five
Click to launch a new Finder window from your dock.


Step Six
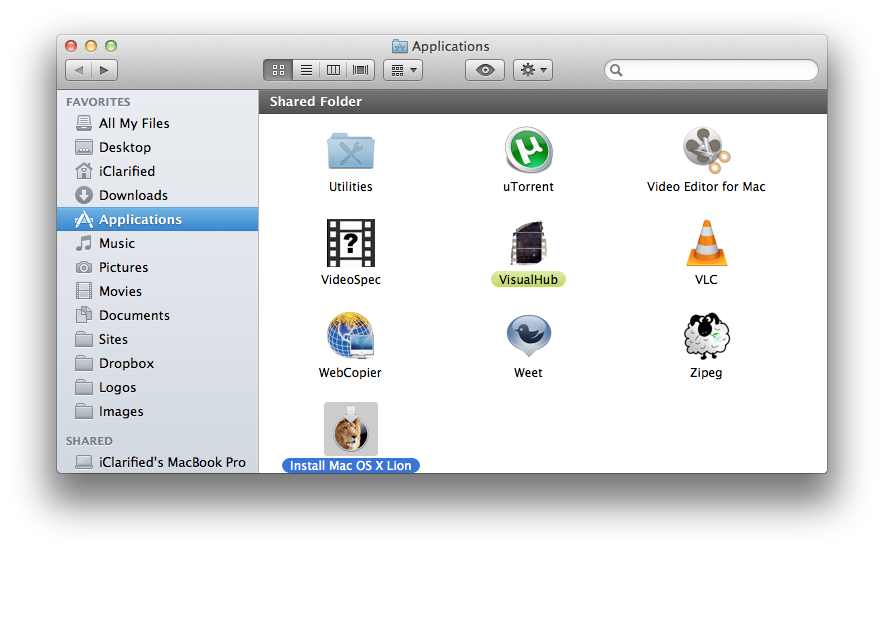
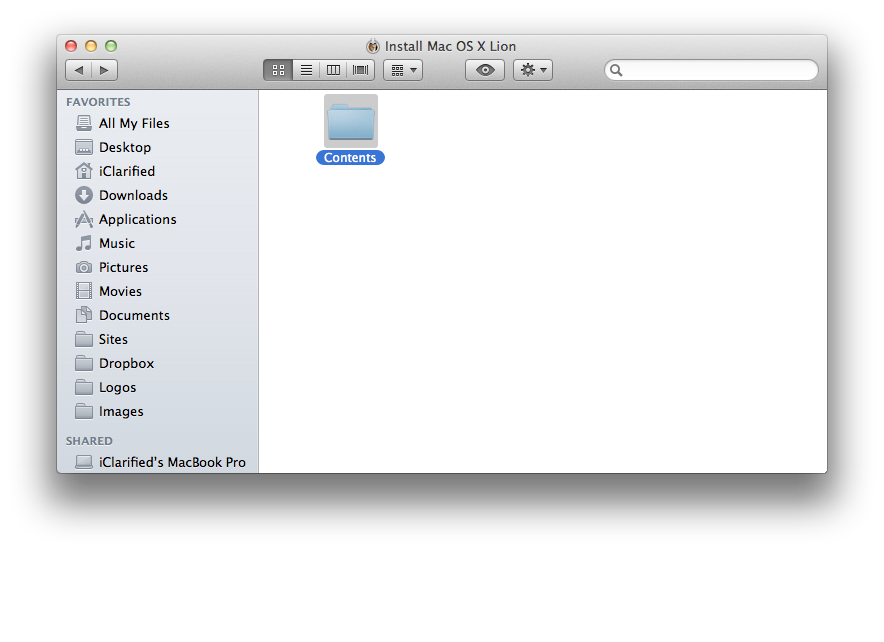
Navigate to the Applications folder and right click the new "Install Mac OS X Lion" icon then select Show Package Contents from the contextual menu.


Step Seven
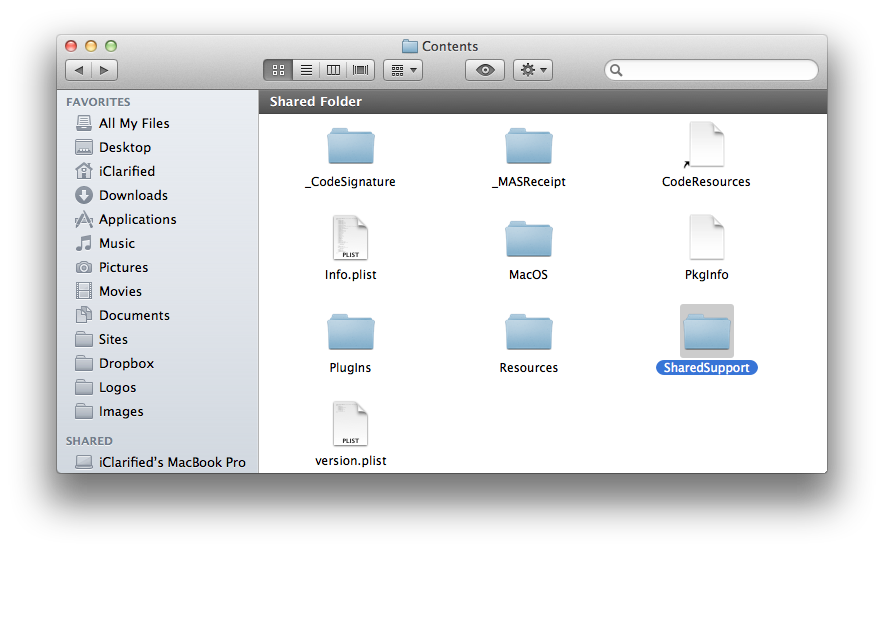
Double click the Contents folder.


Step Eight
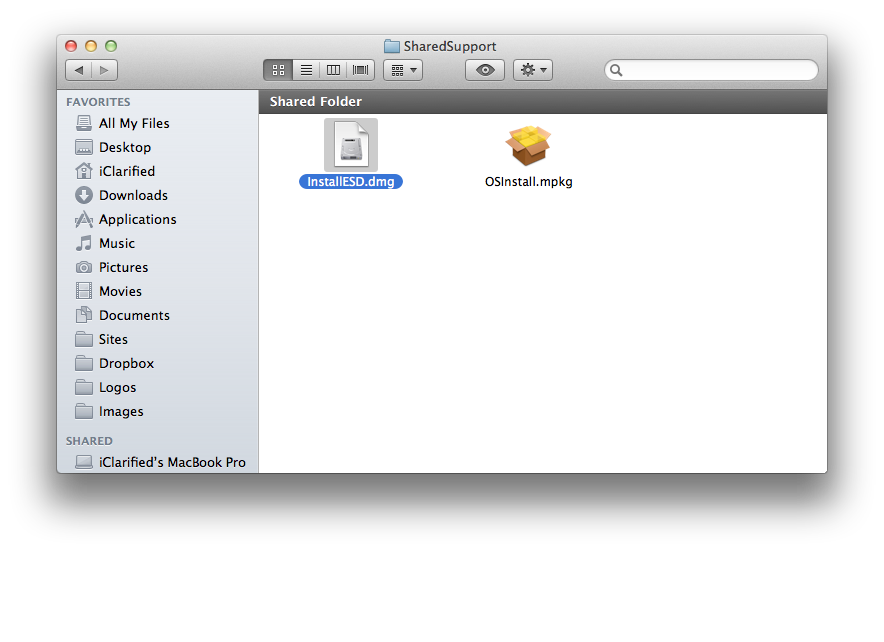
Then double click the SharedSupport folder


Step Nine
Locate the InstallESD.dmg file then open a new Finder window by pressing Command + N on your keyboard.


Step Ten
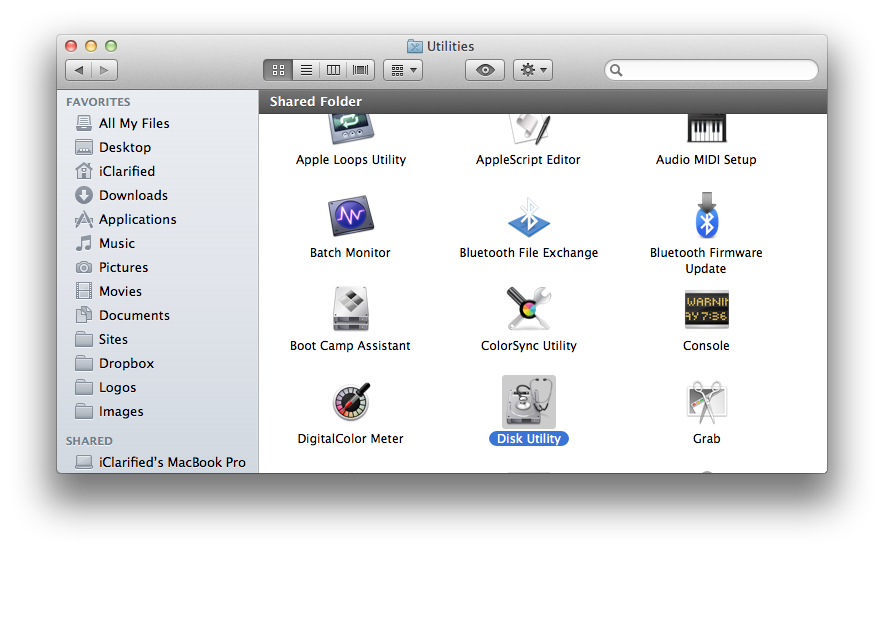
Navigate to your Applications:Utilities folder then double click Disk Utility to launch the application


Step Eleven
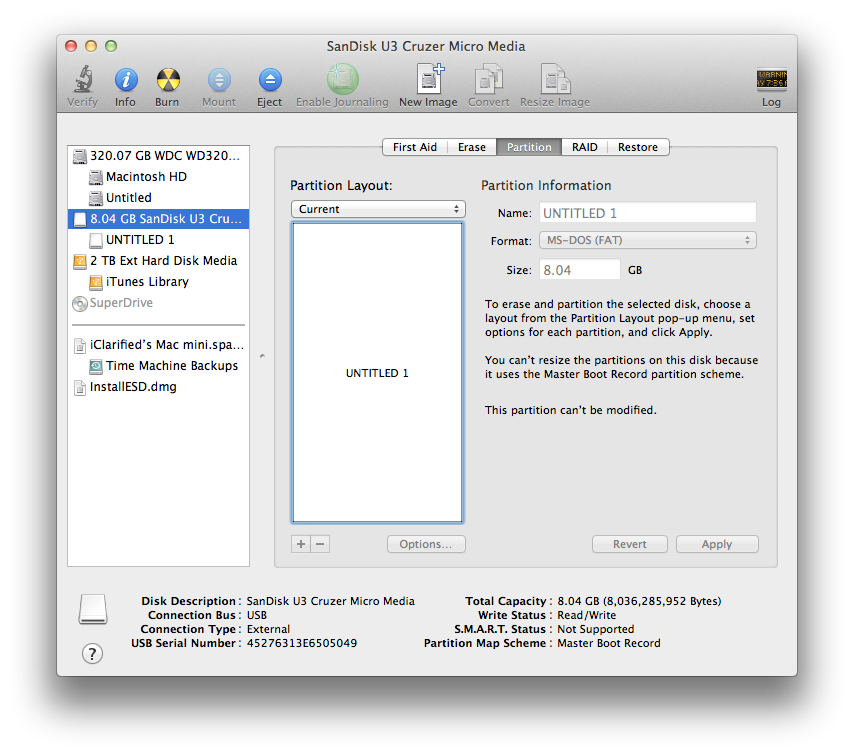
Select your USB thumb drive from the list on the left and click the Partition tab.


Step Twelve
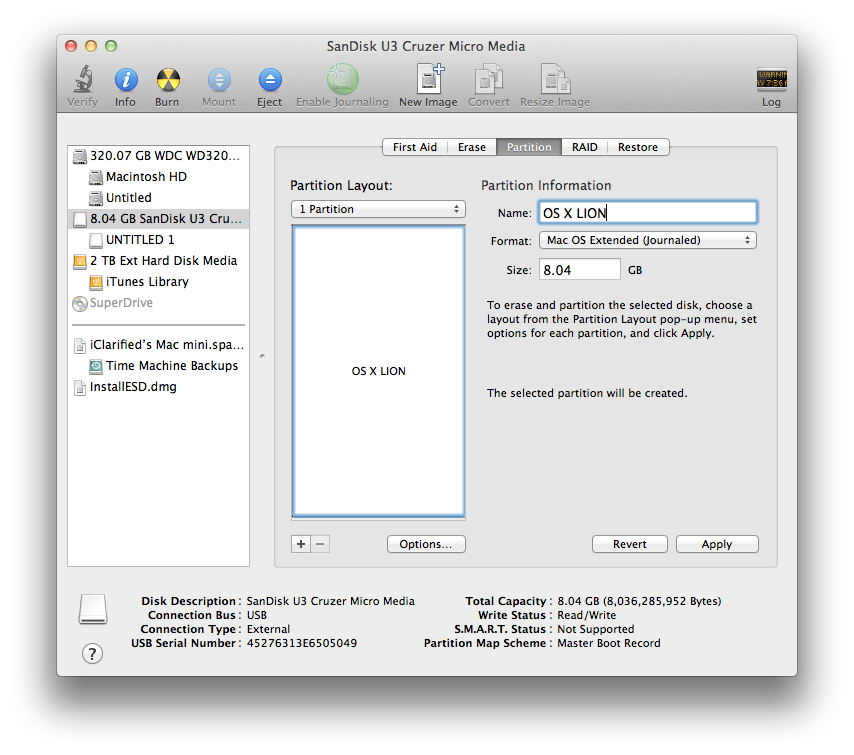
Set the Partition Layout to 1 Partition, set the Name to OS X Lion, and set the Format to Mac OS Extended (Journaled) and then click the Options button.


Step Thirteen
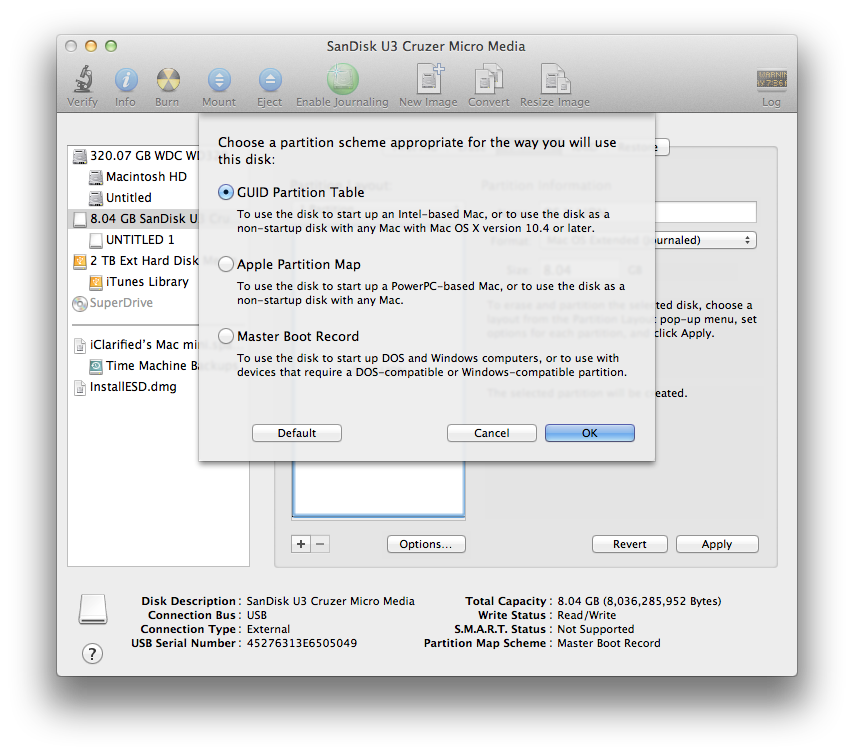
Choose GUID Partition Table from the popup window then click the OK button.


Step Fourteen
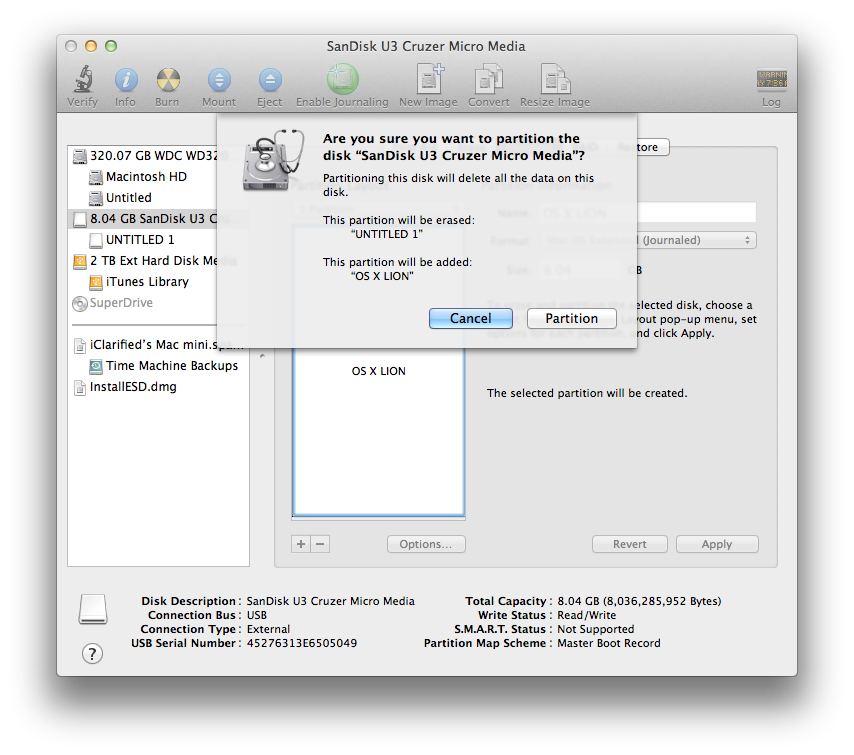
Next click the Apply button to save your changes.


When asked to confirm click the Partition button.


Step Fifteen
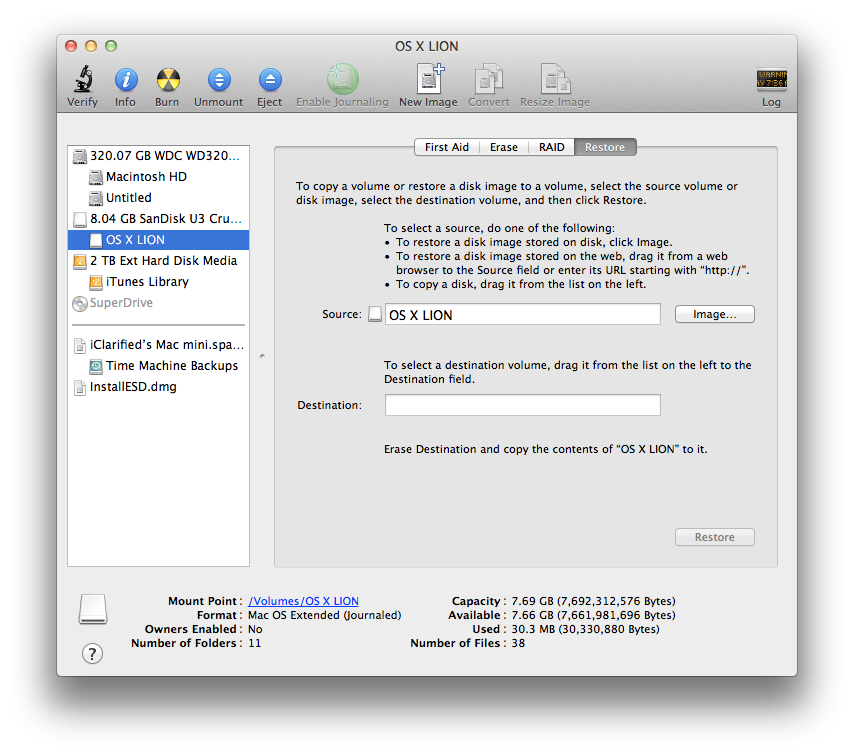
Once the USB drive has been partitioned correctly, select the new OS X Lion partition from the list on the left and click the Restore tab.


Step Sixteen
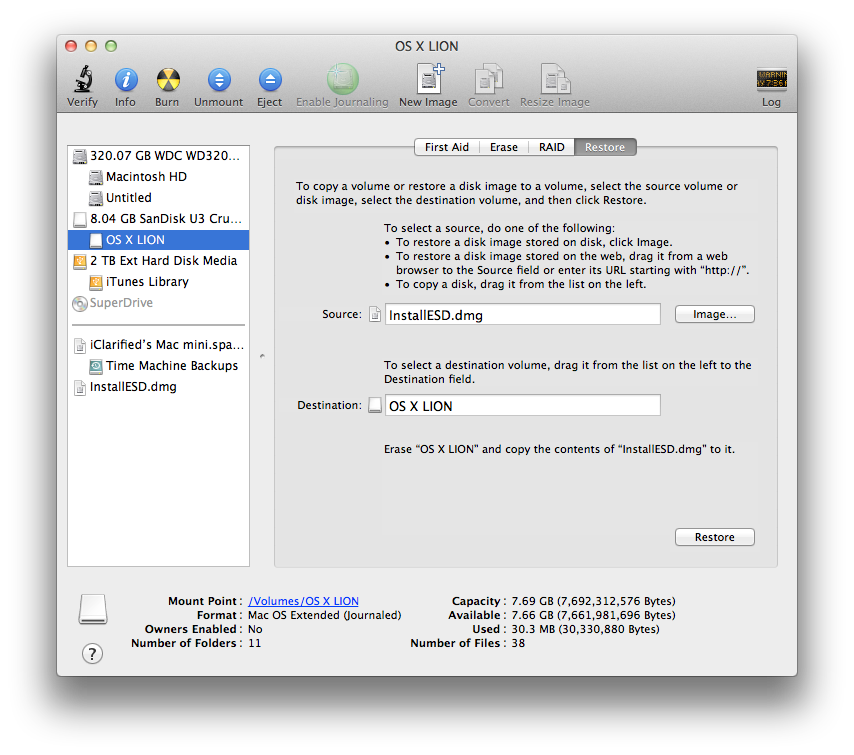
Drag the InstallESD.dmg file we located earlier from the Finder window into the Source field. Then drag theOS X Lion partition from the list on the left into the Destination field.


Step Seventeen
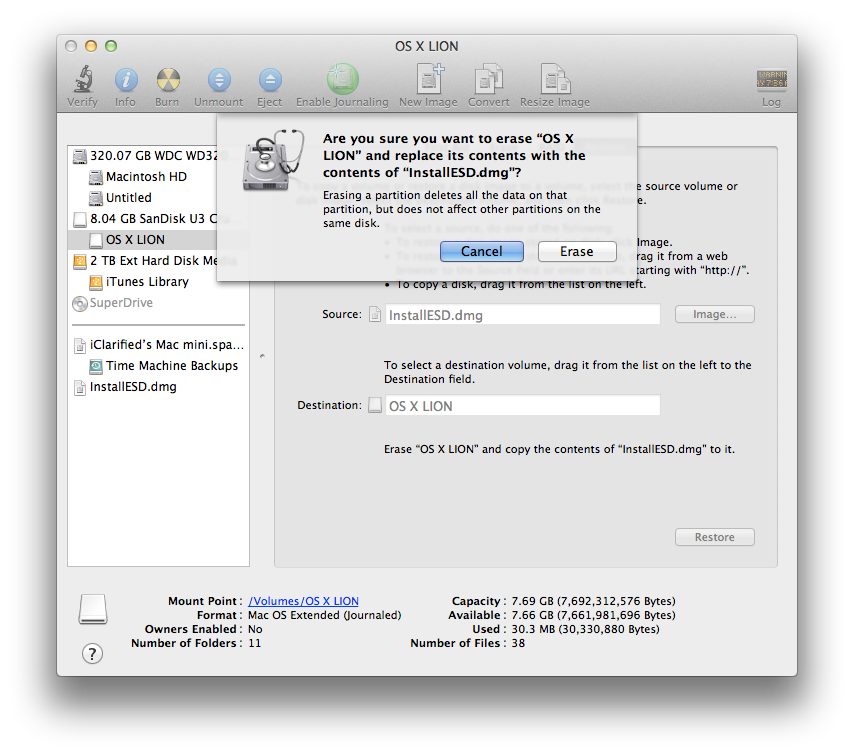
Click the Restore button then click the Erase button from the confirmation popup to begin building your install key.


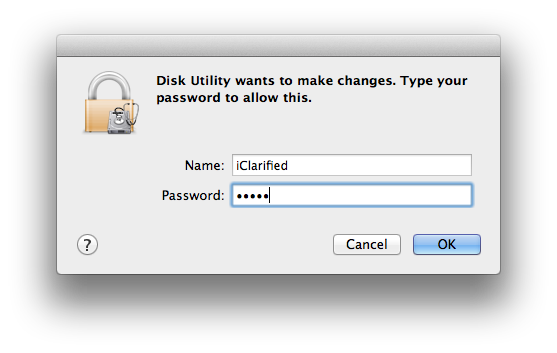
Another popup will appear asking you to log in. Enter your administrative username and password then clickOK.


Step Eighteen
When the restore is complete the Mac OS X Lion USB Install Key will be mounted and it will be ready to use.

How to upgrade from Mac OS X Lion GM to Final release


If you ran one of the beta releases of Mac OS X Lion, you probably ran into a problem when trying to upgrade to the final release of OS X Lion.
When I tried to upgrade one of my dev-machines, I was prompted with an error saying “A newer version of this app is already installed on this computer”
Of course, you know that isn’t the case, as OS X Lion, just came out.
After some digging, I found the solution. It turns out that all you need to do is to hold the option key (⌥) while pressing install. That will force the Lion to install.

Rename Onedrive Business root folder

Rename Onedrive Business root folder Here is what I remember: In the Office 365 web admin pages, change the organization name to a shorte...