Posts mit dem Label USB werden angezeigt. Alle Posts anzeigen

Donnerstag, 2. August 2012

Creating (a better) vSphere 5 ESXi embedded USB Stick


In a previous post I blogged about creating a vanilla vSphere 5 ESXi USB drive using the VMware .iso file from VMware. This post shows how to create one using the HP version of vSphere ESXi (5.0_Oct_2011_ESXi_HD-USB-SDImgeInstlr_Z7550-00253.iso).
Note: (You can use any vendor customized vSphere ESXi .iso file: VMware, Dell and IBM).
The HP version comes pre-installed with all the HP CIM providers which work very well with HP servers, including the HP MicroServer. Using the HP version gives you the more details in the Hardware Status tab.
I’m going to be using a different method, recommended by Will Rodbard (thanks Will), who is a colleague of mine at VMware, you can see his comments from the previous post. In summary the steps are:
  1. Find and download the following tools:
  2. Run the HPUSBFW tool, click on the USB drive, select ‘Fat32′ and click Format
  3. Run UNETBOOTIN, select Diskimage and browse to the ESXi 5 ISO file
  4. Select the USB drive you have just formatted and click OK
  5. If you want to make more USB keys for more servers, then now is the time to create .IMG files using WinImage, then you can basically clone the image of the USB key to more USB keys. Or if you don’t wish to use WinImage then just perform steps 1 to 4 again.
Once completed your USB drive will boot into the ESXi 5 installer. Once booted, install the ESXi 5 Hypervisor to the USB drive (overwriting the installer). This will then leave you with the installed ESXi Hypervisor on the USB.
Note that using this method creates a brand new bootable USB key for use in a new installation of vSphere ESXi. You will have to go through the process of installing ESXi onto the USB key, or another disk or LUN on the target server. If you want a USB key that is already installed with ESXi which saves you from going through the installation wizard, you can use the other method in this post.

Freitag, 12. August 2011

Mac OS X Lion: create a bootable USB or DVD support with one click


A new open-source application called Lion DiskMaker will let you create that with just one click.
Lion DiskMaker is a very simple to use and fast application.
After launching the app, it will locate your Mac OS X Lion installer in the ~/Applications folder, or tries to find it usingSpotlight.
Once located you can create your own bootable OS X Lion Installer on a DVD or on a USB key or SD-Card.
Great tool, highly recommended.
This is the developer’s site where you can find more info and the download link.

Freitag, 22. Juli 2011

How to Make a Bootable Mac OS X Lion USB Install Key

Step One
Connect a 8GB or larger USB key to your computer then launch the Mac App Store from your dock.


Step Two
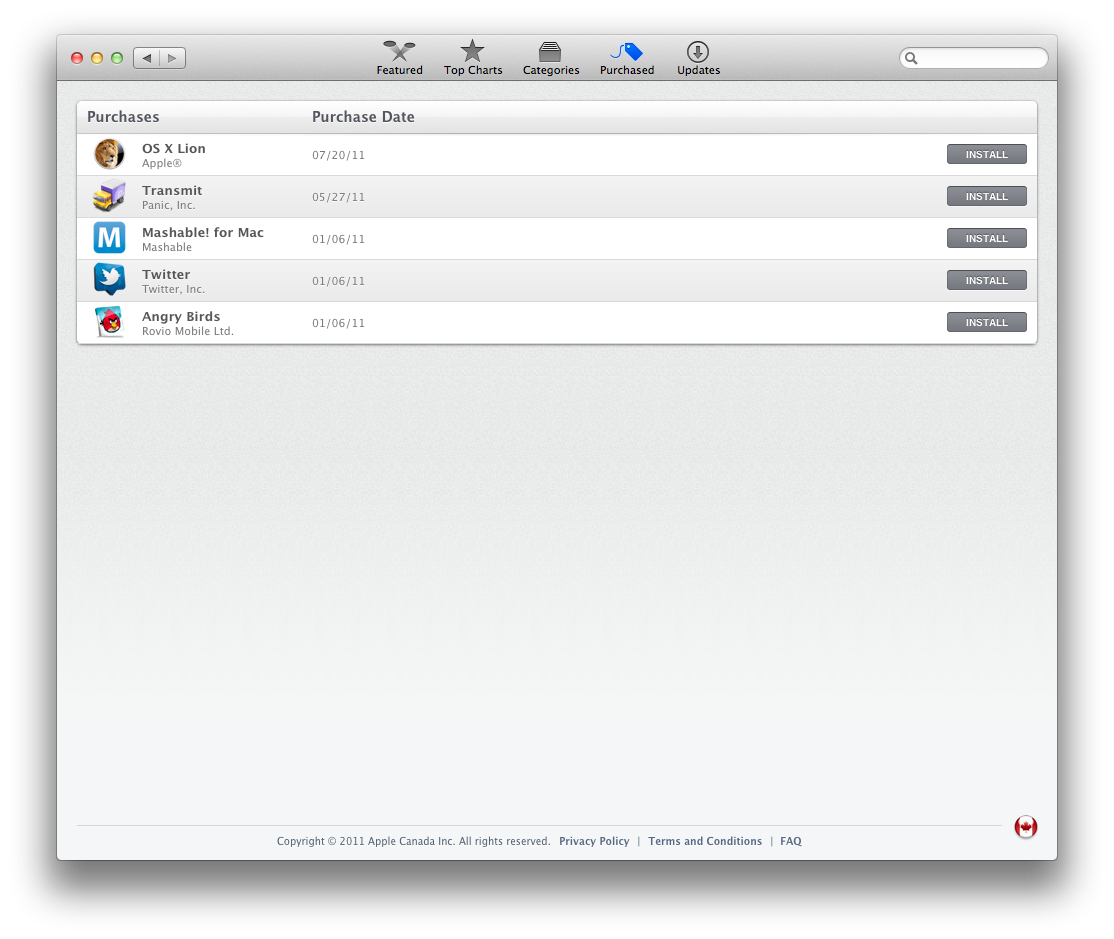
Click the Purchased tab at top of the window the hold down the Option key and click the Purchased tab again.


**If you have not yet installed Lion then you can follow these instructions to buy it and begin downloading.

Step Three
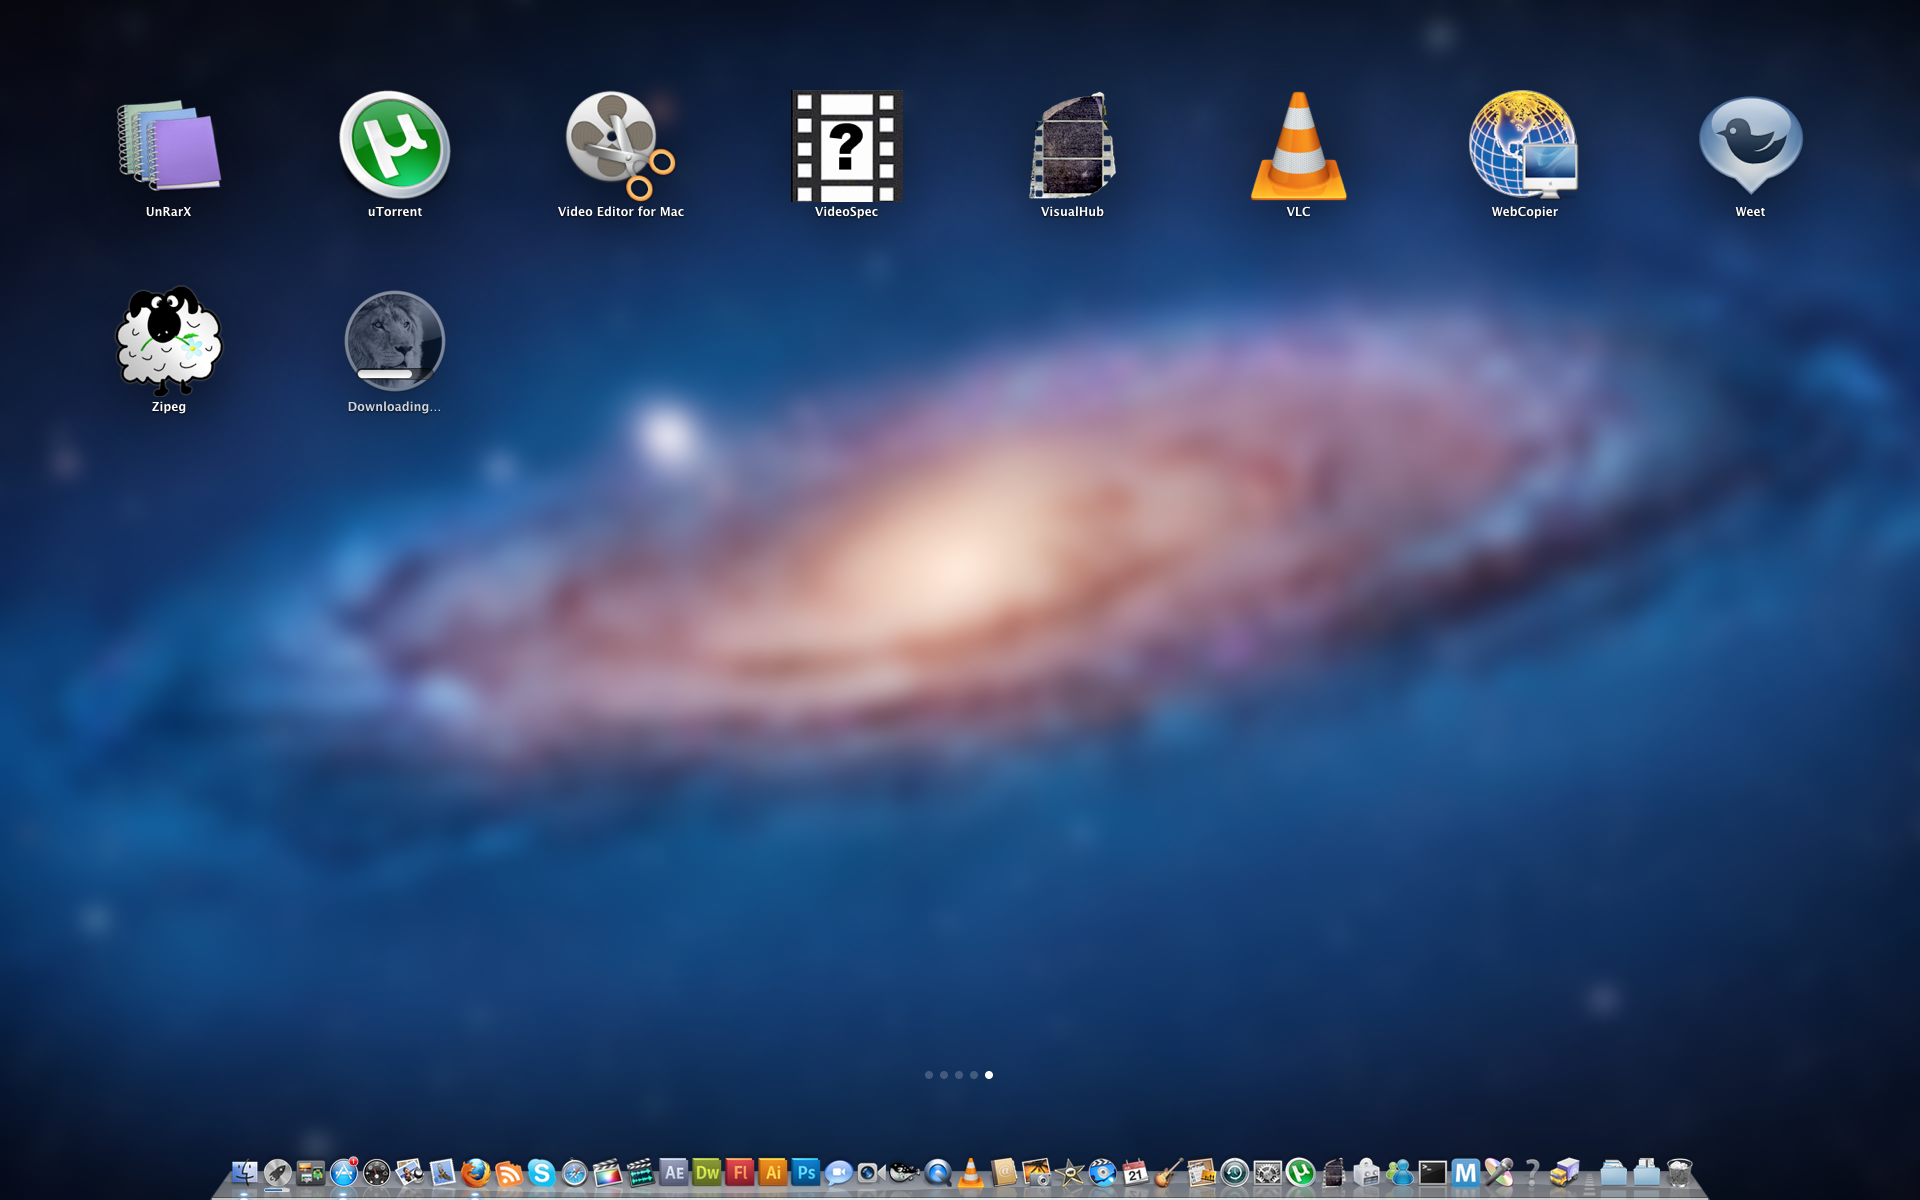
Press the Install button for OS X Lion and wait while the operating system downloads. If the LaunchPad appears press the Escape key.


Step Four
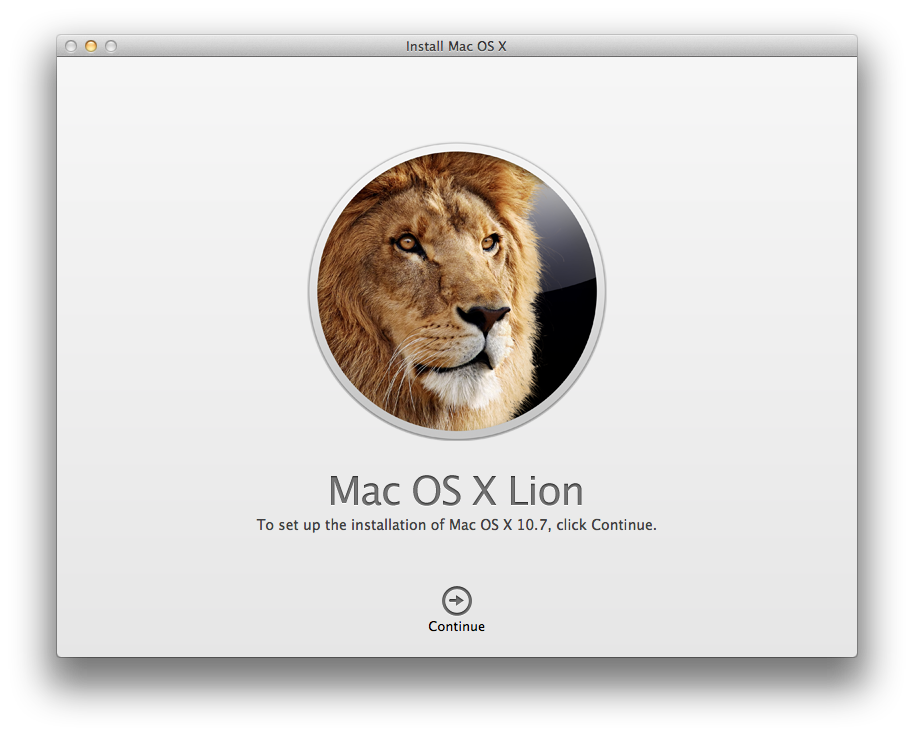
Once the download has completed the Mac OS X Lion Installer will launch. Select Quit from the Install Mac OS X Lion to exit the installer.


Step Five
Click to launch a new Finder window from your dock.


Step Six
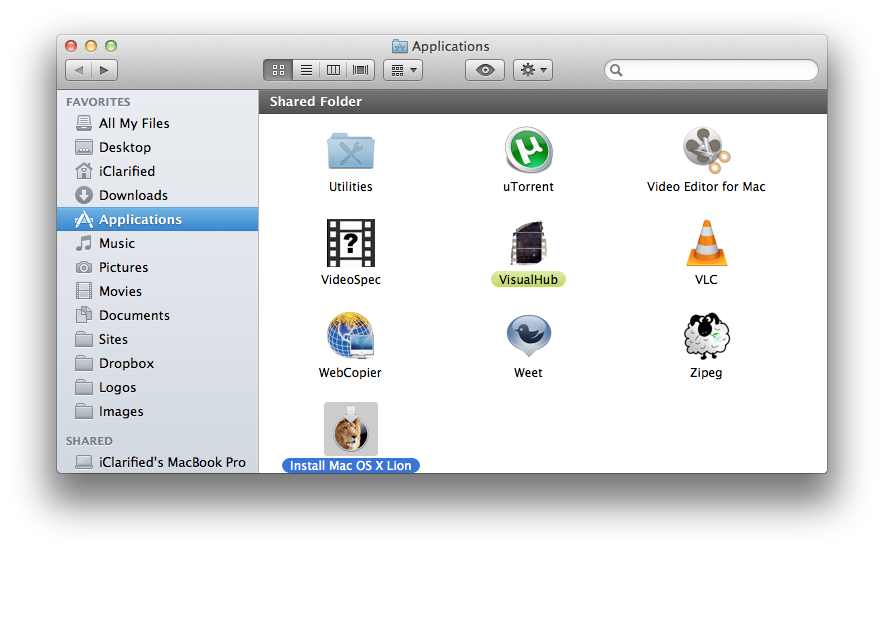
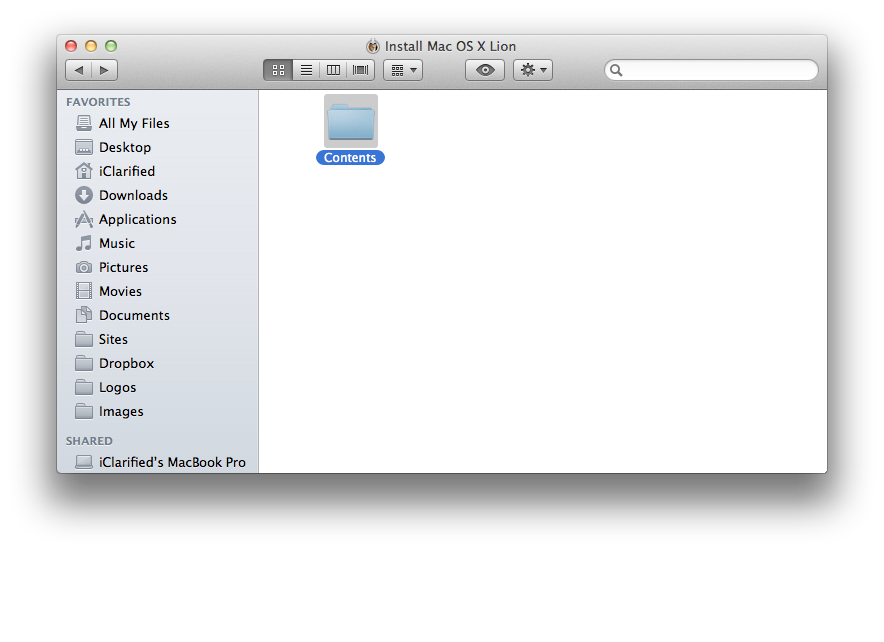
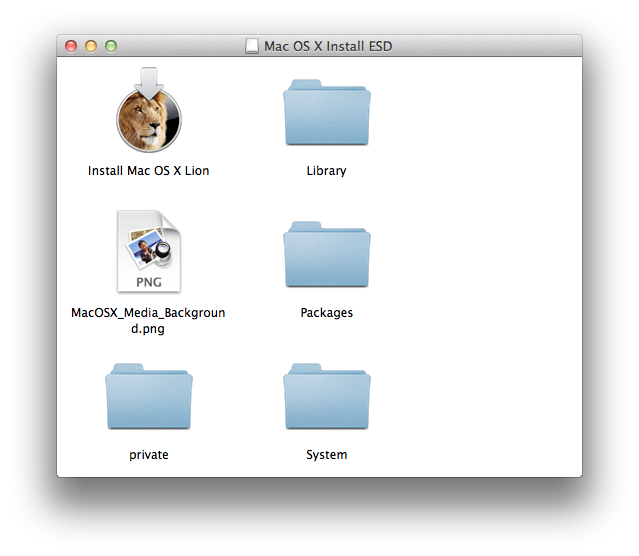
Navigate to the Applications folder and right click the new "Install Mac OS X Lion" icon then select Show Package Contents from the contextual menu.


Step Seven
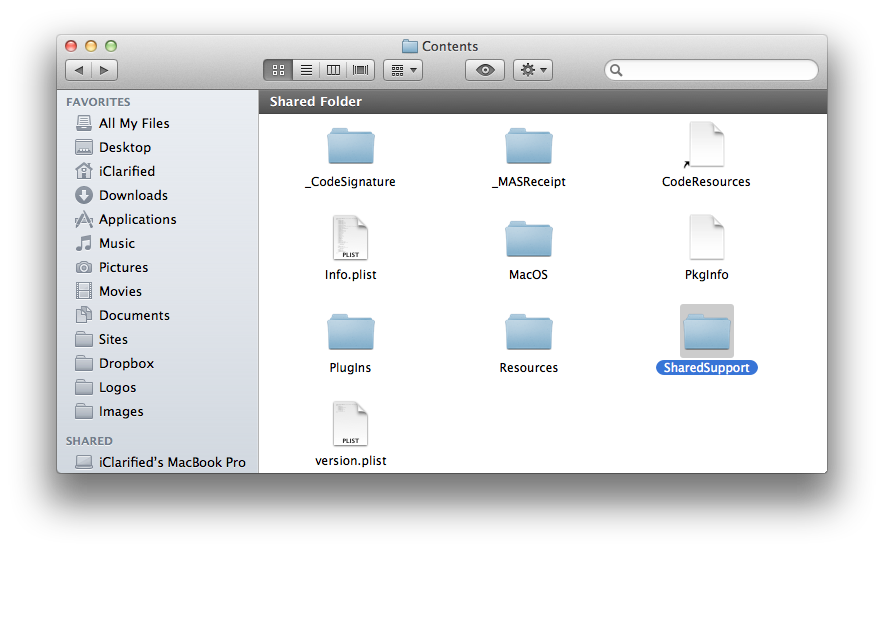
Double click the Contents folder.


Step Eight
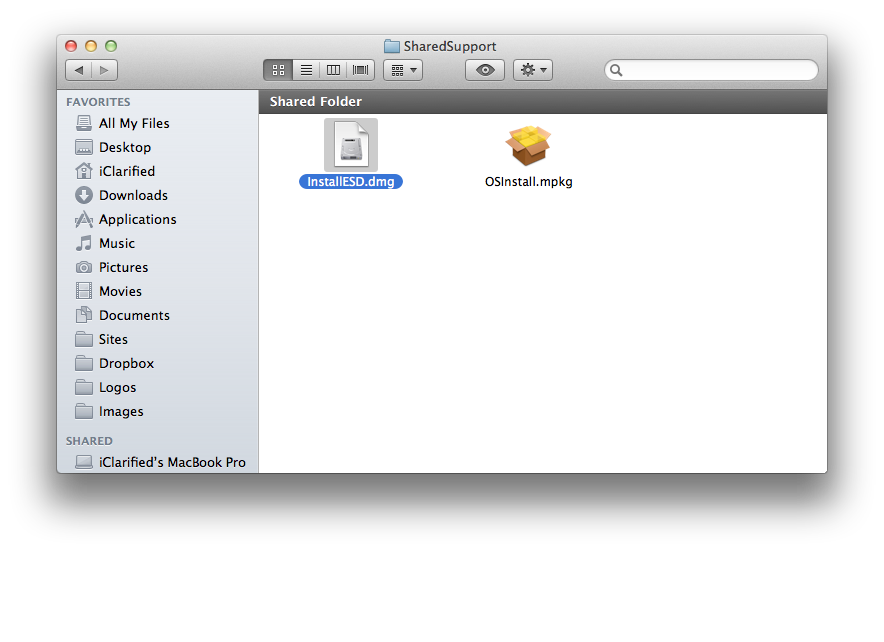
Then double click the SharedSupport folder


Step Nine
Locate the InstallESD.dmg file then open a new Finder window by pressing Command + N on your keyboard.


Step Ten
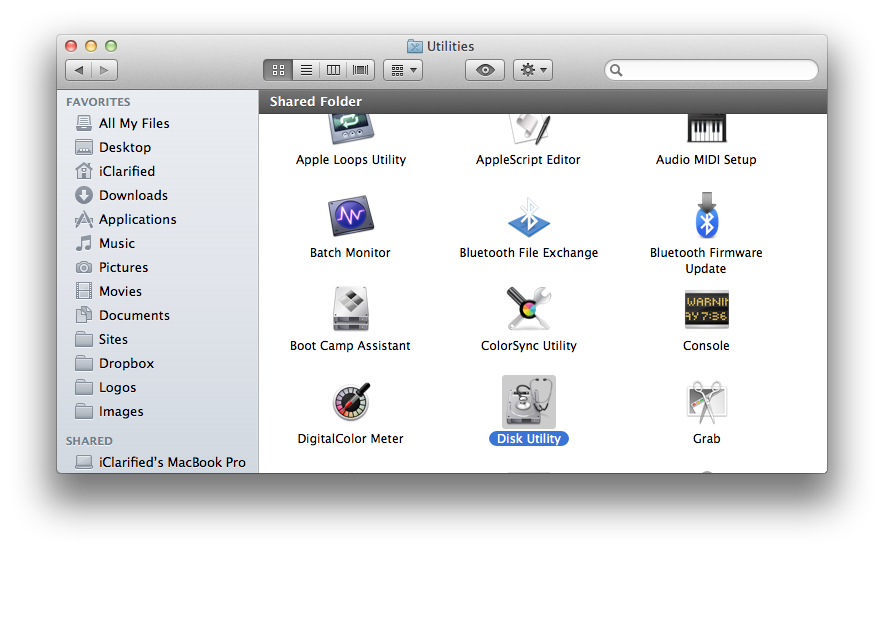
Navigate to your Applications:Utilities folder then double click Disk Utility to launch the application


Step Eleven
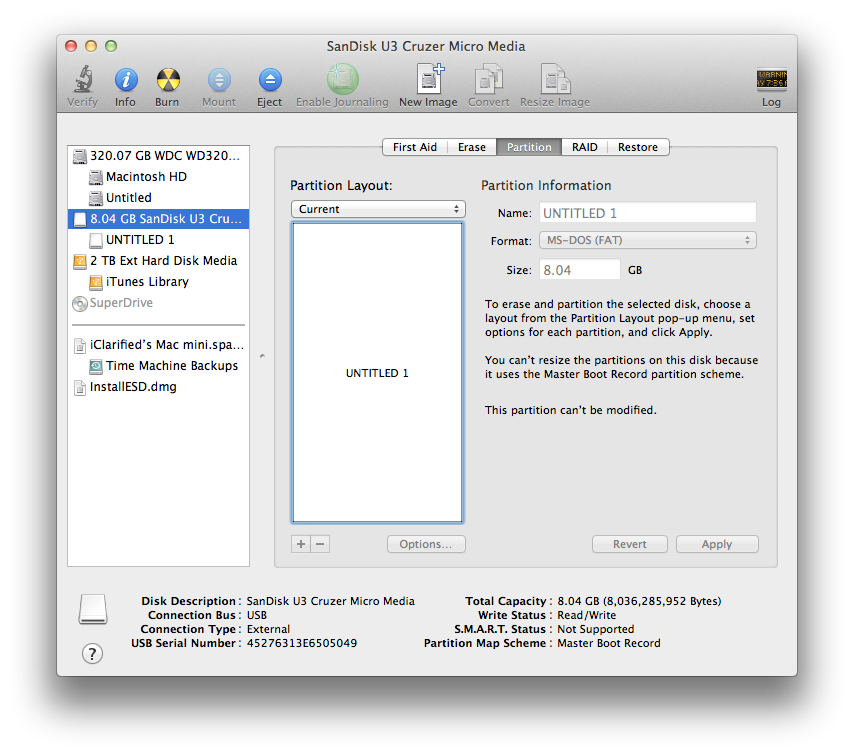
Select your USB thumb drive from the list on the left and click the Partition tab.


Step Twelve
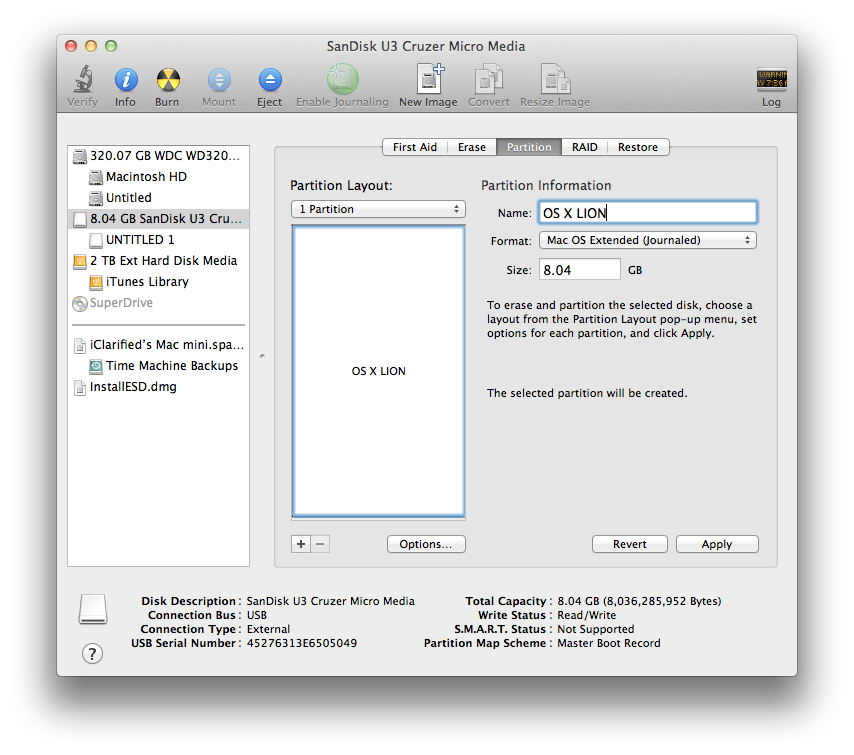
Set the Partition Layout to 1 Partition, set the Name to OS X Lion, and set the Format to Mac OS Extended (Journaled) and then click the Options button.


Step Thirteen
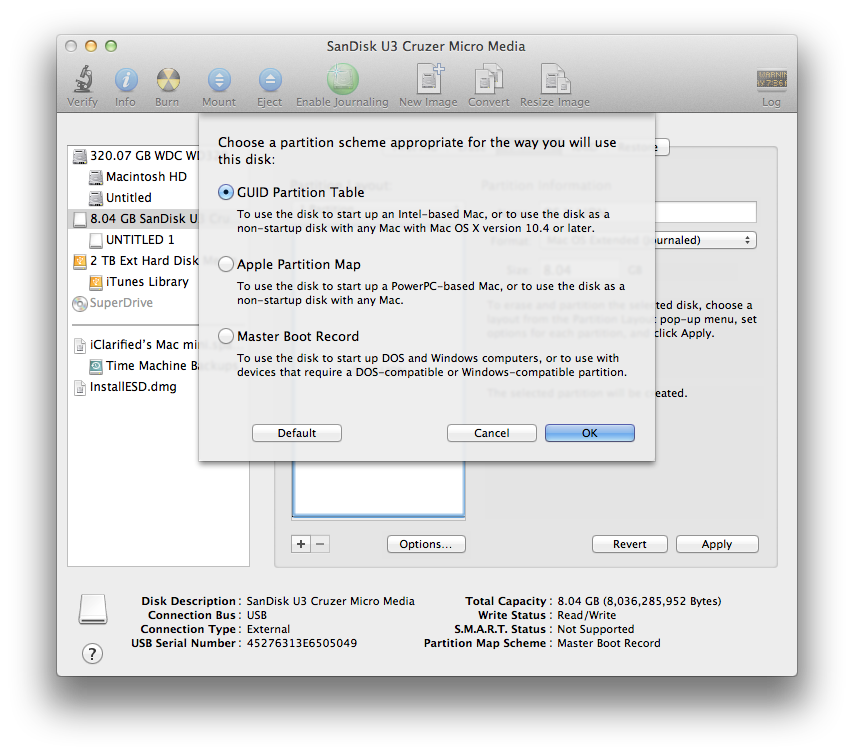
Choose GUID Partition Table from the popup window then click the OK button.


Step Fourteen
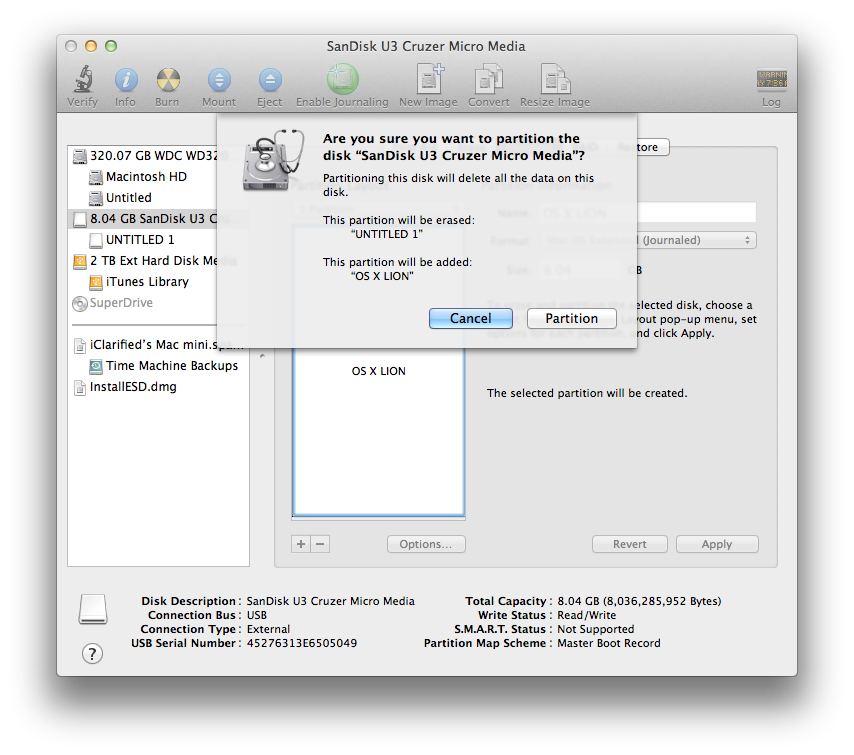
Next click the Apply button to save your changes.


When asked to confirm click the Partition button.


Step Fifteen
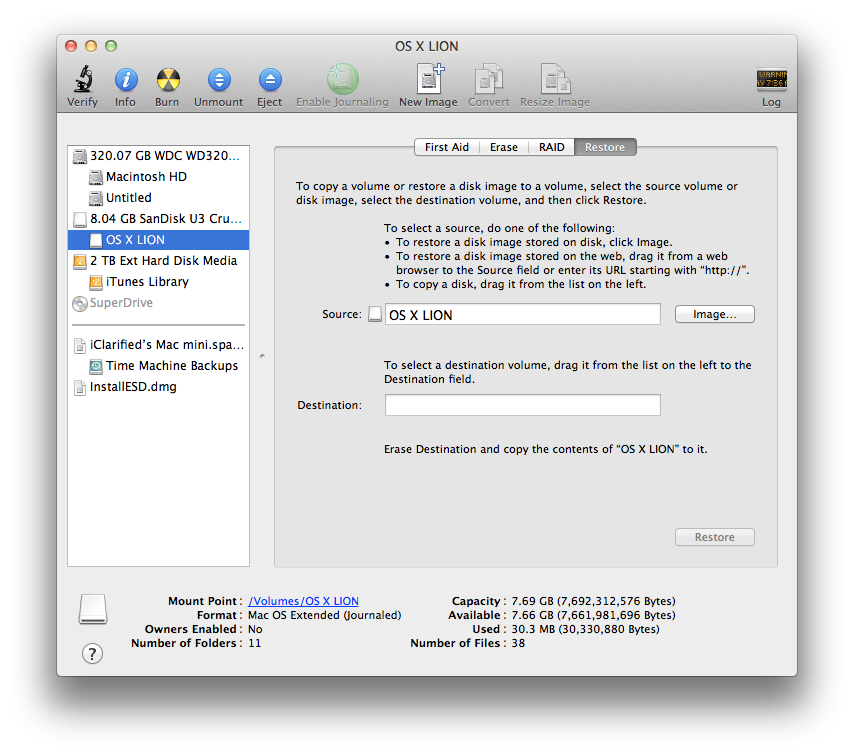
Once the USB drive has been partitioned correctly, select the new OS X Lion partition from the list on the left and click the Restore tab.


Step Sixteen
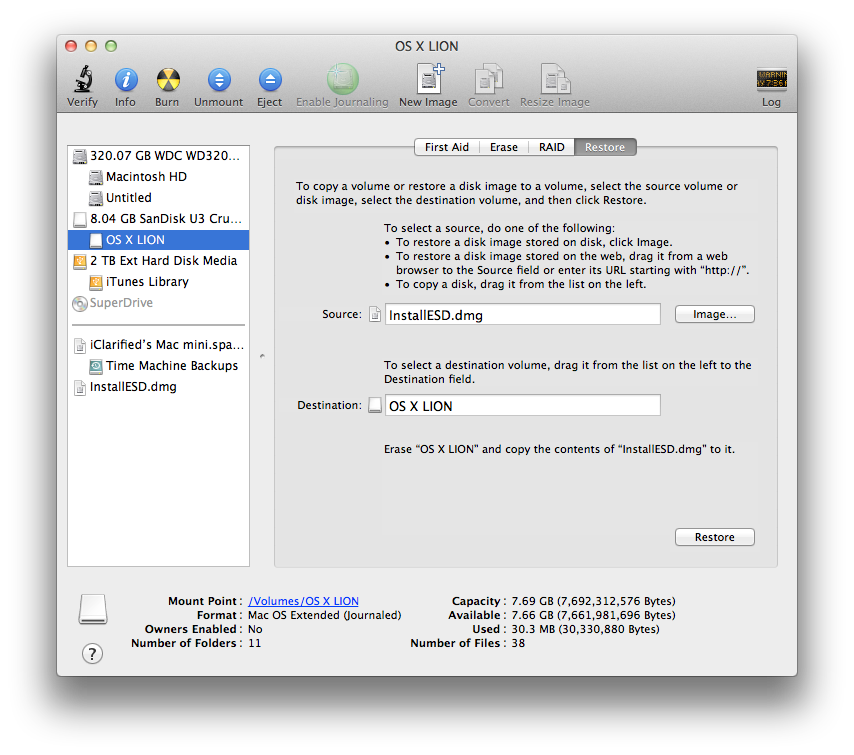
Drag the InstallESD.dmg file we located earlier from the Finder window into the Source field. Then drag theOS X Lion partition from the list on the left into the Destination field.


Step Seventeen
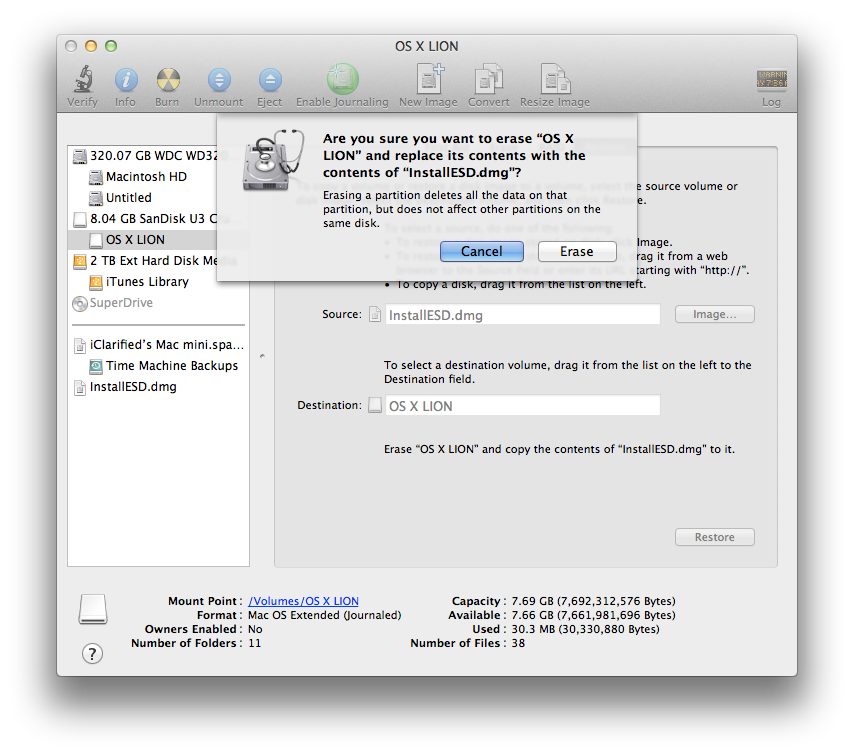
Click the Restore button then click the Erase button from the confirmation popup to begin building your install key.


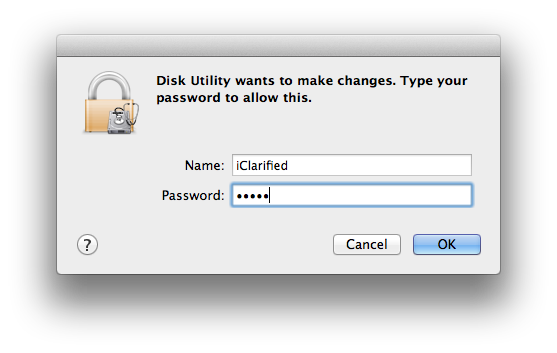
Another popup will appear asking you to log in. Enter your administrative username and password then clickOK.


Step Eighteen
When the restore is complete the Mac OS X Lion USB Install Key will be mounted and it will be ready to use.

Dienstag, 15. Juni 2010

HowTo: Make a Bootable USB Disk

There are lots of ways to make a bootable USB flash disk (Pendrive, USB stick, Flashdrive, or whatever you call it), but most require you to download something you don’t already have. However, if the goal is to make a bootable Windows Vista/Windows 7/Windows Server 2008/R2 USB installation drive to install Windows on a server or other computer that doesn’t have a DVD drive in it, then you already have all the required software. All you need is a USB flashdrive of 4GB or more and the installation DVD. The rest is just a bit of command line fun. On a Windows computer that does have a DVD drive, do the following:

  1. Insert the target USB disk (in this case, a 16 GB pen drive)
  2. Insert the source DVD disk (drive letter is D: and it’s a Windows Server 2008 R2 DVD)
  3. Open a PowerShell or CMD window As Administrator
  4. Type diskpart and press

DISKPART> list disk

Disk ### Status Size Free Dyn Gpt
-------- ------------- ------- ------- --- ---
Disk 0 Online 111 GB 0 B
Disk 1 Online 16 GB 0 B

DISKPART> select disk 1

Disk 1 is now the selected disk.

DISKPART> clean

DiskPart succeeded in cleaning the disk.

DISKPART> create partition primary

DiskPart succeeded in creating the specified partition.

DISKPART> select partition 1

Partition 1 is now the selected partition.

DISKPART> active

DiskPart marked the current partition as active.

DISKPART> format fs=ntfs

100 percent completed

DiskPart successfully formatted the volume.

DISKPART> assign

DiskPart successfully assigned the drive letter or mount point.

DISKPART> exit

Leaving DiskPart...

PSH>

Now, assuming your DVD drive with the Server 2k8 R2 DVD in is D:, and your target USB drive is H:

PSH> D:\boot\bootsect /nt60 h:
Target volumes will be updated with BOOTMGR compatible bootcode.

H: (\\?\Volume{3887d21d-23b9-11df-ab70-00e0b889184e})

Successfully updated NTFS filesystem bootcode.

Bootcode was successfully updated on all targeted volumes.

PSH>


Now, finally, copy the contents of the source DVD to the new bootable USB stick:

PSH> xcopy d:\*.* h:\ /e /h /j

When the copy is finished, you’ll have a bootable USB drive.

Now, finally a couple of comments and cautions. First, you need to use a source disk and a computer to do this on that are compatible. So either both need to be 64-bit, or if for some reason you try to do this on a 32-bit Windows but want to make a 64-bit install USB stick, then you’ll need to juggle DVDs a bit since the bootsect.exe that you run must match the architecture of the computer you’re running it on.

Second, if you don’t like xcopy, and you’re running this on a Win7 computer or have robocopy available, then you can use the robocopy command:

PSH> robocopy d:\ h:\ /mir

Third (and this should be obvious, but just in case), you’ll need to adjust your drive letters and the selected disk in diskpart.exe to match your environment.

Finally, if you’re working from an ISO image, you can mount that ISO image as if it were an actual DVD disk using a utility such as VirtualCloneDrive. (This is freeware, no nag, and really useful!)

All this because my new HP DL160se G6 came with no optical drive at all. But more on that HP later.

Rename Onedrive Business root folder

Rename Onedrive Business root folder Here is what I remember: In the Office 365 web admin pages, change the organization name to a shorte...