Sonntag, 28. Oktober 2012

WSUS won’t uninstall or re-install


Hat heute ein Problem mit WSUS unter Windows Server 2008 R2 bei einem Kunden. Das Problem - die Clients konnten keinen Verbindung zum WSUS Server herstellen. Die Deinstallation wurde unerwartet beenden mit folgender Fehlermeldung:
Attempt to un-install Windows Server Update Services failed with error code 0x80070643. Fatal error during installation

 Die Lösung:

I don’t like Windows Server Update Services (WSUS), but it’s the free alternative many companies select over the higher cost alternatives like Intune or Systems Center. So, today I had to repair a damaged WSUS installation. Turns out someone uninstalled SQL Server 2005 Express not realizing WSUS was using it. Now firing up the WSUS console just yielded an error complaining about the missing SQL database. So like any good troubleshootin IT guy the first thing I tried was to uninstall WSUS…sadly, however the product would not uninstall or re-install. Here’s how I finally got rid of it:
[the problem]
  • WSUS 3.0 SP2 is missing SQL server Express or has been damaged somehow.
  • When opening WSUS you receive a SQL error when trying to connect.
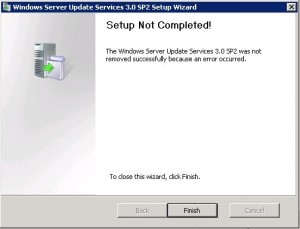
  • You cannot uninstall WSUS. An attempt to uninstall/re-install fails with an error.
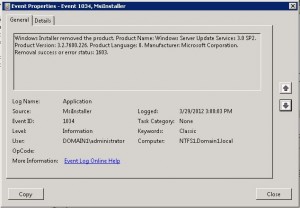
  • The event log shows eventid: 1034 with “Removal success or error status: 1603″
[the solution]
[step 1] Open REGEDIT in and locate: HKLM\Software\Microsoft\Update Services\Server\Setup
[step 2] Change the value of “wYukonInstalled” to 0×0 (zero) and ensure that the value of “SqlInstanceIsRemote” is oxo (zero).
[step 3] Download and run the WSUS 3.0 SP2 installer. You should now be able to remove the product using the installer. Select none of the check boxes (to remove database, logs or updates), we can remove these manually later.
[step 4] Download and install SQL Server 2008 Express R2 (or SQL Server 2005 Express). Make sure you can connect to the instance you create with SQL Server Management Studio.
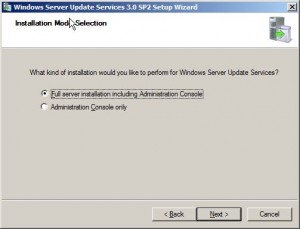
[step 5] Run the WSUS 3.0 SP2 installer again and (this time it should allow you to install). Install the Full product including management console.
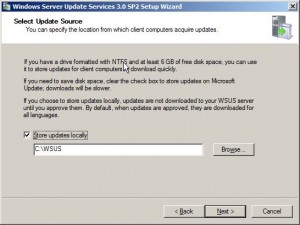
[step 6] Select a location with plenty of space to store the downloaded updates (I recommend at least 20GB of space).
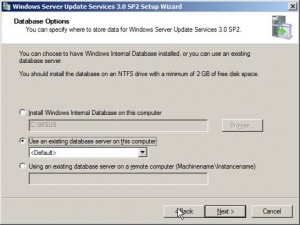
[step 7] Select the option to use an existing database server.
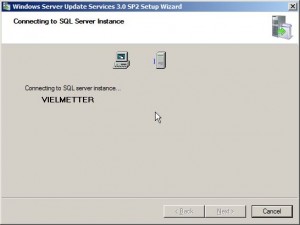
[step 8] It should find the SQL Server 2008 Express instance you installed and tested in [step 4].
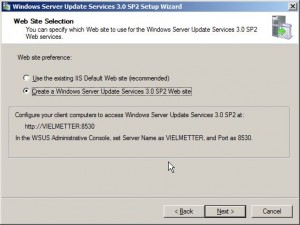
[step 9] Create a separate Windows Update Services website (I don’t recommend using the default IIS website).
[step 10] Step through the WSUS configuration wizard.
That’s it.

Windows 3.11 for Workgroup - Sharing folders and printers


Enable sharing

  1. The first step in sharing folders and resources on your Windows for Workgroups 3.11 PC is to enable this in Network Setup.
  2. Open the Network Group in Program Manager.
Program Manager
  1. Select and double-click the Network Setup icon (above) to open the Network Setup window (below).
Network Setup
  1. Click the Sharing... button (above) to enable file and printer sharing.
Sharing
  1. Select whichever of the two boxes (red) seems appropriate to your needs: "I want to be able to give others access to my files" and "I want to be able to allow others to print to my printer(s)". Obviously, if you have no printer attached to your Windows for Workgroups 3.11 PC then you need only select the first box.
  2. Now click OK (blue)
  3. This will return you to the Network Setup window (below).
Network Setup
  1. Now click OK to return you to the Program Manager (below).

Sharing folders

  1. In Program Manager open the Main group and select and double-click File Manager to open.
File Manager in Program Manager
  1. If the drive that holds the folder you wish to share is not already selected, select it from the drive icon bar (red). In this example I have selected drive C.
  2. Select a folder in the treeview on the left. In this example I have selected c:\gareth
File Manager
  1. Now click on Disk on the Menu bar, and select Share As... (below).
Share As... in File Manager
  1. A window will appear called Share Directory (below). Enter the following information:
  • Share Name (red)
    This is a name that will help other users know what the drive is. Make this something recognisable. You are limited to 8 characters.

    If you would like the drive to be re-shared with the network each time the PC boots up click and select the box marked Re-share at Startup.
  • Path
    This will be filled in by default based on what you selected above. You do have the option here of changing your mind and sharing another folder.
  • Comment
    You can make a comment here that will also help other users know what is on the drive. You are limited to 48 characters.
  • Access Type (green)
    How would you like other users on your network to access this drive? The options are Read-Only, Full or Depends on Password. If you would like a password assigned for any of these options you can enter any password into the Password boxes.
Share Directory
  1. Now click OK (blue) to return you to the File Manager.
  2. You will notice that the folder icon has now changed to that of an open folder with a hand. This indicates that this folder is shared.
File Manager

Connect to a network drive

  1. As well as setting up folders (directories) that other users on your network can connect to, you can connect to folders that have been made available on other users' computers. To do this you have to set up what is known as a "Network Drive".
  2. In File Manager click Disk on the Menu bar, and then select Connect Network Drive...(below).
Connect Network Drive in File Manager
  1. A new window, Connect Network Drive, will appear with various options for selecting the Network Drive connection (below). If you know the path address you can simply enter it into the Path box. If not, you can let the computer work it out:
  • Drive (Red)
    This is the drive letter that you would like to refer to the shared folder on the other PC. You can select a drive letter from those on the drop-down list.
  • Show Share Directories on:
    Select which PC you wish to find the shared folder on. In this case it is STUDY.
  • Shared Directories on \\STUDY:
    I can now see which directories are currently shared on that PC. In this case SharedDocs.
Connect Network Drive
  1. Click OK (purple, above)
  2. You will now see a new network drive icon on your drive bar (below).
  3. Remember that Windows for Workgroups 3.11 cannot understand long filenames and so will reduce them to the DOS 8.3 standard, substituting the long filename usually with the first 6 characters (removing any spaces) of the long file name and adding a tidle (~) and a number to the end.
New network drive in File Manager

Sharing Printers

One of the bonuses of a Local Area Network (LAN) is that you can share resources such as printers.
On the first NIC-to-NIC network I set up I had two printers:
  • Hewlett-Packard 400 on the Windows for Workgroups 3.11 PC
  • EPSON Stylus Color 440 on my Windows 98 Second Edition PC
The process has two stages: first share the printer on the host machine, and second, connect to the printer on the guest machine.

Sharing the WfWg 3.11 Printer


  1. In the Main group in Program Manager double click the Printer Manager icon.
Main group
  1. This will open the Print Manager window (below).
Print Manager
  1. Highlight the printer you want to share (above).
  2. In the menu select Printer | Share Printer As...
Share Printer As... in Print Manager
  1. This will open another dialog window (below).
  2. In the dialog select the Printer you wish to share, in this example "HP DeskJet 400 on LPT1".
Share Printer
  1. Enter the following information about how you would like this printer to be seen by other network users:

    Share As
    Give the printer a recognisable name (max. 12 characters) e.g. HP DJ500 or COLOUR.

    Comment
    Allows you to give a comment about the printer which might help other users identify the printer.

    Password
    If you would like to secure your printer you can assign a password to the printer

    Reshare at startup (checkbox)
    Make sure there is a cross in this box, otherwise you'll have to do this every time you switch on the PC.
Share Manager
  1. To finish click the OK button. This will return you to Print Manager where you will see now that your printer is shared.
Print Manager

Connecting to a shared network printer

With so few printer manufa
  1. The first step is to install to your Windows for Workgroups 3.11 machine the printer drivers for the printer you wish to connect to over the network.
  2. In the Main group in Program Manager double click the Printer Manager icon.
Main group
  1. Printer Manager will open (below).
Shared printer in Print Manager
  1. On the menubar select Printer | Connect Network Printer...
Connect Network Printer... in Print Manager
  1. A new dialog box will appear, Connect Network Printer (below) into which you can enter the path name of your network printer. There are two methods of doing this...
Connect Network Printer

Method 1 (Manual)

  1. You will have to specify the following settings manually:

    Device Name
    Your options are LPT 1:, LPT 2: or LPT 3: Select one which is currently free. If you currently have a printer attached to your machine, select LPT 2:

    Path
    This is the path to the printer, e.g. \\STUDY\LASER -- this is in XXXX format, i.e. two back-slashes (\\) followed by the computer name (STUDY) and the name of the shared printer (LASER).

    Reconnect at Startup
    Click this check-box if you wish to automatically reconnect to the network printer each time you start Windows for Workgroups 3.11.

    Always Browse
    Dunno!

Method 2 (Semi-automatic)

  1. Method 2:
    Allow Windows to work it out for you. Click on the computer to which the printer is connected on the network in the Show Shared Printers on: box, and then select the printer required from the Shared Printers on box. When you select a printer the PATH: box is automatically completed.

    (Note: neither of the two printers listed below are compatible with Windows for Workgroups 3.11, but I can't be bothered to install on my Windows XP machine the HP DeskJet 400 which is compatible... a bit too much work for just one screen capture! Sorry.)
Connect Network Printer
  1. Click OK to return you to the Print Manager.
  2. If you have not already installed the printer drivers you may be prompted to do so now.

Windows 3.11 for Workgroup - How to install the TCP/IP Protocol


With your Windows Network working and a number of resources shared, you can install the TCP/IP Protocol to allow your Windows for Workgroups 3.11 machine to connect to the internet, for browsing or picking up e-mail.
TCP/IP (Transmission Control Protocol/Internet Protocol) is simply the standard by which computers on the internet (and some local area networks) communicate with one another.

Uninstall existing TCP/IP stacks

Before you can install the TCP/IP protocol files you will need to remove any existing TCP/IP stacks installed.
A top tip I received in an email from Philip Rowett is that if you have already installed a browser, such as Internet Explorer 3.02, with a dialler then you will need to
  1. Uninstall the browser (which removes the TCP/IP stack installed by the dialler).
  2. Install the TCP/IP protocol (as described below).
  3. Reinstall the browser without the dialler option.
Philip writes:
Once I removed IE completely (and subsequently re-installed it without the dialler option), the ethernet card was immediately recognised. Both PCs now happily talk to each other behind my hardware firewall (and, should I so wish, I can browse the internet using IE 3.02 through my broadband connection!)

Download and install TCP/IP files

  1. Before you can install the TCP/IP protocol to Windows for Workgroups 3.11 you first need todownload the TCP/IP files and unzip them to a new folder.
  2. Remarkably, you can still download the TCP/IP protocol files from the Microsoft FTP server at ftp.microsoft.com/softlib/mslfiles/tcp32b.exe (Self-extracting EXE, 673 KB).

    If you have any problems, or Microsoft remove it from their server, you can also download the files from here, these are zipped: tcp32b.zip (ZIP, 661 KB).
  3. Once you have downloaded TCP32B.EXE, copy it to a new folder, e.g. C:\TCPIP and double-click it. It will now automatically unzip into the folder. (If you have downloaded the zip file you will need a 16-bit version of WinZip (Self-extracting EXE, 615 KB) to unzip the file.)

  4. In Program Manager, if it is not already open, double-click the Network group to view its icons.
  5. Now select and then double-click the Network Setup icon (below).
Network group in Program Manager
  1. A new window, called Network Setup, will open showing the following information:
Network Setup
  1. Click the Drivers... button (above) to show a list of the currently installed Network Drivers (below):
Network Drivers
  1. Now click the Add Protocol... button, on the right-hand side of the window (above).
  2. You will be prompted for the location of the TCP/IP drivers. This will be where you unzipped TCPIP32B.EXE to.
Install Driver
  1. Click on the Browse... button (above) and locate the folder you unzipped the drivers to. In this example I unzipped them to C:\TCPIP.
Browse
  1. Select the folder in the Directories dialog, and then click OK (above).
  2. You will now be returned to the Install Driver dialog, but the text box now contains the location of the TCP/IP drivers. Click the OK button.
Install Driver
  1. A new window will appear called Unlisted or Updated Protocol listing the protocol: Microsoft TCP/IP-32 3.11b. By default it should be selected. Click OK.
Unlisted or Updated Protocol
  1. The TCP/IP drivers will now install. When they have installed you will be presented back at the Network Drivers window.
  2. You will now see that Microsoft TCP/IP-32 3.11b is now added to the list of installed drivers (below).
Network Drivers
  1. Select the newly installed Microsoft TCP/IP-32 3.11b and click the Setup... button to see the Microsoft TCP/IP Configuration dialog (below).
Microsoft TCP/IP Configuration
  1. In this dialog you can enter your IP addressSubnet Mask and Default Gatewayinformation (see below). Let me explain a little.
  • Enable Automatic DHCP Configuration (Green)
    If you are connecting this PC to a router/switch which has a built-in DHCP (Dynamic Host Configuration Protocol) server then feel free to tick the "Enable Automatic DHCP Configuration" option. Your DHCP server will automatically assign your PC with an IP address and Subnet Mask. You will still need to complete the Default Gateway section (Blue) before you click OK.
  • IP Address and Default Gateway (Red)
    If you are manually assigning an IP address and Subnet Mask you can enter this information here. Each PC must have a unique IP address. For a local area network of two computers I might assign one PC as 192.168.0.1 and the other as 192.168.0.2; you may assign different values here for security reasons (this is the default setting and is easily guessable by anyone trying to hack your PC from the internet). The subnet mask MUST be the same on all PCs on the same network.
  • Default Gateway (Blue)
    If you are only setting up a two computer, peer-to-peer network without a router then you do not need to worry about this setting. If you do have a router/switch attached to your PC, allowing both PCs to access the internet (or another WAN) then enter the IP address of your router here. In this example I have assigned the IP Address 192.168.0.5 to the PC, where the IP address of the router (Default Gateway) is 192.168.0.1.
  • Primary WINS Server and Secondary WINS Server
    WINS stands for Windows Internet Name Service. This is a Windows NT service that dynamically associates the NetBIOS name of a host with a domain name. You do not need to worry about this in this setup.
Microsoft TCP/IP Configuration

If you are connecting to a router/switch

  1. If you are connecting this PC to a Router/Switch to connect to the internet then you may need to set where the Domain Name Service is located. Click the DNS... button (below).

    If you are NOT connecting to a Router/Switch then go to step 24 below.
Microsoft TCP/IP Configuration
  1. Enter the IP address of your Router/Switch in the Domain Name Service (DNS) Search Order box (red) and click the Add -> button (green). The IP address will be added to the box on the right. Now click OK (blue).
Microsoft TCP/IP - Connectivity Configuration
  1. Click OK (blue) and this will return you to the Microsoft TCP/IP Configuration window (below).
  2. Now click the Advanced... button.
Microsoft TCP/IP Configuration
  1. There shouldn't really be much you have to worry about in this section (I think!). I have both the Windows Networking Paramaters selected: Enable DNS for Windows Name Resolution and Enable LMHOSTS Lookup.
Advanced Microsoft TCP/IP Configuration
  1. Click OK. This will return you to the Microsoft TCP/IP Configuration window.
Microsoft TCP/IP Configuration

Exiting and rebooting

  1. Click OK to return you to the Network Setup window (below).
Network Setup
  1. Now click OK to exit the Network Setup window and confirm all the changes you have made.
  2. A dialog box will pop up to inform you that your SYSTEM.INI file has been updated and where the old version has been saved to (below).
Network Setup
  1. Click OK and you will be asked to reboot the machine.
Windows Setup

Test your TCP/IP connection

  1. One very good way of testing whether your TCP/IP protocol is installed properly and working is to use the PING command.

    Once you have rebooted, start an MS-DOS-Prompt window, and at the prompt type

    ping 192.168.0.1

    then press Enter.

    (Obviously substitute the 192.168.0.1 for the IP address of a PC or router on your network, if necessary.)
MS-DOS Prompt - ping successful
  1. If your TCP/IP connection is up and running well, you should see something similar to the output above. If you are experiencing problems you will see something similar to the screenshot below.
MS-DOS Prompt - Ping request timed out

Rename Onedrive Business root folder

Rename Onedrive Business root folder Here is what I remember: In the Office 365 web admin pages, change the organization name to a shorte...