Posts mit dem Label Policy werden angezeigt. Alle Posts anzeigen

Mittwoch, 23. November 2011

Exchange ActiveSync Mailbox Policies and Exchange Remote Wipe

Exchange Active Policies help you to remotely configure Android, iPhone and Windows Phone smartphones and Exchange Remote Wipe allows you to remotely erase all data on a lost smartphone.
Since the uptake of smartphones has become more widespread, it is more than likely that your end users will require access to their corporate email via their smartphones. Whether or not the smartphone is company supplied . It is certainly a sensible idea to make sure that we have policies in place to protect our data should it end up in the wrong hands.

Exchange ActiveSync Mailbox Policies

Exchange 2010 has a feature called “Exchange ActiveSync Mailbox Policies”. You can find this in the Exchange Management Console, within the “Organization Configuration\Client Access” node from the tree view. You will notice that within the Exchange ActiveSync Mailbox Policies tab, you can create multiple policies – these can then be applied to different groups of users. I just want a common policy throughout my entire organization, so I will just modify the default policy that is already listed.
Exchange ActiveSync Mailbox Policies
Using the policy properties, you can force devices to use a passcode, set the minimum length or enable encryption, and so on.We can disable some function of an smartphone such as its camera, or Wi-Fi should this be a requirement in your organization.
Once a compatible ActiveSync device is synchronized with your Exchange organization, the appropriate policy will be applied, and the smartphone will react accordingly. It should be noted though that these policies do not apply to all devices , so it’s important to check it out first. The vast majority of smartphones in our organization are iPhones – Apple published a list of the supported policies on their developer site.

Exchange Remote Wipe

Should the inevitable happen, and a user loses their phone with all their company emails and trade secrets on it, and it doesn’t look like it’s coming back any time soon, we have a couple of ways of performing a remote device wipe. Firstly, the end user can do it on their own via Outlook Web Access (great if they lose the device when the helpdesk isn’t yet open!). The user will need to log into OWA, and select options from the top right, then select “see all options” from the menu. Once you’re in the OWA options screen, select phone from the right, and you should be presented with a list of mobile devices associated with your Exchange account. From the list of devices, simply select the device in question, and click the “wipe device button”.
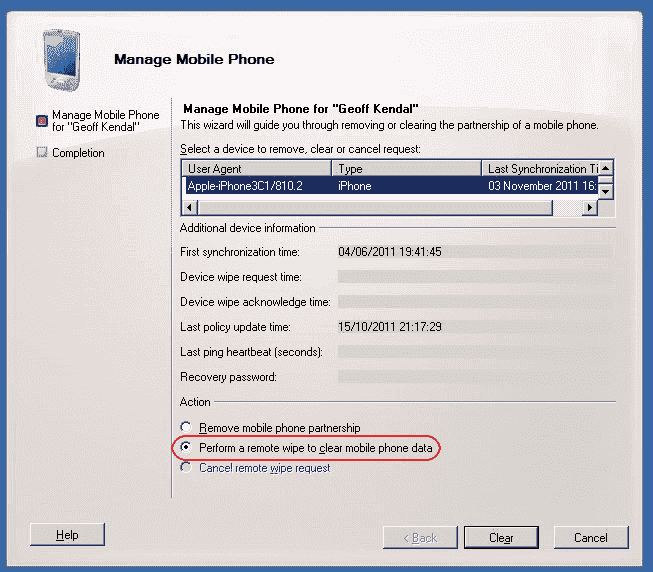
Chances are that the end users will just ring the helpdesk to request that the device be remotely wiped. An Exchange administrator can easily do this from the Exchange Management Console. Navigate to the Recipient Configuration\Mailbox node from the tree view. In the main area of the console, right click the user in question, then select “manage mobile phone” from the context menu. You will be presented with a list of mobile devices that are associated with the user’s Exchange account – select the appropriate device, click the “remote wipe” radio button, then click the “clear” button.
Exchange Remote Wipe
Shortly after this, the mobile device should perform a full wipe and erase all data. If your staff are accessing your corporate emails via their personal smartphones, it might be an idea to let them know that you have the ability to wipe mobile devices should they be lost – many users might lose their smartphones and never tell you otherwise!
Freitag, 26. November 2010

Step-by-Step Guide to Fine-Grained Passwords in Windows Server 2008


This step-by-step guide provides instructions for configuring, applying and editing fine-grained password and account lockout policies for different sets of users in Windows Server 2008.

In Microsoft Windows 2000 and Windows Server 2003 Active Directory domains, you could apply only one password and account lockout policy, which is specified in the domain's Default Domain Policy, to all users in the domain. As a result, if you wanted different password and account lockout settings for different sets of users, you had to either create a password filter or deploy multiple domains.

Fine-Grained Passwords in Windows Server 2008

In Windows Server 2008, you can use fine-grained password policies to specify multiple password policies and apply different password restrictions and account lockout policies to different sets of users within a single domain. For example, to increase the security of privileged accounts, you can apply stricter settings to the privileged accounts and then apply less strict settings to the accounts of other users.
Another valid application for using fine-grained password policies, are situations where legacy applications or other data sources require password synchronization.  These situations may require us to relax certain aspects of password complexity or length.

Step-By-Step Configuration of Fine-Grained Passwords in Windows Server 2008

I find it’s best to work with an example to demonstrate a solution, so in this case we will assume that you have a number of users who are Special Administrators and require a stronger password group policy than the standard user.  We will refer to these users as SpecialAdmins
In the following steps, we will configure a fine-grained password policy in Windows Server 2008 with the following settings:
Policy NamePolicy Setting
Enforce password history
24 passwords remembered
Maximum password age
30 days
Minimum password age
1 day
Minimum password length
12 characters
Passwords must meet complexity requirements
Disabled
Account lockout duration
0
Account lockout threshold
3
Reset account lockout counter after
30 minutes
Table 1: Password Policy
Note: yourdomainname in the following steps should be replaced with the NETBIOS name of your domain.
  1. Logon to a Windows Server 2008 domain controller using an account that has membership in the Domain Admins group, or equivalent permissions.
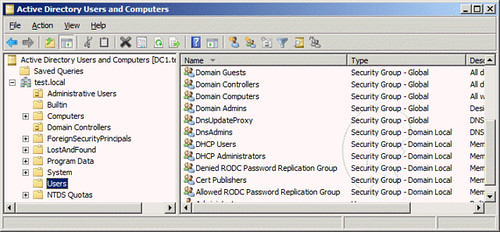
  2. Go to Start, Administrative Tools, and then select Active Directory Users and Computers

    Active Directory Users and Computers
  3. Expand yourdomainname.com, right-click on the Users container, select New, and then select Group.
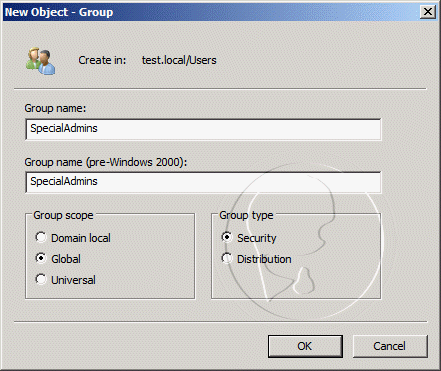
  4. On the New Object - Group window, enter SpecialAdmins into the Group Name field, and then click OK

    New Object - Group
  5. Close Active Directory Users and Computers
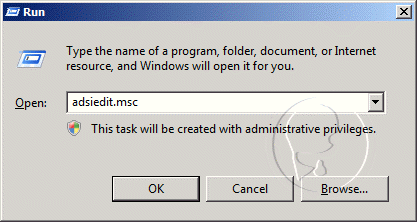
  6. Click Start, click RUN, type ADSIEDIT.MSC, and then click OK
    adsiedit.msc
  7. In the ADSI Edit snap-in, right-click ADSI Edit, and then click Connect to
  8. In the Name field, enter yourdomainname.com, and then click OK
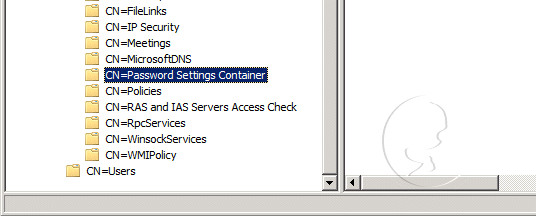
  9. Double-click yourdomainname.com in the console tree, double-clickDC=yourdomainname,DC=com, double-click CN=System, and then click CN=Password Settings Container
    CN=Password Settings Container
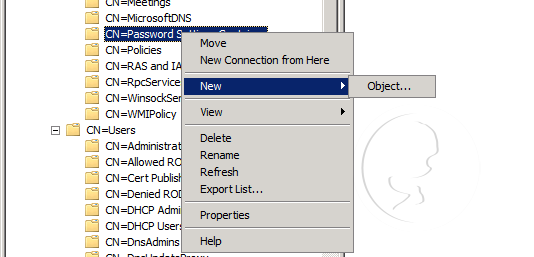
  10. Right-click CN=Password Settings Container in the console tree, click New, and then clickObject

    Password Settings Container - New Object
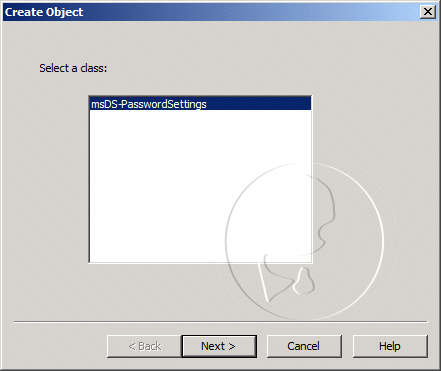
  11. In the Create Object dialog box, under Select a class, click msDC-PasswordSettings, and then click Next.

    Create Object - msDS-PasswordSettings
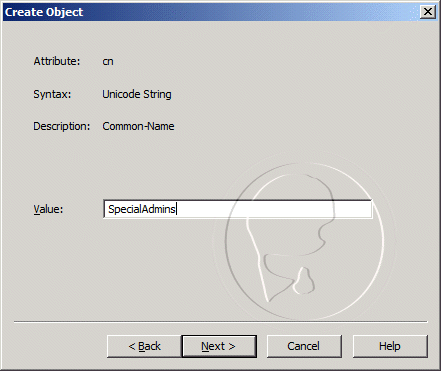
  12. In the Create Object dialog box, enter SpecialAdmins in the Value field, and then clickNext.

    Create Object - msDS-PasswordSettings Value
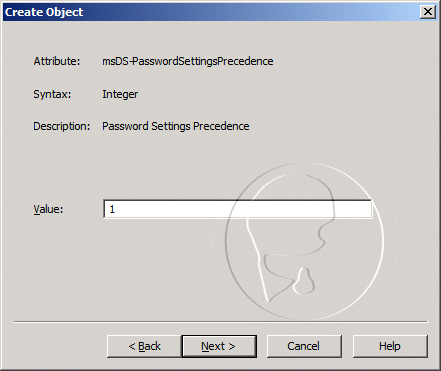
  13. For the msDS-PasswordSettingsPrecedence value, enter 1, and then click Next

    msDS-PasswordSettingsPrecedence
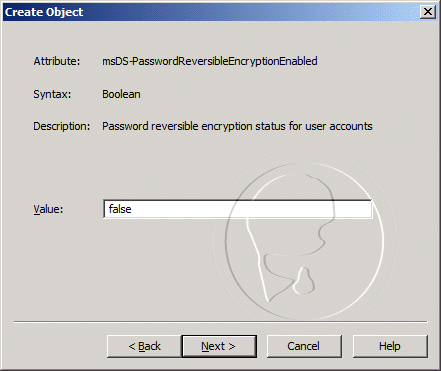
  14. For the msDS-PasswordReversibleEncryptionEnabled value, enter false, and then clickNext

    msDS-PasswordReversibleEncryptionEnabled
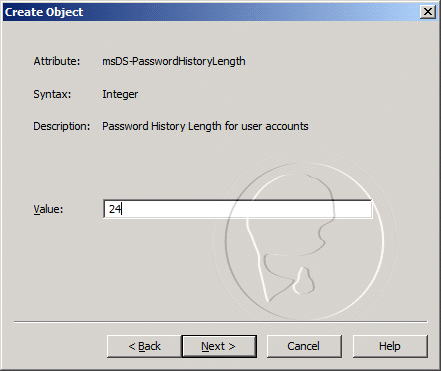
  15. For the msDS-PasswordHistoryLength value, enter 24, and then click Next

    msDS-PasswordHistoryLength
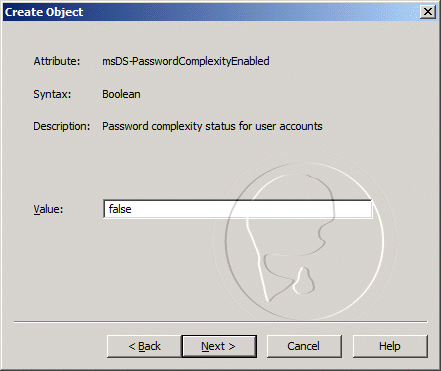
  16. For the msDS-PasswordComplexityEnabled value, enter false, and then click Next

    msDS-PasswordComplexityEnabled
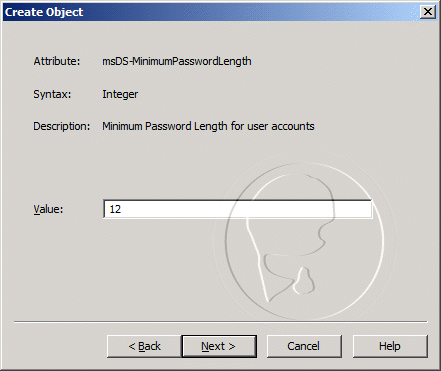
  17. For the msDS-MinimumPasswordLength value, enter 12, and then click Next

    msDS-MinimumPasswordLength
  18. For the msDS-MinimumPasswordAge, enter 1:00:00:00, and then click Next

    msDS-MinimumPasswordAge
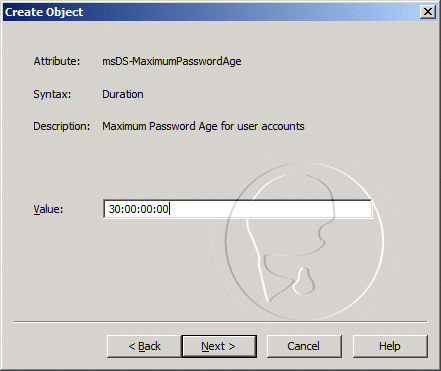
  19. For the msDS-MaximumPasswordAge, enter 30:00:00:00, and then click Next

    msDS-MaximumPasswordAge
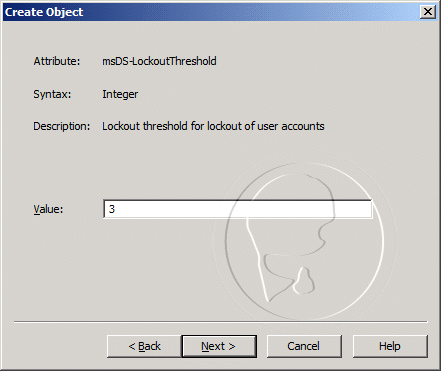
  20. For the msDS-LockoutThreshold, enter 3, and then click Next

    msDS-LockoutThreshold
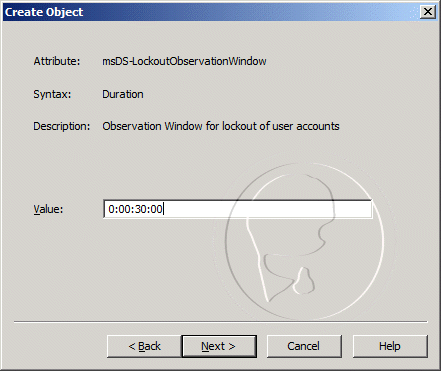
  21. For the msDS-LockoutObservationWindow, enter 0:00:30:00, and then click Next

    msDS-LockoutObservationWindow
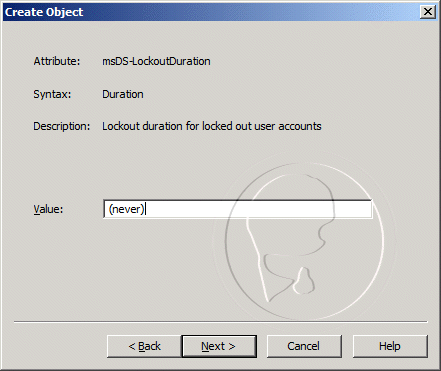
  22. For the msDS-LockoutDuration, enter (never), and then click Next, then click Finish

    msDS-LockoutDuration
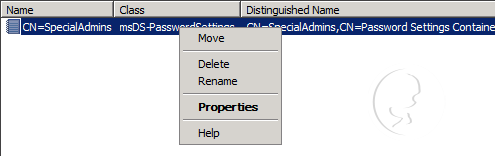
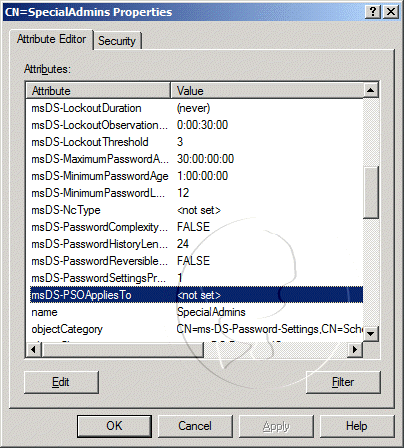
  23. Right-click on CN=SpecialAdmins in the console tree, and then select Properties

    msDS-PasswordSettings Properties
  24. On the CN=SpecialAdmins Properties window, select the msDS-PSOAppliesTo attribute, and then click the Edit button

    msDS-PSOAppliesTo
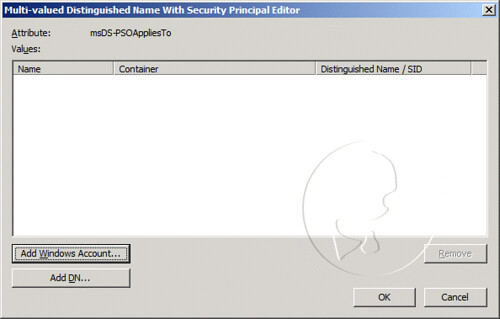
  25. On the Multi-valued Distinguished Name With Security Principal Editor window, click on the Add Windows Account button

    Multi-valued Distinguished Name With Security Principal Editor
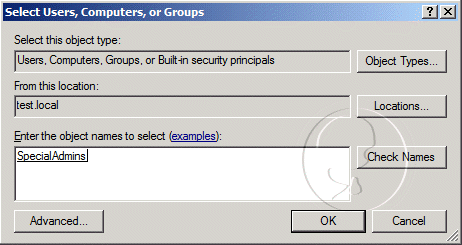
  26. On the Select Users, Computers, or Groups window, enter SpecialAdmins in the Enter the object names to select field, and then click OK

    Select Users, Computers, or Groups
  27. Click OK on the Multi-valued Distinguished Name With Security Principal Editor window
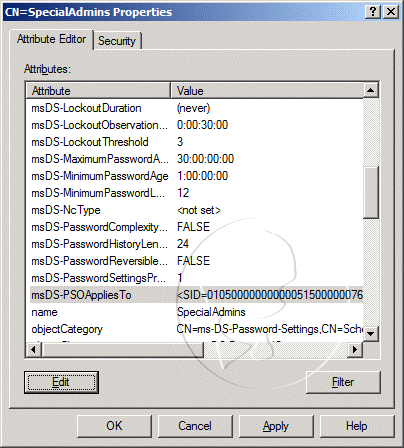
  28. Click OK on the CN=SpecialAdmins Properties window

    msDS-PSOAppliesToSetting

Conclusion

This step-by-step guide demonstrated how to configure fine-grained passwords in WindowsServer 2008.  We defined a number of password settings and applied it to a Active Directory Group.  From now on, all user members of the group will be applied with the custom password policy.

References

What is the function of the msDS-LockoutDuration element of the fine-grain account lockout policy?
http://www.ucertify.com/article/what-is-the-function-of-the-msds-lockoutduration-element-of-the-fine-grain-account-lockout-policy.html
AD DS Fine-Grained Password and Account Lockout Policy
http://technet.microsoft.com/en-us/library/cc770842.aspx

Rename Onedrive Business root folder

Rename Onedrive Business root folder Here is what I remember: In the Office 365 web admin pages, change the organization name to a shorte...