Freitag, 21. Dezember 2018

Ihr Viren- und Bedrohungsschutz wird von ihrer Organisation verwaltet


Was bedeutet „Ihr Viren- und Bedrohungsschutz wird von ihrer Organisation verwaltet“?
Diese Meldung sieht man auch als „Privatperson“, die gar keiner „Organisation“ angehört. Das „wird von ihrer Organisation verwaltet“ beim Virenschutz soll nur heißen, dass der Windows Defender eine Einstellung gefunden hat, die er nicht selbsttätig ändern oder überschreiben kann. In diesem Fall geht es zum Beispiel darum, dass in der Windows-Registry ein Wert gesetzt wurde, der den eingebauten Virenschutz deaktiviert. In wenigen Schritten könnt ihr das ändern und den Virenschutz wieder aktivieren.
So könnt ihr den Viren- und Bedrohungsschutz von Windows 10 wieder aktivieren:
  1. Drückt die Tasten Windows + R gleichzeitig, um ein „Ausführen-Fenster“ zu öffnen.
  2. Dort tippt ihr den Befehl regedit ein und klickt auf OK.
  3. Jetzt klickt euch durch bis zu
    HKEY_LOCAL_MACHINE/SOFTWARE/Policies/Microsoft/Windows Defender
  4. Rechts seht ihr nun den Eintrag „DisableAntiSpyware“.
  5. Führt einen Doppelklick auf den Eintrag aus und ändert den Wert von 1 auf 0.
  6. Schließt den Registry-Editor und startet Windows neu, um die Änderung zu übernehmen.
Danach könnt ihr das „Windows Defender Security Center“ öffnen und werdet feststellen, dass der Bereich „Viren- & Bedrohungsschutz“ einen grünen Haken hat, der anzeigt, dass alles störungsfrei funktioniert.

Samstag, 15. Dezember 2018

Windows 10 Update Fehler 0x80d02002, 0x80244019 und 0xc1800118

Wir haben in den letzten Tagen bereits mehrfach über die Verteilung des Windows 10 Anniversary Updateüber den WSUS (Windows Server Update Services) berichtet. Allerdings scheinen endlose Anwender große Probleme bei der Installation des Updates zu haben, denn uns haben zahlreiche E-Mails erreicht, die von den unterschiedlichsten Fehlern berichtet. Scheinbar treten die unterschiedlichsten Fehlercodes beim Abruf des Anniversary Updates für Windows 10 auf.
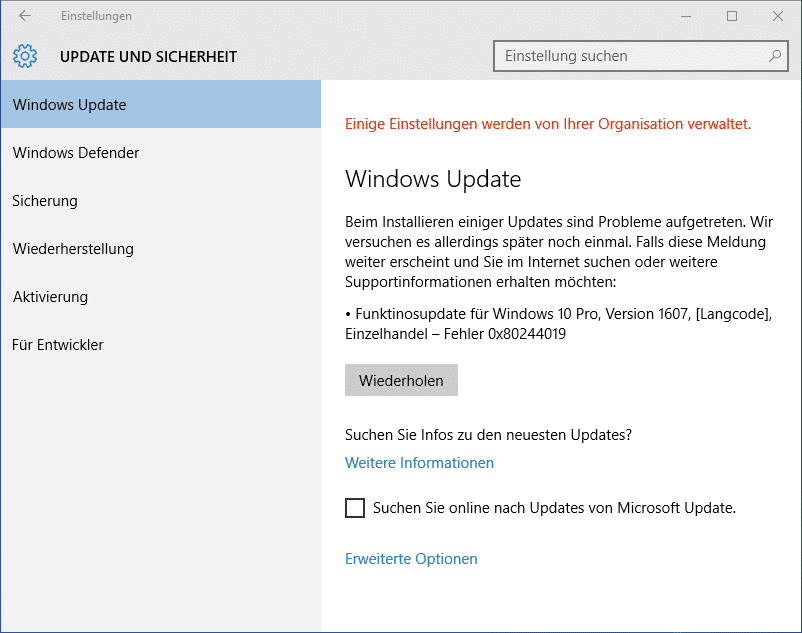
Wir haben bei dem Herunterladen und der nachfolgenden Installation des Funktionsupdates für Windows 10 nacheinander folgende 2 Fehlermeldungen erhalten:

Windows 10 Updatefehler 0x800244019

Windows 10 Funktionsupdate 0x80244019

Windows 10 Updatefehler 0x80d02002

Windows 10 Funktionsupdate 0x80d02002

Windows 10 Updatefehler 0xc1800118

Von dieser Fehlermeldung liegt uns leider kein Bild vor.

Ursache:

Warum es zu diesen Problemen kommt, können wir derzeit leider noch nicht sagen. Wir haben zahlreiche Lösungsmöglichkeiten ausprobiert, u.a. auch das Löschen des Ordners „Softwaredistribution“, welches Windows 10 eigentlich veranlasst, das Update erneut vom Server herunterzuladen.
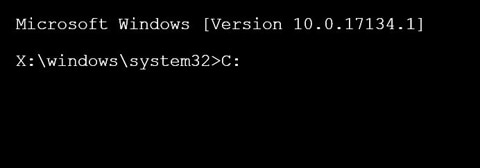
  • DOS Eingabeaufforderung als Administrator
  • net stop wuauserv
  • rename c:\windows\softwaredistribution softwaredistribition.alt
  • net start wuauserv
Danach beginnt Windows 10 zwar erneut mit dem Download des Updates, bricht aber nach einiger Zeit mit der gleichen Fehlermeldung wieder ab. Scheinbar sind zahlreiche Administratoren derzeit ratlos, woran es wirklich liegt. Bei einigen Installationen scheint es ja wohl auch zu funktionieren, bei vielen Anwendern hingegen nicht.
Habt Ihr die gleichen Probleme? Konntet Ihr sie lösen und wenn ja, wie? Wir würden gerne Eure Meinung zu den Windows 10 WSUS Updateproblemen hören, vielleicht können wir ja auf diese Art und Weise einigen Administratoren das Leben wieder ein wenig einfacher machen.
Wir haben die letzten Tage mehrfach über das Verteilen der Windows 10 Feature Updates (1607 Anniversary Update) berichtet und auch darüber geschrieben, dass viele Anwender Probleme damit haben. Scheinbar sind doch einige Voraussetzungen zu erfüllen, damit der WSUS (Windows Server Updates Services) die Feature Updates einwandfrei verteilen kann.
Wir haben bereits in einem anderen Beitrag die Grundanforderungen aufgezeigt. Dies könnt Ihr in dem Beitrag „Windows 10 Anniversary Update 1607 über WSUS korrekt verteilen“ nachlesen.
Wichtigste Voraussetzung ist die Installation des Windows Updates KB3095113 (Microsoft Update zur Aktivierung der WSUS-Unterstützung für Windows 10 Feature-Upgrades). Natürlich müsst Ihr im Bereich „Produkte/Klassifizierungen“ die notwendigen Windows 10 Komponenten aktivieren und die danach heruntergeladenen Updates auch für die Installation freigeben.

Lösung des Problems:

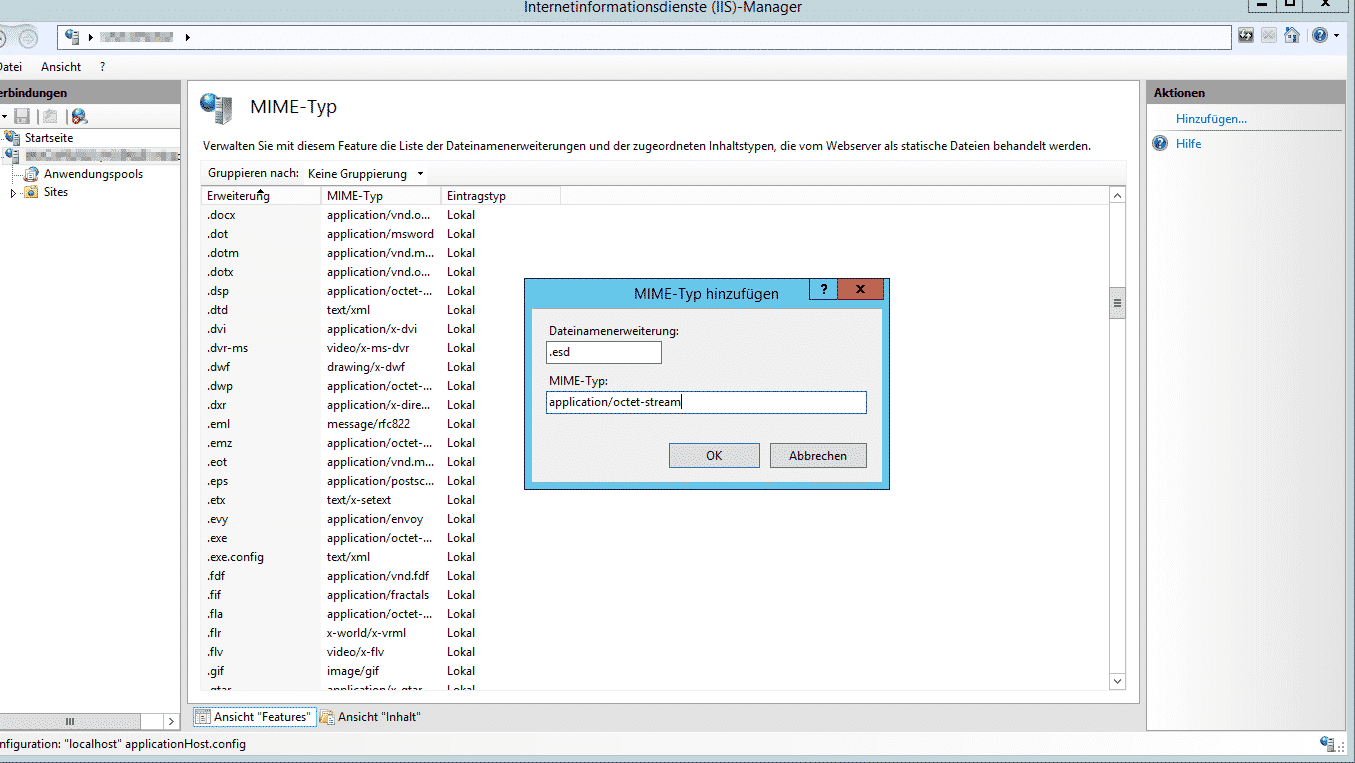
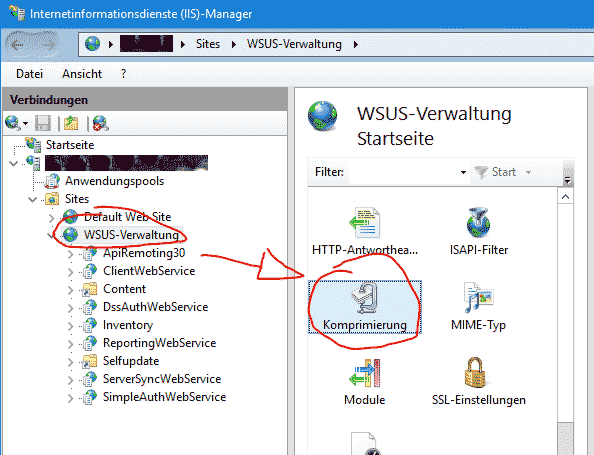
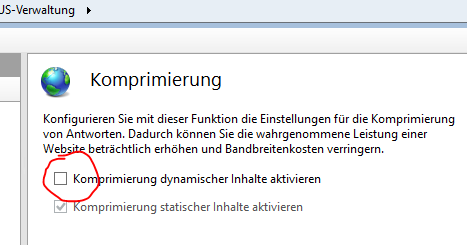
Entscheidend allerdings ist, und danach haben auch wir extrem lange gesucht, ist eine Anpassung um Internetinformationsdienste (IIS)-Manager. Dort müsst Ihr nämlich unbedingt den MIME Typ .ESDhinzufügen.
wsus application-octet-stream feature updates windows 10
Wichtig ist, dass die Dateinamenerweiterung „.ESD“ mit dem MIME-Typ
application/octet-stream
angelegt bzw. vorhanden ist. Nachdem Ihr diesen MIME Typ hinzugefügt habt, solltet Ihr einmal den WSUS Server neu starten. Nachdem der WSUS Server neu gestartet ist, beginnen die Clients sofort mit dem Download des Windows 10 Funktionsupdates.
Windows 10 Funktionsupdate Download
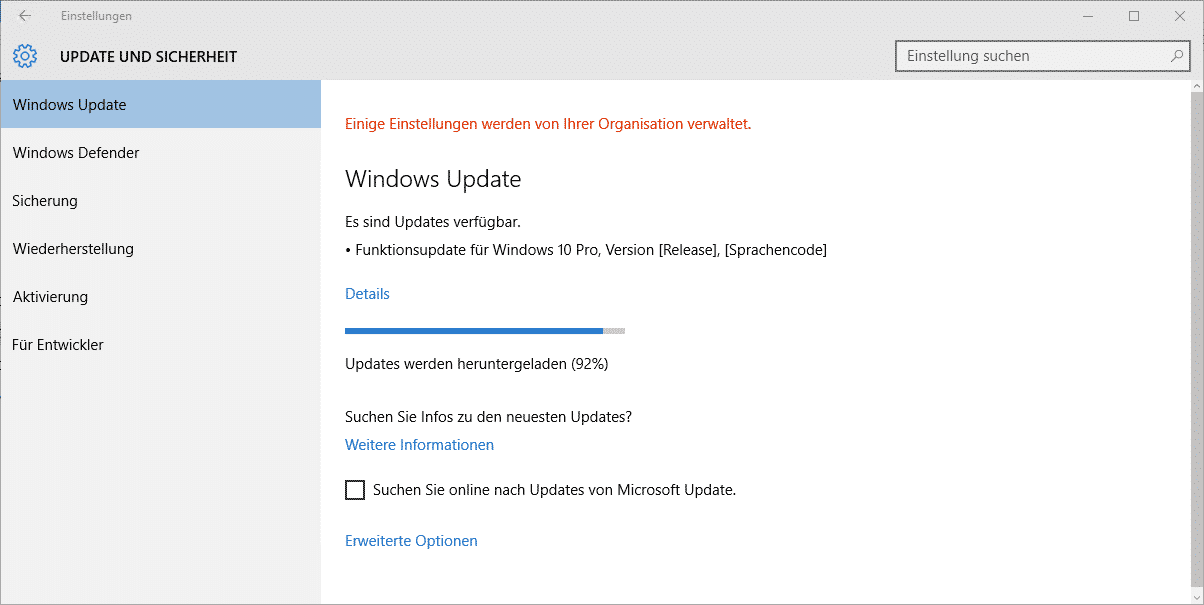
Innerhalb kürzester Zeit haben sich die Clients dann das Update heruntergeladen, wie Ihr oben erkennen könnt. Danach kann das Update dann problemlos installiert werden. Somit ist das Problem endlich gelöst. Wir hoffen wir konnte Euch helfen. Über einen entsprechenden Kommentar am Ende dieses Beitrages würden wir uns natürlich sehr freuen.

Samstag, 24. November 2018

HP PCs - Blue Screen Error 'WDF_Violation' After Installing Windows Update (Windows 10)

This document is for HP and Compaq computers with Windows 10.
After installing updates through Windows Update, your computer might display the blue screen error with the error message WDF_Violation.
This issue is related to Windows update KB4464330. Use the steps in this document to resolve the blue screen issue.

Blue screen error 'WDF_Violation' after updating

Use the following steps to resolve the WDF_Violation blue screen error:
  1. Restart your computer and immediately press the F11 key repeatedly until the Choose an option screen opens.
  2. Click Troubleshoot.
    The Troubleshoot option selected on the Choose an option screen
  3. Click Advanced Options.
    Advanced options selected in the Troubleshoot menu
  4. Click Command Prompt.
  5. At the Command Prompt, type C:, and then press Enter.
    Command Prompt showing C: entered
  6. Type cd C:\Windows\System32\drivers, and then press Enter.
    Command Prompt showing cd C:\Windows\System32\drivers entered
  7. Type ren HpqKbFiltr.sys HpqKbFiltr.sys.bak, and then press Enter.
  8. Close the Command Prompt window.
  9. Click Continue.
    The computer restarts.
If the blue screen error is not resolved after following these steps, see HP devices may experience blue screen error WDF_VIOLATION after installing HP keyboard driver (version 11.0.3.1) from Microsoft Support.

Samstag, 6. Oktober 2018

WSUS unter Windows Server 2012 und 2016 funktioniert nicht (Error 503, 0x80040154, 0x80245002)

Problem

Ein frischer Windows Server 2016 (oder 2012/2012R2) WSUS-Server funktioniert nicht. Clients werden in der WSUS-Console zwar aufgeführt, aber es werden keine Updates verteilt. Stattdessen sagen die %SystemRoot%\WindowsUpdate.log Logfiles, das der Fatale Fehler 0x80040154 oder 0x80245002 aufgetreten sei. Die DNS-Auflösung des WSUS-Servers klappt aber ohne Probleme.
Zudem wirft die manuell aufgerufene URL http://<WSUS-SERVERNAME>/ClientWebService/client.asmx einen HTTP-Fehler, und zwar den http-error 503.

Lösung (und ein Tipp)

Bei der Installation des IIS ist vermutlich die dynamische Komprimierung installiert worden. Aus magischen Gründen wird diese bei der Installation auf allen neu angelegten Sites („WSUS-Verwaltung“) auch gleich aktiviert. Die dynamische Kompression muss ausgeschaltet sein, sonst mag der Windows Update Client die HTTP-Antworten nicht mehr verstehen.
IIS-Manager > Sites > WSUS-Verwaltung > Komprimierung (rechts) > Dynamische Kompression AUSSCHALTEN

Tipp

Bei mehr als 190 WSUS-Clients steigt der WSUS-Applikationspool im IIS regelmäßig aus, wenn die Clients anfangen ihren Patchstand zu reporten. Der Pool beendet sich mit ienem „Out of Memory“ Fehler.
Wir raten daher eindringlichdazu, den Arbeitsspeicher des Pools von den knapp gerechneten ~1,8g (1.843.200kb) auf mindestens 4gb zu erhöhen. Dananch tritt der Fehler (zumindest bis 800 Clients) nicht mehr auf.
IIS-Manager > Anwendungspools > WsusPool > Erweiterte Eigenschaften > Wiederverwendung/“Limit für den privaten Speicher“ auf 4000000 (4Mio) setzen.

Dienstag, 14. August 2018

Manually Adding Ubiquiti Unifi Access Point or Switch to Unifi Contoller

This is the process to add a new Unifi AP or Switch to the Unifi controller when discovery doesn’t work.  In our case, we have a central Unifi controller managing APs or Switch on multiple networks.  But, the routers don’t allow the discovery tool to see new APs on other networks, so this is how we add one.  In this example, we’ll say the Unifi controller is at 192.168.8.9.


1) Write down (or take a picture on your phone) the MAC address for the new Device

2) Connect the new Unifi AP or Switch

3) Check DHCP or  IP Scanner to see what IP address was given to the Unifi Device.

Once you have the IP, we’ll use putty to ssh into the device.  In this example, we’ll use 192.168.10.40.

start putty01

NOTE: If the Device has been provisioned before, you’ll have to use the password for the Unifi controller it was provisioned by.

login as: ubnt
password: ubnt


NOTE: If the Device has been provisioned before, you’ll have to reset it to factory defaults.  to do that, use the following command, and then SSH back into the device when it comes back up.

> syswrapper.sh restore-default

Aften than update the Firmware on your device

> upgrade "FW url"

Example:
> upgrade http://dl.ubnt.com/unifi/firmware/US24P250/3.9.42.9152/US.bcm5334x.v3.9.42.9152.180709.2252.bin

Since this is a brand new Device for us, we just need to do this:

> set-inform http://192.168.8.9:8080/inform

Next, we go connect to the Unifi command center.  In a few minutes, we should see an alert stating a new device has checked in.  If you don’t see the alert, check the device list, it should show up there as “Unknown”.  From either location (alerts or ap device list), you should have a button that says “Adopt”.  Adopt the new AP and go back to the SSH shell.

Send the command again, this should allow the AP to see that it has been adopted.

> set-inform http://192.168.1.55:8080/inform

Now you should see the new AP provisioned in the Unifi controller and you can edit the name and update the AP firmware.

Windows Domain Controller: Es sind momentan keine Anmeldeserver zum Verarbeiten der Anmeldeanforderung verfügbar

Zurzeit häuft sich (warum auch immer) das Problem dass nach einem Neustart eines Windows Domain Controllers bei der Anmeldung die Fehlermeldung „Es sind momentan keine Anmeldeserver zum Verarbeiten der Anmeldeanforderung verfügbar“ kommt und eine Anmeldung so nicht möglich ist
DC-KeineAnmeldeserverVerfügbar
Das Problem ist hierbei das der Domain Controller im Active Directory Reperatur Modus (Abgesicherter Modus) startet.
Am einfachsten lässt sich dieses Problem folgendermaßen beheben:
1) Anmeldung mit dem DSRM (Directory Services Restore Mode) / Verzeichnisdienstwiederherstellungskennwort
DC-AbgesicherterModus
Falls die Anmeldung nicht funktioniert kann man einen Workaround wie hier beschrieben durchführen.
2) Systemkonfiguration mittels msconfig.exe aufrufen
msconfig-ADR
und unter Start den Haken bei Abgesicherter Modus entfernen und mittels Übernehmen bestätigen
msconfig-fix
3) neustarten und sich ganz normal wieder mit dem Domänen-Administrator anmelden.

Montag, 9. Juli 2018

Gemalpto Smart Card Reader only appears as "Shared" not "Passthrough"

you can manually enable passthrough mode. The reason why the passthrough mode was disabled was because we were stepping toes with a service called pcscd service that is required for the shared mode to work. However if you do not want to use the shared mode, you can manually disable shared mode and enable the passthrough mode

Here are the steps:
Shutdown the VM to which you want to passthrough the smart card and:

1) Go to the VM's installation directory. Typically C:\Users\<username>\Documents\Virtual Machines\
2) Open <virtual-machine-name>.vmx file
3) Append the following lines:

      usb.generic.allowCCID = "TRUE"
       usb.ccid.disable = "TRUE"

4) Kill the process corresponding to the PCSC daemon on the Linux host

Do a # ps -ef | grep -i pcsc on your Linux host
       sudo kill -9 <pid of the process that corresponds to pcscd>

Notes:
1) The first line in step 3 enables the passthrough mode
2) The second line in step 3 disables shared mode
3) Since you are killing the pcscd on your host, you wont be able to use the smart card on the host. You can passthrough the smart card now and use it in the VM

Hope this helps,

Sonntag, 10. Juni 2018

WinStoreUI.admx-Konflikt beim zentralen Speicher mit Windows 10 Version 1511 ADMX-Dateien aktualisieren

Link: https://support.microsoft.com/de-at/help/3190327/winstoreui-admx-conflict-when-central-store-is-updated-with-windows-10

How to configure Microsoft Edge Settings Using Group Policy?

With the release of Windows 10, Microsoft also introduced its new default web-browser Microsoft Edge. Let’s try to figure out whether it is possible to centrally manage Microsoft Edge Group Policy settings in the enterprise environment.
If you open the Local Group Policy Editor console (gpedit.msc) on Windows 10 RTM, then under section Computer Configuration -> Administrative Template -> Windows Components -> Microsoft Edge (and User Settings -> Administrative Template -> Windows Components -> Microsoft Edge) you can find 10 different Group Policy settings (quite a small amount comparing to almost 1500 different GPO settings for Internet Explorer browser). The following policies are available to manage Microsoft Edge settings:
  • Allows you to run scripts, like Javascript
  • Allows you to let people use autofill on websites
  • Allows you to let people send Do Not Track headers
  • Allows you to configured password manager
  • Allows you to run pop-ups
  • Stops address bar from showing search suggestions
  • Allows you to configure SmartScreen
  • Configure how Microsoft Edge treats cookies
  • Allows you to configured the Enterprise Site list
  • Sends all intranet traffic over to Internet Explorer
microsoft edge group policy

Samstag, 9. Juni 2018

How To Activate Windows 10 / Server 2016 Through Command Line

If you are having problems activating Windows 10, Server 2016, Windows 8, or Server 2012 one of these three solutions below should get you through:

Command Line to Launch Activation GUI:

This is handy if the GUI won’t start and you want to skip some steps to get it to work.
  1. click START (gets you to the tiles)
  2. type RUN
  3. type slui 3 and press ENTER
    1. yes, SLUI: which stands for SOFTWARE LICENSING USER INTERFACE
      1. SLUI 1 brings up the activation status window
      2. SLUI 2 brings up the activation window
      3. SLUI 3 brings up the CHANGE PRODUCT KEY window
      4. SLUI 4 brings up the CALL MICROSOFT & MANUALLY ACTIVATE window
  4. Type in your product key
  5. Have a nice day.

Command Line to Activate Windows Through Command Line:

  1. Launch a CMD as an Administrator
  2. Type: slmgr.vbs /ipk xxxxx-xxxxx-xxxxx-xxxxx-xxxxx
  3. Press Enter
If your key is valid and you are connected to the internet, it should activate within a second or two.

Call Microsoft Activation Center:

In Canada and the US, call the support line directly at 1 800-936-4900, otherwise, use this table of Microsoft Activation Phone Numbers to do the deed

Sonntag, 4. März 2018

Latest HPE ILO firmware


Here you can download the most recent HP iLO (Integrated Lights-Out) firmware files


UPDATE - 04.03.2018

ILO1 : ilo196.bin (30-Apr-2014)
ILO2 : ilo2_232.bin (18-Feb-2018)
ILO3 : ilo3_189.bin (iLO3 v 1.89.2 07-Jul-2017)
ILO4 : ilo4_255.bin (iLO4 v 2.55.10 16-Aug-2017)
ILO5 : ilo5_120.bin (9-Feb-2018)

extract .bin files from these links.


Old versions:

ILO1:
ilo187.bin
ilo188.bin
ilo189.bin
ilo191.bin
ilo192.bin
ilo193.bin
ilo194.bin
ilo195.bin

ILO2:

ilo2_120.bin
ilo2_122.bin
ilo2_124.bin
ilo2_126.bin
ilo2_129.bin
ilo2_130.bin
ilo2_135.bin
ilo2_140.bin
ilo2_142.bin
ilo2_143.bin
ilo2_150.bin
ilo2_160.bin
ilo2_161.bin
ilo2_170.bin
ilo2_175.bin
ilo2_177.bin
ilo2_178.bin
ilo2_179.bin
ilo2_180.bin
ilo2_181.bin
ilo2_182.bin
ilo2_183.bin
ilo2_201.bin
ilo2_205.bin
ilo2_206.bin
ilo2_207.bin
ilo2_208.bin
ilo2_209.bin
ilo2_212.bin
ilo2_213.bin
ilo2_215.bin
ilo2_220.bin
ilo2_222.bin
ilo2_223.bin
ilo2_225.bin
ilo2_227.bin
ilo2_228.bin
ilo2_229.bin
ilo2_230.bin
ilo2_231.bin

ILO3:
ilo3_187.bin
ilo3_100.bin
ilo3_105.bin
ilo3_110.bin
ilo3_115.bin
ilo3_116.bin
ilo3_120.bin
ilo3_126.bin
ilo3_128.bin
ilo3_150.bin
ilo3_155.bin
ilo3_157.bin
ilo3_161.bin
ilo3_165.bin
ilo3_170.bin
ilo3_180.bin
ilo3_182.bin
ilo3_185.bin
ilo3_187.bin
ilo3_188.bin

ILO4:
ilo4_101.bin
ilo4_105.bin
ilo4_110.bin
ilo4_113.bin
ilo4_120.bin
ilo4_122.bin
ilo4_130.bin
ilo4_132.bin
ilo4_140.bin
ilo4_150.bin
ilo4_151.bin
ilo4_153.bin
ilo4_200.bin
ilo4_202.bin
ilo4_203.bin
ilo4_210.bin
ilo4_211.bin
ilo4_220.bin
ilo4_222.bin
ilo4_230.bin
ilo4_231.bin
ilo4_240.bin
ilo4_242.bin
ilo4_244.bin
ilo4_250.bin
ilo4_253.bin
ilo4_254.bin

ILO5:
ilo5_117.bin

Samstag, 20. Januar 2018

Workaround für Fehler 0x8007003B beim Anlegen eines Ordners auf einem Netzlaufwerk - Windows 10

CMD ausführen als Administrator

sc.exe config lanmanworkstation depend= bowser/mrxsmb10/nsi
sc.exe config mrxsmb20 start= disabled

PC neu gestartet und der Fehler war beseitigt.

Rename Onedrive Business root folder

Rename Onedrive Business root folder Here is what I remember: In the Office 365 web admin pages, change the organization name to a shorte...