Montag, 29. November 2010

Unexpected error refreshing Server Manager-errors 0x800706BE and 1601 on Window Server 2008 R2


On certain Windows Server 2008 R2 machines you may experience the Server Manager being unable to open Roles and/or Features in the MMC. The error it usually comes back with is Unexpected error refreshing Server Manager: The remote procedure call failed. (Exception from HRESULT: 0x800706BE). You may also find that there is also Error 1601 in the Event Log.

Introduction

On certain Windows Server 2008 R2 machines you may experience theServer Manager being unable to open Roles and/or Features in the MMC.  The error it usually comes back with is Unexpected error refreshing Server Manager: The remote procedure call failed. (Exception from HRESULT: 0x800706BE). 
Server Manager 0x800706BE Error
Certain people have also reported finding that there is also an error being logged in the event log – Error 1601.  Various reasons lead us to believe that this is an issue related to file corruption.  More specifically, file corruption caused by failed Windows Updates.
Server Manager Error 1601
If your Server Manager is crashing and you’re unable to add Roles or Features this article will talk you through a number of steps which may help you resolve the issue.

Step 1 – Download & Install System Update Readiness Tool (KB947821)

The first step in trying to diagnose this is to download and install KB947821 on the server which is having the problem with System Manager and generating the 0x800706BE refresh error.  You can download it from http://support.microsoft.com/kb/947821
The System Update Readiness Tool, runs a onetime scan for inconsistencies that might prevent future servicing operations. This scan typically takes less than 15 minutes to run. However, the tool might take significantly longer on some computers. The Windows Update progress bar is notupdated during the scan, and progress seems to stop at 60% complete for some time. This behavior is expected. The scan is still running and you should not cancel the update.  If you are prompted to restart your computer, do so.

Step 2 – Analyze KB947821 output log file

After you install KB947821 on your computer, you need to inspect the output log file it left behind.  You can find the file in: C:\Windows\Logs\CBS\CheckSUR.log
The log should show what files have been detected as corrupt or missing from/in the C:\windows\servicing\packages folder.  For instance, on our test machine they were shown as:
2010-10-07 09:30:43, Info                  CBS    Failed to get session package state for package: Package_3_for_KB975467~31bf3856ad364e35~amd64~~6.1.1.0 [HRESULT = 0x80070490 - ERROR_NOT_FOUND]
2010-10-07 09:30:43, Info                  CBS    Failed to get session package state for package: Package_2_for_KB975467~31bf3856ad364e35~amd64~~6.1.1.0 [HRESULT = 0x80070490 - ERROR_NOT_FOUND]
You might also want to have a look at the CheckSUR.persist.log. In our case it looked like this:
=================================
Checking System Update Readiness.
Binary Version 6.1.7600.20593
Package Version 7.0
2010-04-14 09:56

Checking Windows Servicing Packages

Checking Package Manifests and Catalogs
(f) CBS MUM Corrupt 0x00000000 servicing\Packages\Package_for_KB976264_RTM~31bf3856ad364e35~amd64~~6.1.2.0.mum  Expected file name Microsoft-Windows-Foundation-Package~31bf3856ad364e35~amd64~~6.1.7600.16385.mum does not match the actual file name

Checking Package Watchlist

Checking Component Watchlist

Checking Packages

Checking Component Store

Summary:
Seconds executed: 72
 Found 1 errors
  CBS MUM Corrupt Total count: 1

Unavailable repair files:
 servicing\packages\Package_for_KB976264_RTM~31bf3856ad364e35~amd64~~6.1.2.0.mum
 servicing\packages\Package_for_KB976264_RTM~31bf3856ad364e35~amd64~~6.1.2.0.cat

(w) Unable to get system disk properties 0x0000045D IOCTL_STORAGE_QUERY_PROPERTY Disk Cache
We also checked the servermanager.log and found that the CbsUpdateState.bin file in the C:\Windows\system32\ServerManager\Cache\ folder is missing.
4652: 2010-10-14 17:43:53.856 [Provider]                  C:\Windows\system32\ServerManager\Cache\CbsUpdateState.bin does not exist.
4652: 2010-10-14 17:43:53.965 [CBS]                       IsCacheStillGood: False.
4652: 2010-10-14 17:44:13.356 [CBS] Error (Id=0) Function: 'CreateSessionAndPackage()->Session_OpenPackage' failed: 800706be (-2147023170)
4652: 2010-10-14 17:44:13.419 [ExceptionHandler] Error (Id=0) An unexpected exception was found:
System.Runtime.InteropServices.COMException (0x800706BE): The remote procedure call failed. (Exception from HRESULT: 0x800706BE)
at System.Runtime.InteropServices.Marshal.ThrowExceptionForHRInternal(Int32 errorCode, IntPtr errorInfo)
at Microsoft.Windows.ServerManager.ComponentInstaller.CreateSessionAndPackage(IntPtr& session, IntPtr& package)
at Microsoft.Windows.ServerManager.ComponentInstaller.InitializeUpdateInfo()
at Microsoft.Windows.ServerManager.ComponentInstaller.Initialize()
at Microsoft.Windows.ServerManager.Common.Provider.RefreshDiscovery()
at Microsoft.Windows.ServerManager.LocalResult.PerformDiscovery()
at Microsoft.Windows.ServerManager.ServerManagerModel.CreateLocalResult(RefreshType refreshType)
at Microsoft.Windows.ServerManager.ServerManagerModel.InternalRefreshModelResult(Object state)

Step 3 – Copy missing or corrupt files

In order to perform this step, you’ll need access to a machine which has a working ServerManager.  Copy the files listed as corrupted/missing from C:\windows\servicing\packages on the working machine to the server which is exhibiting the HRESULT 0x800706BE error.  You may need to change the ownership of the files on the destination machine to your user account as well as give yourself write permissions on the files before Windows allows you to overwrite them.
Once done, start Server Manager and see if that fixes the error.  To be doubly sure, check the contents of the C:\Windows\system32\ServerManager\Cache folder – there should be two files there: CbsUpdateInfo.bin and CbsUpdateState.bin.  If these files still don’t exist after ServerManager starts you haven’t completely fixed the 0x800706BE error.
Server Manager CbsUpdateInfo.bin CbsUpdateState.bin

Step 4 – Copy all files in C:\windows\servicing\packages folder

If you’re still unable to get Server Manager started, it means that there may be other problems and we need to overwrite all the packages in the C:\windows\servicing\packages folder.  The first step we need to do is take ownership of all the files.  To do this, launch a Command Prompt as an Administrator, and I mean right click the Command Prompt icon and select Run As Administrator.  At the command prompt execute:
takeown /F c:\Windows\Servicing\Packages /D y /R
The takeown command will give you ownership of the files, but you still need to give yourself write access to the files in order to change them.  In the same command prompt window execute the following command: (replace username with your username)
cacls c:\Windows\Servicing\Packages /E /T /C /G "username":F
Now copy all the files from the C:\windows\servicing\packages folder on a working server.  Make sure that the source server has been patched to the same level and has the same roles/features installed as the destination server.

Step 5 – Start Server Manager and check Cache folder

Try starting Server Manager and check if you’re still getting the error.  In all our tests, the above steps have been able to resolve 99% of all Server Manger problems related to error 0x800706BE and 1601.  Jus to be on the safe side, check the contents of the C:\Windows\system32\ServerManager\Cache folder and see that the two .bin files are now visible.

Conclusion

This article has demonstrated a quick and easy way to solve the errors associated with ServerManager and the 0x800706BE and 1601 errors that it exhibits when trying to install Roles or Features.  If the problem is not resolved by applying Microsoft KB947821, we have shown a reliable way to fix the 0x800706BE and 1601 errors by copying all files in C:\windows\servicing\packages from anther working Windows Server 2008 R2 server.

References

System Update Readiness Tool (KB947821)
http://support.microsoft.com/kb/947821
Advanced guidelines for diagnosing and fixing servicing corruption
http://technet.microsoft.com/en-us/library/ee619779%28WS.10%29.aspx

Samstag, 27. November 2010

Hyper-V Sicherung mittels Powershell Script

Sicherung ist eines der meist vernachlässigsten und dennoch wichtigsten Aufgaben in der IT. Hand aufs Herz, nachdem man eine virtuelle Maschine laufen hat, kann es schon mal vorkommen das man das Sichern vergisst. Damit das in unseren Projekten nicht passiert, haben wir nach einer Lösung gesucht, die es uns mit Bordmitteln ermöglicht, ein konsistentes Backup einer Hyper-V VM zu fahren. Vorweg aber etwas das uns sehr am Herzen liegt:
Da Daten und deren Sicherungen für Unternehmen einen existenziellen Wert darstellen, möchten wir hier ausdrücklich darauf hinweisen, dass wir für die hier bereitgestellten Skripte und Methoden  keinerlei Haftung übernehmen und Sie diese auf eigene Gefahr einsetzen.
Wie sieht nun unsere Methode aus? Hyper-V bringt seit der ersten Version die Möglichkeit mit sich eine VM zu exportieren. Bei diesem Vorgang werden die kompletten Daten, d. h. die Platten (VHDs), die Snapshots (falls vorhanden) und die Konfiguration, in einem Format in ein Verzeichnis kopiert,  so dass diese jederzeit auf einen anderen Host kopiert und wieder importiert werden können. Daraus kann sich ein Problem ergeben: Da die Daten kopiert werden, und das nur auf einer Platte des Hosts passieren kann (keinem Netzlaufwerk), benötigt die Maschine mindestens den gleichen freien Plattenplatz, wie die gesamte VM belegt.
Weiterhin kann die VM beim Exportvorgang nicht laufen, das heißt sie ist entweder heruntergefahren (was wir präferieren) oder sie ist zumindest gespeichert. Diese Ausfallzeit der VM kann, je nach Größe der VHDs und Snapshots, schon einige Minuten dauern. Als Beispiel dauert der Export unseres Exchange Server mit ca. 80 GB um die 30 Minuten. Natürlich möchten wir den Exportvorgang nicht von Hand anstoßen, sondern automatisieren. Deswegen haben wir uns ein PowerShell Script geschrieben, das mittels Aufgabenplaner in regelmäßigen Interwallen diesen Exportvorgang durchführt. Wenn Sie möchten kopiert dann dieses Script, nach Abschluss des Exportvorgangs, die Daten auf einen beliebigen Netzwerkpfad, damit die Daten nicht nur auf dem Host liegen.

Hier der grobe Ablauf des Scripts:
  1. Maschine herunterfahren oder schlafen legen
  2. Exportvorgang auf lokalen Datenträger
  3. Maschine starten oder aufwecken
  4. Gegebenenfalls den Export auf Netzwerkfreigabe kopieren
Damit unser PowerShell Script funktioniert, benötigen wir die PSHyperv Library die James O’Neill entwickelt und unter  CodePlex (Download unter http://www.codeplex.com/psHyperV) frei zur Verfügung stellt.  Achtung: die aktuelle Version funktioniert nur mit der PowerShell V2, allerdings auf beiden Hyper-V Varianten. Zum reibungslosen Installieren der Library sind folgende Schritte vorab durchzuführen:
  1. Sie laden das ZIP-Archive in ein Verzeichnis (z.B. C:\Temp) herunter
  2. imageSie wenden das Sysinternal Tool “streams” an, um die Kenzeichnung, dass die Datei aus dem Internet geladen wurde (“Zone.Identifier”), zu entfernen
  3. Sie entpacken das Archive in einem temporären Verzeichnis (z.B. c:\Temp)
imageDanach führen Sie die Installation des Library durch: Rechtsklick auf das “install.cmd” Script und auswählen “Als Administrator ausführen”. Jetzt werden Sie gefragt, ob Sie “.Net Framework 2” und “PowerShell” installiert haben. Ist das nicht der Fall, dann brechen Sie bitte die Installation ab und holen dieses nach.imageErfüllen Sie alle Voraussetzungen, dann drücken Sie “Enter” und das Script kopiert die Library und nimmt alle erforderlichen Einstellungen vor. In dem Screenshot sehen Sie zwei Fehler, die auf einer nicht Core Installation auftreten. Diese Fehler können Sie ignorieren und bestätigen einige weitere Male die Installationsschritte.
Nach erfolgreicher Installation sollte ein Powershell-Fenster aufgehen, indem Sie die Installation mit dem PowerShell Befehl:
get-command –module HyperV
überprüfen können.
Nach der erfolgreichen Installation der PsHyperV Bibliothek laden Sie unser PowerShell Script “HyperV-Backup.ps1” herunter (die aktuelle Version finden Sie am Ende des Artikels). Das ZIP Archive entpacken Sie in einem Verzeichnis z.B. “C:\Tools”. Auch hier sollten Sie das Sysinternal Tool “streams” anwenden, damit Powershell das Script ausführen kann.
Einen ersten Überblick über die Scriptoptionen erhalten Sie, wenn sie das Script nun aus einer Powershell (Achtung Administratoren Rechten erforderlich) mit dem Argument “-?” oder “-help” aufrufen z.B.: “C:\Tools\HyperV-Backup.ps1 –?”. Als Hilfestellung für den Einsatz gebe ich im folgenden einige Beispiele, wie Sie dieses Script benutzen können:
1. lokaler Export eines VMs:
C:\Tools\HyperV-Backup.ps1 –VM W2K8-VM –ExportPath D:\Exports
Schritte die das Script ausführt:
  1. die VM "W2K8-VM” wird heruntergefahren
  2. Sie wird in das Verzeichnis C:\Exports\W2K8-VM exportiert und ein dort gegebenenfalls vorhandener alter Export gelöscht
  3. die VM wird wieder gestartet
2. lokaler Export einer VM mit Kopie auf Sicherungsserver:
C:\Tools\HyperV-Backup.ps1 –VM W2K8-VM –ExportPath
D:\Exports  -RemotePath \\Storage\Sicherung$ –verbose
Schritte die das Script ausführt:
  1. die VM "W2K8-VM” wird heruntergefahren
  2. Sie wird in das Verzeichnis C:\Exports\W2K8-VM exportiert und ein dort gegebenenfalls vorhandener alter Export gelöscht
  3. die VM “W2K8-VM” wird wieder gestartet
  4. Der Export wird in die Netzwerkfreigabe “\\Storage\Hyper-V-Sicherungen$\W2K8-VM” kopiert und ein dort gegebenenfalls vorhandener alter Export gelöscht
  5. Die Export unter “D:\Exports\W2K8-VM” wird gelöscht
Zusätzlich gibt das Script, wegen des Schalters –verbose einige Informationen auf der Konsole aus.
3. remote Export mit Kopie auf Sicherungsserver:
C:\Tools\HyperV-Backup.ps1 –VM Debian1-VM –Server Hyperv5
–ExportPath D:\Exports  -SaveState -RemotePath
\\Storage\Sicherung$ –verbose
Schritte die das Script ausführt:
  1. die VM "Debian1-VM” wird gespeichert (Option –SaveState)
  2. Sie wird in das Verzeichnis D:\Exports\Debian1-VM exportiert und ein dort gegebenenfalls vorhandener alter Export gelöscht
  3. die VM “Debian1-VM” wird wieder aufgeweckt
  4. Der Export wird in die Netzwerkfreigabe “\\Storage\Hyper-V-Sicherungen$\Debian1-VM” kopiert und ein dort gegebenenfalls vorhandener alter Export gelöscht
  5. Die Export unter “D:\Exports\W2K8-VM” wird gelöscht
Zusätzlich gibt das Script wegen des Schalters –verbose einige Informationen auf der Konsole aus.
Nun sollte es ein leichtes sein, mit Hilfe der Windows Aufgabenplanung lokale und auch remote HyperV VMs zu exportieren.

Freitag, 26. November 2010

Step-by-Step Guide to Fine-Grained Passwords in Windows Server 2008


This step-by-step guide provides instructions for configuring, applying and editing fine-grained password and account lockout policies for different sets of users in Windows Server 2008.

In Microsoft Windows 2000 and Windows Server 2003 Active Directory domains, you could apply only one password and account lockout policy, which is specified in the domain's Default Domain Policy, to all users in the domain. As a result, if you wanted different password and account lockout settings for different sets of users, you had to either create a password filter or deploy multiple domains.

Fine-Grained Passwords in Windows Server 2008

In Windows Server 2008, you can use fine-grained password policies to specify multiple password policies and apply different password restrictions and account lockout policies to different sets of users within a single domain. For example, to increase the security of privileged accounts, you can apply stricter settings to the privileged accounts and then apply less strict settings to the accounts of other users.
Another valid application for using fine-grained password policies, are situations where legacy applications or other data sources require password synchronization.  These situations may require us to relax certain aspects of password complexity or length.

Step-By-Step Configuration of Fine-Grained Passwords in Windows Server 2008

I find it’s best to work with an example to demonstrate a solution, so in this case we will assume that you have a number of users who are Special Administrators and require a stronger password group policy than the standard user.  We will refer to these users as SpecialAdmins
In the following steps, we will configure a fine-grained password policy in Windows Server 2008 with the following settings:
Policy NamePolicy Setting
Enforce password history
24 passwords remembered
Maximum password age
30 days
Minimum password age
1 day
Minimum password length
12 characters
Passwords must meet complexity requirements
Disabled
Account lockout duration
0
Account lockout threshold
3
Reset account lockout counter after
30 minutes
Table 1: Password Policy
Note: yourdomainname in the following steps should be replaced with the NETBIOS name of your domain.
  1. Logon to a Windows Server 2008 domain controller using an account that has membership in the Domain Admins group, or equivalent permissions.
  2. Go to StartAdministrative Tools, and then select Active Directory Users and Computers

    Active Directory Users and Computers
  3. Expand yourdomainname.com, right-click on the Users container, select New, and then select Group.
  4. On the New Object - Group window, enter SpecialAdmins into the Group Name field, and then click OK

    New Object - Group
  5. Close Active Directory Users and Computers
  6. Click Start, click RUN, type ADSIEDIT.MSC, and then click OK
    adsiedit.msc
  7. In the ADSI Edit snap-in, right-click ADSI Edit, and then click Connect to
  8. In the Name field, enter yourdomainname.com, and then click OK
  9. Double-click yourdomainname.com in the console tree, double-clickDC=yourdomainname,DC=com, double-click CN=System, and then click CN=Password Settings Container
    CN=Password Settings Container
  10. Right-click CN=Password Settings Container in the console tree, click New, and then clickObject

    Password Settings Container - New Object
  11. In the Create Object dialog box, under Select a class, click msDC-PasswordSettings, and then click Next.

    Create Object - msDS-PasswordSettings
  12. In the Create Object dialog box, enter SpecialAdmins in the Value field, and then clickNext.

    Create Object - msDS-PasswordSettings Value
  13. For the msDS-PasswordSettingsPrecedence value, enter 1, and then click Next

    msDS-PasswordSettingsPrecedence
  14. For the msDS-PasswordReversibleEncryptionEnabled value, enter false, and then clickNext

    msDS-PasswordReversibleEncryptionEnabled
  15. For the msDS-PasswordHistoryLength value, enter 24, and then click Next

    msDS-PasswordHistoryLength
  16. For the msDS-PasswordComplexityEnabled value, enter false, and then click Next

    msDS-PasswordComplexityEnabled
  17. For the msDS-MinimumPasswordLength value, enter 12, and then click Next

    msDS-MinimumPasswordLength
  18. For the msDS-MinimumPasswordAge, enter 1:00:00:00, and then click Next

    msDS-MinimumPasswordAge
  19. For the msDS-MaximumPasswordAge, enter 30:00:00:00, and then click Next

    msDS-MaximumPasswordAge
  20. For the msDS-LockoutThreshold, enter 3, and then click Next

    msDS-LockoutThreshold
  21. For the msDS-LockoutObservationWindow, enter 0:00:30:00, and then click Next

    msDS-LockoutObservationWindow
  22. For the msDS-LockoutDuration, enter (never), and then click Next, then click Finish

    msDS-LockoutDuration
  23. Right-click on CN=SpecialAdmins in the console tree, and then select Properties

    msDS-PasswordSettings Properties
  24. On the CN=SpecialAdmins Properties window, select the msDS-PSOAppliesTo attribute, and then click the Edit button

    msDS-PSOAppliesTo
  25. On the Multi-valued Distinguished Name With Security Principal Editor window, click on the Add Windows Account button

    Multi-valued Distinguished Name With Security Principal Editor
  26. On the Select Users, Computers, or Groups window, enter SpecialAdmins in the Enter the object names to select field, and then click OK

    Select Users, Computers, or Groups
  27. Click OK on the Multi-valued Distinguished Name With Security Principal Editor window
  28. Click OK on the CN=SpecialAdmins Properties window

    msDS-PSOAppliesToSetting

Conclusion

This step-by-step guide demonstrated how to configure fine-grained passwords in WindowsServer 2008.  We defined a number of password settings and applied it to a Active Directory Group.  From now on, all user members of the group will be applied with the custom password policy.

References

What is the function of the msDS-LockoutDuration element of the fine-grain account lockout policy?
http://www.ucertify.com/article/what-is-the-function-of-the-msds-lockoutduration-element-of-the-fine-grain-account-lockout-policy.html
AD DS Fine-Grained Password and Account Lockout Policy
http://technet.microsoft.com/en-us/library/cc770842.aspx

Donnerstag, 25. November 2010

Reparieren Sie Server Manager Fehler die nach der Installation von Updates erscheinen. (HRESULT:0x800F0818/HRESULT:0x800B010)


Symptome

Ihr installiert mehrere Updates. Nach einer erfolgreichen Installation, bemerkt ihr das keine Roles oder Features hinzugefügt oder entfern werden können.
So können die Fehler dargestellt werden:

Unexpected error refreshing Server Manager: Exception from HRESULT:0x800F0818

Oder

Server Manager:Unexpected error refreshing Server Manager: No signature was present in the subject. (Exception from HRESULT: 0x800B0100)

Lösung

Als erstes ladet das Microsoft Update Readiness Tool herunter.
Lasst es laufen und nachdem es fertig gescanned hat überprüft C:\Windows\logs\CBS\Checksur.log
Ihr solltet einer dieser Paragraphe sehen:

Checking Package Manifests and Catalogs
(f) CBS MUM Corrupt 0x00000000 servicing\Packages\Package_for_KB978601~31bf3856ad364e35~amd64~~6.0.1.0.mum  Expected file name Package_for_KB978601_server~31bf3856ad364e35~amd64~~6.0.1.0.mum does not match the actual file name
(f) CBS MUM Corrupt 0x00000000 servicing\Packages\Package_for_KB979309~31bf3856ad364e35~amd64~~6.0.1.0.mum  Expected file name Package_for_KB979309_server~31bf3856ad364e35~amd64~~6.0.1.0.mum does not match the actual file name

oder

(f) CBS MUM Corrupt 0x800B0100 servicing\Packages\Package_for_KB978601~31bf3856ad364e35~amd64~~6.0.1.0.mum servicing\Packages\Package_for_KB978601~31bf3856ad364e35~amd64~~6.0.1.0.cat Package manifest cannot be validated by the corresponding catalog
(f) CBS MUM Corrupt 0x800B0100 servicing\Packages\Package_for_KB979309~31bf3856ad364e35~amd64~~6.0.1.0.mum servicing\Packages\Package_for_KB979309~31bf3856ad364e35~amd64~~6.0.1.0.cat Package manifest cannot be validated by the corresponding catalog

oder

(f) CBS MUM Missing 0x00000002servicing\packages\Package_114_for_KB955839~31bf3856ad364e35~amd64~~6.0.1.0.mum
(f) CBS MUM Missing 0x00000002servicing\packages\Package_83_for_KB955839~31bf3856ad364e35~amd64~~6.0.1.0.mum


Weiter unten inm Log:

Unavailable repair files:
 servicing\packages\Package_for_KB978601~31bf3856ad364e35~amd64~~6.0.1.0.mum
 servicing\packages\Package_for_KB979309~31bf3856ad364e35~amd64~~6.0.1.0.mum
 servicing\packages\Package_for_KB978601~31bf3856ad364e35~amd64~~6.0.1.0.cat
 servicing\packages\Package_for_KB979309~31bf3856ad364e35~amd64~~6.0.1.0.cat

Diese Files müssen zu %systemroot\Windows\Servicing\Packages kopiert werden.
Um diese Operation erfolgreich ausführen zu können folgt bitte diese Schritte:

  1. Als erstes müssen wir uns (Administrator) rechte auf den Ordner verschaffen:
Mit folgendem Befehl machen wir den jetzigen Benutzer zum Besitzer des Orderns:
takeown /F c:\Windows\Servicing\Packages /D y /R

Volle Kontrolle wird mittels folgenden Befehls erzielt:
cacls c:\Windows\Servicing\Packages /E /T /C /G "BenutzerName":F

Optional könnt ihr folgende ZIP Datei herunterladen. Darin befinden sich 2 REG Dateien. Die TakeOwnership.reg wird eine neue Option in das rechts click Menu legen. Somit können Sie direkt einen Ordner übernehmen und hereinschreiben.
scr1 

  1. Als nächster Schritt sammeln wir die fehlenden oder korrupten Files die in dem Checksur Log beschrieben sind.
Ladet die KB Files für die jeweiligen fehlende Files herunter:
servicing\packages\Package_for_KB978601~31bf3856ad364e35~amd64~~6.0.1.0.mum
- entpackt diese mittels:

Expand -F:* UpdateKBXXXX.msu x:\DestinationDirectory

Nach dem Entpacken werdet ihr in dem Ordner ebenfalls eine UpdateKBXXXX.cab Datei bemerken. Diese muss ebenfalls entpackt werden:

Expand -F:* UpdateKBXXXX.CAB x:\DestinationDirectoryCAB

Diese CAB Datei enthält 2 Files die wir brauchen: update.mum und update.cat

  1. update.mum und update.cat müssen unbenannt werden, undswar so:
Ex.: update.mum for KB978601 wird so unbenannt:
Package_for_KB978601~31bf3856ad364e35~amd64~~6.0.1.0.mum
Dieselbe Operation muss für alle Fehlenden Files wiederholt werden. Im Anschluss kopiert diese zu /servicing/packages
Nach der Kopieraktion sollte der Server Manager wieder funktioniere. Kein Reboot ist notwendig.
Sollte dieses nicht der Fall sein, lasst das Update Readiness Tool erneut laufen und versucht die oben beschriebenen Schritte erneut.

Samstag, 20. November 2010

Install SCCM 2007 on Windows Server 2008 R2

Prerequisites

In order to install SCCM 2007 there are a number of prerequisites that are required to be installed on the machine.

Configuring Internet Information Services on Server 2008R2

Installing Internet Information Services (“IIS”)
  • On the Windows Server 2008R2 computer, navigate to Start / All Programs / Administrative Tools / Server Manager to start Server Manager. In Server Manager, select the Features node and click Add Features to start the Add Features Wizard.

  • On the Select Features page of the Add Features Wizard:

  • Select BITS Server Extensions. When prompted, click Add Required Role Services to add the dependent components, including the Web Server (IIS) role.

  • Select Remote Differential Compression, and then click Next.

  • On the Web Server (IIS) page of the Add Features Wizard, click Next.

  • Click Next on the IIS installation page

  • Under Application Development, select ASP.NET and, when prompted, click Add Required Role Services to add the dependent components.

  • Select ASP because the site system will be configured as a reporting point.

  • Under Security, select Windows Authentication.

  • In the Management Tools node, under IIS 6 Management Compatibility, ensure that both IIS 6 Metabase Compatibility and IIS 6 WMI Compatibility are selected and then click Next.

  • Under common http feature ensure that WebDav publishing is installed

  • Click Next

  • On the Confirmation page, click Install, and then complete the rest of the wizard.

  • Click Close to exit the Add Features Wizard, and then close Server Manager.

  • Install and configure Web-based Distributed Authoring and Versioning (“WebDAV”)
    WebDAV is required to support management point and BITS-enabled distribution point site system computers.
  • Enable WebDAV and create an Authoring Rule, as follows:

  • Navigate to Start / All Programs / Administrative Tools / Internet Information Services (IIS) Manager to start Internet Information Services 7 Application Server Manager.

  • In the Connections pane, expand the Sites node in the navigation tree, and then click Default Web Site if you are using the default Web site for the site system or SMSWEB if you are using a custom Web site for the site system.

  • In the Features View, double-click WebDAV Authoring Rules.

  • When the WebDAV Authoring Rules page is displayed, in the Actions pane, click Enable WebDAV.

  • After WebDAV has been enabled, in the Actions pane, click Add Authoring Rule.

  • In the Add Authoring Rule dialog box, under Allow access to, click All content.

  • Under Allow access to this content to, click All users.

  • Under Permissions, click Read, and then click OK.

  • Change the property behavior as follows:

  • In the WebDAV Authoring Rules page, in the Actions pane, click WebDAV Settings.

  • In the WebDAV Settings page, under Property Behavior, set Allow anonymous property queries to True.

  • Set Allow Custom Properties to False.

  • Set Allow property queries with infinite depth to True.

  • If this is a BITS-enabled distribution point, under WebDAV Behavior, set Allow hidden files to be listed to True.

  • In the Action pane, click Apply.

  • Close Internet Information Services (IIS) Manager.

  • Configure Remote Differential Compression (“RDC”)
    RDC is required for site server and branch distribution point computers

    Install SQL Server 2008

    SCCM primary sites must constantly communicate with a Microsoft SQL Server hosting the site database. Typically, performance is better if the SCCM site server and the site database are installed on the same server however, if a high-availability, high-bandwidth connection is present leveraging SQL on a remote server is an option. Since AT run a number of different Beta products we have decided to run a local installation of sql 2008 sp2
    Installing SQL on the SCCM site server
    1. SQL 2008 requires the installation of .Net 3.51 which can be installed from the features section in server manager. On the Windows Server 2008R2 computer, navigate to Start / All Programs / Administrative Tools / Server Manager to start Server Manager. In Server Manager, select the Features node and click Add Features to start the Add Features Wizard.
    2. On the Select Features page of the Add Features Wizard and select .Net Framework 3.5.1
    3. On the Add feature popup select add required features
    4. Click Install
    5. Insert the SQL Server 2008 CD and click on Install Server Components, if the splash screen does not appear, run Splash.hta from the .\Servers directory.
    6. After launching the Sql 2008 setup select installation from the left menu
    7. Select New SQL Server stand-alone installation
    8. Click OK on the setup support rules
    9. Enter the product key and select Next
    10. Click I Accept the license terms and then click Next
    11. Click Install on the Setup Support files page
    12. Click Next on the Setup Support Rules page
    13. On the feature selection page select the following: Database Engine, Full Text Search, Reporting Services, Management Tools Complete
    14. We will be installing our SQL information to the D: drive and click Next
    15. Accept the defaults on the instance configuration page (validate D: drive for the root directory) and click Next
    16. Select Next on the disk space requirements page
    17. On the server configuration page enter the Service account that we previously created (see table1)
    18. On the Database Engine configuration leave Windows Integrated and add the appropriate account for SQL Admin and click NEXT
    19. On the Reporting Services Configuration leave the default of Install Native Mode default configuration
    20. On the Error Reporting page accept the defaults and click NEXT
    21. Make sure all the rule have passed then click NEXT
    22. Click INSTALL on the Ready To Install page
    23. On the Install Progress page click NEXT
    24. Click CLOSE on the completion page
    Installing SQL 2008 SP1
    1. Double click the SQL SP1 installation file En_SQL_Server_2008_SP1_x64.exe
    2. On the Welcome screen click NEXT
    3. Accept the License terms and click NEXT
    4. on the Selection Features click NEXT
    5. On the Check files in Use page click NEXT
    6. Click UPDATE on the Ready to update screen
    7. On the update progress page click NEXT
    8. Click CLOSE on the completion page
    Leveraging a remote SQL instance
    When installing the site database on a remote SQL Server computer, the logged on user and site server machine account require administrative rights to the remote SQL Server computer. If installing the site database on a SQL Server cluster instance, the logged on user and site server machine account require administrative rights to all SQL Server cluster instance node computers.
    Required Communication Protocols
    The TCP/IP protocol is required for SQL Server network communications to allow Kerberos authentication. The named pipes protocol is not required for SCCM site database operations and should only be used to troubleshoot any Kerberos authentication issues encountered when using TCP/IP protocol communication. By default, SQL Server uses TCP port 1433 to listen on TCP/IP. To change the port, or network communication protocol used, start the SQL Server Configuration Manager, and click Protocols for .
    Site Database Creation
    Configuration Manager 2007 Setup automatically creates the site database, using SQL Server defaults, on the SQL Server computer and instance specified during setup. If the configured SQL Server default settings are not sufficient to manage your site database, it is recommended that you pre-create the database and set the required settings. If you are using a remote SQL Server to host the site database, you should ensure that the site server’s computer account has sufficient privileges on the SQL Server computer to create the site database before beginning the installation process.
    Using a Domain Account to run the SQL service
    If you configure a domain user account to run the SQL Server service instead of the local system account a Service Principal Name (“SPN”) must be configured for the domain user account in Active Directory Domain Services.
  • Click Start, click Run and then enter CMD in the Run dialog box.

  • Enter a valid command to create the SPN. The command should be in the form of:

  • setspn –A MSSQLSvc/:1433
  • Verify that the command completed successfully by reviewing the command’s output for the updated object line

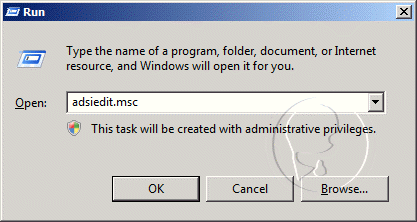
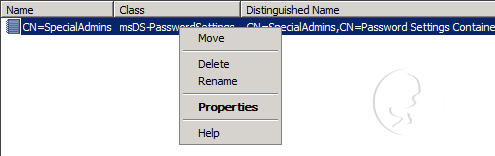
  • Click Start, click Run, and enter adsiedit.msc to launch the ADSIEdit MMC console, connect to the  domain

  • In the console pane, expand the  domain, expand DC=, expand CN=Users, and right-click CN=. On the context menu, click Properties

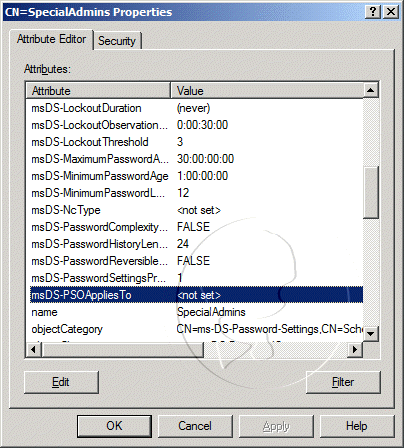
  • In the CN= Properties dialog box, review the ServicePrincipalName value to ensure that a valid SPN has been created and associated with the correct SQL Server


  • Implementing SCCM 2007

    The following section outlines the installation process  to install the core SCCM software, additional site system roles and, supporting components.

    Extend the 2008 Active Directory schema

  • Create a backup of the schema master domain controller’s system state using the standard CompanyX backup process.

  • Log on to the schema master domain controller with an account that is a member of the Schema Admins security group.

  • Disconnect the schema master domain controller from the network.

  • Click Start, click Run, and enter adsiedit.msc to launch the ADSIEdit MMC console , connect to the  domain.

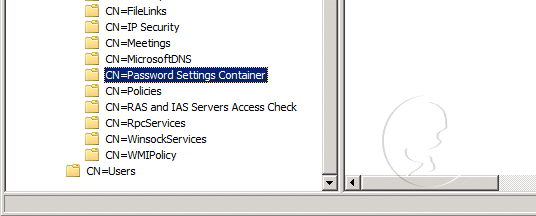
  • In the console pane, expand Domain, expand the distinguished name entry, and right-click CN=System.

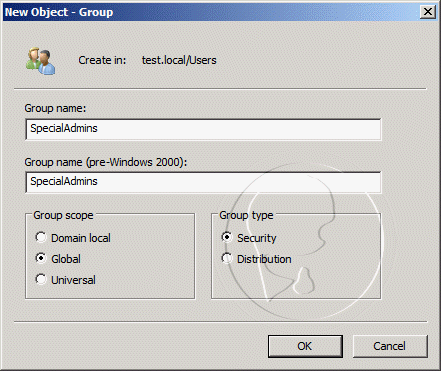
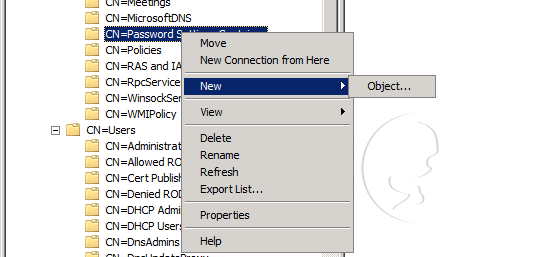
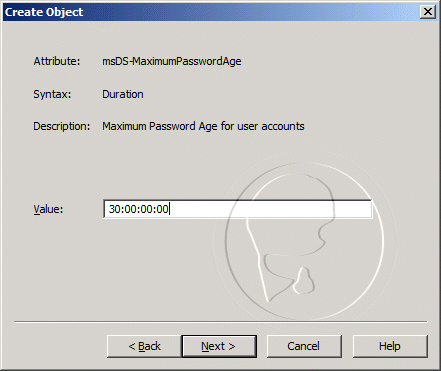
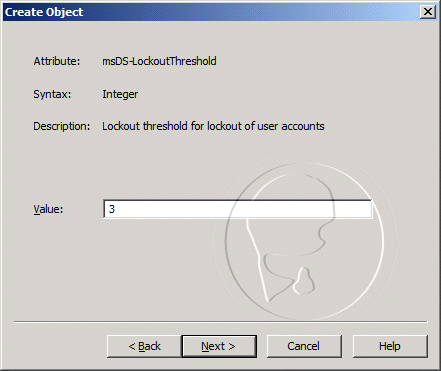
  • On the context menu, click New and then click Object.

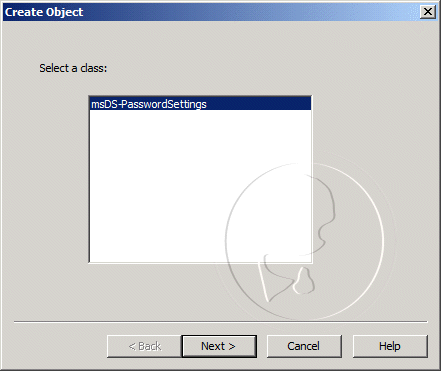
  • In the Create Object dialog box, select Container and click Next.

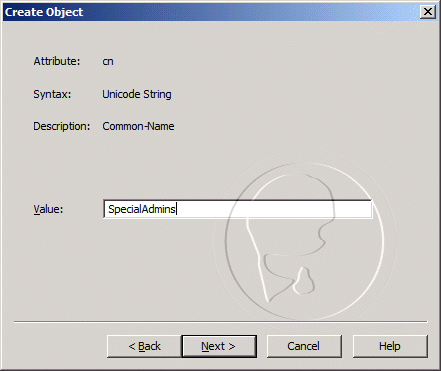
  • In the Value field, type System Management and click Next.

  • Click Finish and close the ADSIEdit MMC console.

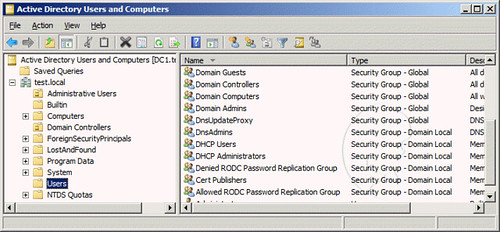
  • Click Start, Click Run, and enter dsa.msc to open the Active Directory Users and Computers administrative tool.

  • Click View, and then click Advanced Features.

  • In the console pane, expand the System container.

  • Right Click the System Management container and select Properties

  • In the Security tab click the Add button

  • Click the Object Types button and select Computers

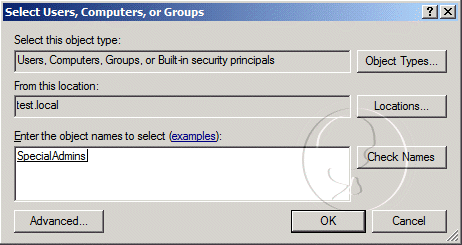
  • In the Object Names field enter the SCCM server’s machine account e.g.$, click OK

  • In the Security tab select the machine account then click the Advanced button

  • Select the machine account in the Permissions window and click the Edit button

  • In the Apply to: field select “This object and all descendant objects” and select Full Control under permissions

  • Close the Active Directory Users and Computers administrative tool

  • Run extadsch.exe, located at \SMSSETUP\BIN\I386 on the SCCM installation media, to add the new classes and attributes to the Active Directory schema.

  • Verify that the schema extension was successful by reviewing the extadsch.log located in the root of the system drive.

  • If the schema extension procedure was successful, reconnect the schema master domain controller to the network and allow it to replicate the schema extensions to the global catalog servers throughout the Active Directory forest.

  • If the schema extension procedure was unsuccessful, restore the schema master’s previous system state from the backup created in step 1. This will reverse the schema extension actions before reconnecting the schema master domain controller to the network.

  • Installing the SCCM 2007 SP2 Central Site

  • Create a directory to hold updated installation files at C:\Install Source\Updates

  • Execute SPLASH.HTA, from the root of the SCCM installation media to start the setup wizard.

  • Click Run the Prerequisite Checker

  • Input the SQL Server Name, SDK Server , and Management Point server and click OK

  • You see we have a warning related to WSUS, however since we are not integrating that component at this time we can click OK

  • Launch Setup

  • Click Install Configuration Manager SP2

  • Click Next on the Welcome page.

  • On the Available Setup Options page, select the Install a Configuration Manager Site Server option.

  • Agree to the licensing terms on the License Agreement page, click Next.

  • On the Installation Settings page, select the Custom Settings option.

  • On the Site Type page, select Primary site.

  • On the Customer Experience Improvement Program page, select “No, I do not want to participate right now”.

  • On the Configuration Manager Product Key page, The AT key is entered by default.

  • On the Destination Folder page, enter d:\Program Files (x86)\Microsoft Configuration Manager\

  • On the Site Settings page, enter a three letter site code in the Site Code field and AT Belvoir Site in the Site Name field.

  • On the Configuration Manager Site Mode page, select Configuration Manager in Mixed Mode.

  • On the Configuration Manager Client Agents page, select all the client agents but Network Access Protection to enable them with their default settings.

  • On the Configuration Manager Database Server page, enter the Microsoft SQL Server NetBIOS name, , and the SQL 2008 database name, SMS_ABV

  • On the SMS Provider Settings page, enter the NetBIOS name of the local server to install the SMS Provider on, .

  • On the Configuration Manager Management Point page, choose to install a management point during setup. Verify the NetBIOS name of the server, , is targeted to install the management point site system role.

  • On the Configuration Manager Port Settings page, accept the default port (80) to be used for client-to-site-system communications.

  • On the Updated Prerequisite Components page, select “Check for new updates and download them to an alternate path”.

  • Enter C:\Install Source\Updates for the alternative path to store the updates.

  • Note: The Setup command line option Setup /download can be used to download client prerequisite component files without running the complete Configuration Manager Setup wizard.
  • On the Settings Summary page, review the summary details for the site installation before continuing.

  • When prerequisite checking has completed, review any messages in the results pane of the Prerequisite Check page to verify that all prerequisites have been met or that Configuration Manager Setup can resolve any prerequisites that have not been met for installation to continue.

  • Review the installation steps on the Installation Status to verify the actions taken and their status as Configuration Manager is installing. Clear the checkbox to Launch the Configuration Manager console after closing.

  • The Completion page displays whether or not the installation was successful and the details of the primary site installation as well as the options to view the setup log file (ConfigMgrSetup.log) and launch the Configuration Manager console.

  • Adding Site System Roles

    After installing the SCCM Central Site, additional site system roles are required to support ABM functional requirements.
    Configure the Management Point role
    A MP is required to transfer information between SCCM clients and SCCM servers, without a functional MP, clients cannot be managed.
  • In the Configuration Manager console, navigate to System Center Configuration Manager / Site Database / Site Management / YourSite / Site Settings / Component Configuration.

  • Right-click Management Point, and then click Properties.

  • If the default management point for the site will be a standard site system, click Management Point, and then select an available management point site system from the Server name list.

  • If the default management point for the site will be an NLB clustered management point, click Network Load Balancing cluster virtual server and configure the IP Address or FQDN information for the NLB cluster configuration.

  • Click OK to save configuration changes and close the management point properties.

  • Configure the Server Locator Point role (conditional)
    Server locator points (“SLP”) are used to complete client site assignment on the intranet and help clients find management points when they cannot find that information through AD. Clients must use a server locator point if the AD schema is not extended for SCCM, the site is not published to AD, or if clients do not belong to the same AD forest as the site server’s forest. The SLP role will not be implemented initially but this section is included to account for potential ABM SCCM environmental for growth.
  • In the Configuration Manager console, navigate to System Center Configuration Manager / Site Database / Site Management / ABV- AT Belvoir Site / Site Settings / Site Systems.

  • To create a new site system server and add the reporting point site role: Right-click \\, click New Roles.

  • Verify the general site system settings for the site system server.

  • Specify a fully qualified domain name (FQDN) for this site system on the intranet:.

  • Check: Use the site servers computer account to install this system

  • Click Next.

  • Select Server locator point, and then click Next.

  • Select Use the site database and Use the server locator point’s computer account options then click next

  • Click Next on the summary page, and then click Close.

  • Repeat the steps above to validate the following roles are installed and configured

  • Adding the SLP to Wins is only required if you have non AD joined machines that you want to be managed by SCCM or you plan to manage systems in remote directories.
    *This task should be run from a Server that has the Wins Role installed*
  • Click Start, click Run, type cmd in the Run Dialog Box and then click OK.

  • At the command prompt, type netsh, and then press Enter.

  • Type wins, and then press Enter.

  • Type server, and then press Enter. To manage a remote WINS server, type server\\.

  • Type the appropriate command, as in the following example: add name Name=SMS_SLP endchar=1A  rectype=0 ip={SERVER IP address here}

  • To verify that the server locator point entry was added correctly to WINS
  • Click Start, click Run, enter cmd in the Run dialog box and then click OK.

  • At the command prompt, type netsh, and then press Enter.

  • Type wins, and then press Enter.

  • Type server, and then press Enter. To manage a remote WINS server, type server \\.

  • Type the following command: show name Name=SMS_SLP endchar=1A.
  • Rename Onedrive Business root folder

    Rename Onedrive Business root folder Here is what I remember: In the Office 365 web admin pages, change the organization name to a shorte...