Dienstag, 25. Dezember 2012

VMware ESXi 5.1 can run Microsoft Hyper-V Server 2012 VMs

Here's the gist:

  1. Create a "Microsoft Windows Server 2012 (64-bit)" VM, using Typical Configuration
  2. right-click the new VM and Upgrade Virtual Hardware to Version 9
  3. tweak the VMX, adding these 4 lines:
    • mce.enable = TRUE
    • hypervisor.cpuid.v0 = FALSE
    • featMask.vm.hv.capable = “Min:1″
    • vhv.enable = TRUE
  4. be sure it's assigned to a network where the vSwitch has Promiscuous Mode set to Accept
  5. power up the new Hyper-V VM
  6. perform typical install and configure of Hyper-V, hard-code IP if you'd like, create an Admin username/password that matches a client system
  7. create a Windows 8 "client" VM, since Hyper-V Manager takes just a few seconds to add
  8. fix COM Security on that client system
  9. use that VM's Hyper-V Manager to connect to Hyper-V, then...
  10. create a Hyper-V hosted Virtual Machine, connect to it, and turn it on to test

I'm eager for any suggestions or alternative methods, but for now, this was the only way I could get it working in my own lab, figured others might want to try to replicate this excercise.


youtube Link: http://www.youtube.com/watch?v=u7rhWn0dNac


You heard all about guestOS = "winhyperv" here first.

What if you just want to virtually “kick the tires” on the latest Microsoft Hyper-V Server 2012, without committing dedicated hardware, to focus more on learning the features than the performance? Well, if you already have the prerequisites:

a) an ESXi 5.1 lab where you’re allowed to tweak the Hyper-V VM’s vmx file slightly (not changing anything in the ESXi host configuration)
b) a current subscription to MSDN or TechNet Professional, or even the free eval obtained by clicking the Free Download button here

then you’re in luck. Just leave your VMware VMs going, and add a Hyper-V VM without the server UI stuff (called the Core version), for a smaller resources footprint, and the ability to “nest” Hyper-V VMs.

The video walk-through seen at the end is 32 minutes, but you can skip the video and deploy this in your lab in well under 15 minutes, if you already have the 1.7GB ISO file downloaded that is. Just follow along with the screenshots below!

Backstory:
Windows Server 2012 with Hyper-V includes these lofty claims:
Why Hyper-V? Competitive Advantages of Windows Server 2012 Hyper-V over VMware vSphere 5.1.

More info here:
Microsoft Hyper-V Server 2012and in TechNet here:
technet.microsoft.com/en-us/library/hh833684.aspx.

Yes, the initial learning curve for Hyper-V without the full GUI is a bit rough:
Standalone Hyper-V is too painful to usebuy hey, all you really care about is getting it to run multiple VMs, so do you really need a fancy UI, do you? I finally got this all working just this past weekend, so I didn’t waste any time getting this word out there (early Monday).

In other words, if you got VMware ESXi 5.1 working on your hardware, that means your BIOS and CPU are capable with Intel VT-x or AMD-V explained here, and you will very likely be able to get ESXi 5.1 to run Windows Server 2012 with Hyper-V.

Back on ESXi 5.0, luck with running nested Hyper-V VMs didn’t work out well. By nesting, I mean getting ESXi 5.0 to run Hyper-V to run Hyper-V VMs at all, explained here:
tinkertry.comhyper-v-server-2012-release-candidate-x64-runs-fine-on-esxi-5-update-1

Doing a little research that included combing the best of these recent articles:

How to Enable Nested ESXi & Other Hypervisors in vSphere 5.1, Wednesday, August 29, 2012
www.virtuallyghetto.com/2012/08/how-to-enable-nested-esxi-other.html

How To Install CentOS 6.3 KVM on vSphere 5.1, by Chris Colotti,
www.chriscolotti.us/vmware/nicira-nvp/how-to-install-centos-6-3-kvm-on-vsphere-5-1

coupled with the incentive that this really should work, based on folks’ discussions over here (that didn’t exactly spell out the exact steps):

Server 2012 Hyper-V under ESXi 5.x??, Sep 14, 2012 7:41 PM
communities.vmware.com/message/2115423

Running Nested VMs, Created on: Nov 30, 2008 9:17 PM by jmattson – Last Modified: Sep 12, 2012 2:06 PM by jmattson
communities.vmware.com/docs/DOC-8970

I was finally able to prototype and get this whole procedure going , and boiled it down to the simplest method I could come up with. I even managed to avoid the step of having to use the vSphere Web Client to expose hardware assisted virtualization to the guest OS, to speed you along toward success.


VMware ESXi 5.1 can run Microsoft Hyper-V Server 2012 VMs
Comprehensive Implementation Guide


1 ) Install VMware ESXi 5.1:
Assuming your hardware platform is compatible, such as tinkertry.com/vzilla, installation and configuration instructions of ESXi 5.1 can be seen here:
tinkertry.com/install-esxi-5-1-flash-drive-then-configure-and-run-vms


2 ) Turn on SSH on ESXi using the vSphere Client:
If you haven’t done this already, the steps are shown on VMware’s site here, or a more visual approach here:
www.thomasmaurer.ch/2011/08/enable-ssh-on-esxi-5-via-vsphere-client


3 ) Download the 1.7GB ISO:
Microsoft Hyper-V Server 2012 Release Candidate (x64) – DVD (English)
Visit MSDN’s download site, with the permalink to the x64 English version here:
msdn.microsoft.com/subscriptions/downloads#FileId=50558

The actual file you’re grabbing is:
en_microsoft_hyper-v_server_2012_x64_dvd_915600.iso
or from the free eval site here by clicking the Free Download button, or just use the direct download link here, with a file named:
9200.16384.WIN8_RTM.120725-1247_X64FRE_SERVERHYPERCORE_EN-US-HRM_SHV_X64FRE_EN-US_DV5.ISO

These 2 files are identical, so doesn’t matter which you choose (seen pictured below):


4 ) Use Datastore Browser (or Veeam FastSCP) to transfer the ISO file to your ESXi storage:
Consider creating a folder named ISO, then use Datastore Browser to upload your ISO file to that new folder


5 ) Configure your ESXi host network properly, turning on “Promiscuous Mode”:
You’ll need to enable “Promiscuous Mode” on your vSwitch that this Hyper-V VM network will use (there are a variety of ways to layout your network, including dedicating a NIC for this Promiscous mode Hyper-V that will still be accessible by clients), also seen in the video atthis exact spot.


Source:
www.ivobeerens.nl/2012/06/28/nest-windows-server-2012-hyper-v-in-vmware-esxi-5

If you forget this step, you may get the Hyper-V Manager RPC Error ”Cannot connect to the RPC service on computer. Make sure your RPC service is running.”


6 ) Configure a new VM:
In the video, you’ll see me create a new VM called “TEMPLATE-hyperv-Microsoft Server 2012 with Hyper-V” using the Typical wizard, pictured below.
The finalized product name was actually ”TEMPLATE-hyperv-Microsoft Hyper-V Server 2012″ so despite the screenshots, you may wish to go with that name instead.


Navigate to the ISO file, and be sure Connect at power on checkbox is on, click “Finish”:


7 ) Upgrade Virtual Hardware to Version 9:


8 ) Tweak the VM’s .vmx File:
Use free WinSCP to edit the .vmx file for the VM you just created. VMware’s jmattson has informed me this is the only tweak needed in the VMware Nested Virtualization forum:

Change this one line from:


guestOS = "windows8srv-64"
to
guestOS = "winhyperv"

and add the following line to the very end
featMask.vm.hv.capable = "Min:1"

followed by a carriage return, then save your changes.


Those changes, along with VM Hardware version 9 upgrade, are the “secret sauce” to success. And potentially a bit easier than trying to do this from vSphere Web Client or VMware Workstation 9.

Sources:

The definitive simplification was from jmattson’s response at http://communities.vmware.com/message/2119895#2119895, and his Running Nested VMs overview.
www.virtuallyghetto.com/2011/07/how-to-enable-support-for-nested-64bit.htmlcommunities.vmware.com/docs/DOC-8970tw.linkedin.com/in/aliao and www.youtube.com/watch?v=I-rjR4OawvQ
and Chris Colloti’s article giving me the idea to compare the vmx file before and after editing with the vSphere Web Client to ”Expose hardware assisted virtualization to the guest OS” as Chris explains here:
www.chriscolotti.us/vmware/nicira-nvp/how-to-install-centos-6-3-kvm-on-vsphere-5-1


9 ) Power on the VM, and install Hyper-V:
Proceed with a normal install


10) Configure Hyper-V:
Configure basic Hyper-V settings if you’d like, including allow Remote Management, and creating an administrator account for the remote client system that you’ll be connecting, using the same username and password.


11) Install Hyper-V Manager on Windows 8 Release Preview:
Go to Add/Remove Programs, Add/Remove Windows Components, then turn on the Hyper-V Management Tools checkbox. I used my convenient, 3-minutes-to-deploy Windows 8 VM for the client, because the Hyper-V management UI is extremely easy to install.


If you’re on Windows 7, get the equivalent function from
Remote Server Administration Tools for Windows 7 with Service Pack 1 (SP1).


12) Run Hyper-V Manager and connect to Hyper-V:
Now you’re ready to hit the Windows key on your keyboard, and type “hyper” and hit enter, and the Hyper-V Manager should start right up and allow you to connect, or at least try to, but you’ll get this error:
“Access denied. Unable to establish communication between”

So finding COM Management to fix this in Windows 8 wasn’t easy like it was on Windows 7:
tokyoimage.wordpress.com/2010/10/15/hyper-v-manageraccess-denied-unable-to-establish-communication-betweenbut I finally found this post:
http://www.calvinirwin.net/tag/hyper-vwhich told me to use Start, Run, DCOMCNFG, then click “Properties”, “COM Security”, “Edit Limits…”, turn on the “Remote Access” checkbox and click OK


13) Created a simple “nested” VM:
Use all the defaults for a VM you create, but on the Connect Virtual Hard Disk, choose “Attach a virtual hard disk later”. Why? We’re just trying to test if a nested VM is allowed to boot succesfully, either it works, or it doesn’t.


14) Power on to test the “nested” VM:
It not only works, it seems to work pretty well, with less CPU load noticed on the ESXi 5.1 host than the betas, this is a good sign.


Of course, future tests will exercise this new nested lab of mine considerably harder, with nested VMs with full operating systems, and Hyper-V live migrations. I’ll also test conversions of VMware VMs to Hyper-V with Microsoft’s tools here, just to compare with VMware Converter. And I need to test if Hyper-V VMs can actually see the network properly, and if the better vmxnet3 network driver would work.

mce.enable = TRUE
hypervisor.cpuid.v0 = FALSE
featMask.vm.hv.capable = "Min:1"
vhv.enable = TRUE

youtube Link: http://www.youtube.com/watch?v=u7rhWn0dNac

Sonntag, 23. Dezember 2012

Restoring Windows Server to Bare Metal


Introduction

Successful disaster recovery is all about preparation because bad things happen when you least want them to. There are several different ways you can restore a Windows server when the system drive fails on it. The approach we're going to walk you through here is simple and straightforward: just replace the failed drive, boot the server from Windows installation media, and launch the restore process. There are a couple of things to watch for however when you do this as we shall shortly see.

Test Environment

For simplicity, the walkthrough performed below uses a virtual environment running on Microsoft Hyper-V. The server we're going to restore is a virtual machine named SEA-FS1 in the contoso.com domain. The backup will be saved to a shared folder on the Hyper-V host on which this virtual machine is running. And the "bare metal system" to which we're going to restore the backup is another virtual machine that has no operating system installed on it. But the steps listed below are the same as if you were backing up a physical server and restoring it to actual bare metal.

Backing Up the Server

Let's begin. Figure 1 below shows our file server before it "crashes" and needs to be restored. The server name and domain are circled in red, and the title bar of the Virtual Machine Connection window also shows the server's name:

Figure 1: The server before it crashed
We'll map a drive letter to a shared folder named Backups on the Hyper-V host machine so we can store our backup "on the network" when we create it:

Figure 2: Preparing to back up the server
We enter credentials for accessing the shared folder on the host:

Figure 3: Preparing to back up the server
As you can see there are currently no backup sets in the shared folder:

Figure 4: There's no backup yet
Now we'll type "backup" in the Start menu search box to bring up the Windows Server Backup feature (which of course must be installed on your server before you can use it):

Figure 5: Step 1 of backing up the server
When the Windows Server Backup window opens, click Backup Once as shown here:

Figure 6: Step 2 of backing up the server
On the Backup Options page of the wizard, make sure Different Options is selected:

Figure 7: Step 3 of backing up the server
On the Select Backup Configuration page, select Custom:

Figure 8: Step 4 of backing up the server
On the Select Items For Backup page, click the Add Items button:

Figure 9: Step 5 of backing up the server
In the Select Items dialog, select the checkbox labeled Bar Metal Recovery. Doing this will automatically select all other checkboxes as well:

Figure 10: Step 6 of backing up the server
Clicking OK returns you to the Select Items For Backup page. Click Next on this page:

Figure 11: Step 7 of backing up the server
On the Specify Destination Type page, select Remote Shared Folder:

Figure 12: Step 8 of backing up the server
On the Specify Remote Folder page, we type the UNC path to the shared folder on the "network" where we will be storing our backups. The path we specify is \\HV-1\Backups and we leave the other options on the page at their defaults:

Figure 13: Step 9 of backing up the server
At the credential prompt, we specify credentials for accessing the shared folder on the host machine:

Figure 14: Step 10 of backing up the server
After reviewing the Confirmation page below, we will click Backup to begin backing up the server:

Figure 15: Step 11 of backing up the server
The server is being backed up:

Figure 16: Step 12 of backing up the server
Backup is finished:

Figure 17: The server has been backed up
We open the mapped drive in Explorer to verify the backup set is there:

Figure 18: The server has definitely been backed up
Now we shut down our file server and close the virtual machine. We're ready to restore to bare metal!

Restoring the Server to Bare Metal

Figure 19 below shows a virtual machine named Bare Metal System. As you can see, when we try to boot the system the boot fails because there is no operating system installed on the machine:


Figure 19: This bare metal system has no operating system installed
To launch the recovery process, we need to boot our bare metal system using Windows media. Since our system is a virtual machine, we simply attach an .iso image of Windows Server 2008 R2 installation media in the settings for the virtual machine and then restart the virtual machine. In a few seconds the Install Windows dialog comes up:

Figure 20: Step 1 of restoring to bare metal
After clicking Next in the previous screen, we now select the Repair Your Computer option at the bottom left as shown here:

Figure 21: Step 2 of restoring to bare metal
In the System Recovery Options dialog, we select the "Restore your computer using a system image that you created earlier" option:

Figure 22: Step 3 of restoring to bare metal
When the Re-image Your Computer dialog appears, we click Cancel:

Figure 23: Step 4 of restoring to bare metal
Note:#If the backup you were restoring from resided on a hard drive attached to the system (for example an external USB drive) this Re-image Your Computer dialog won't be displayed. Instead, you'll be taken directly to the next screen below where you will select the first option "Use the latest available system image (recommended)" and proceed with the restore process.
On the Select A System Image Backup page, make sure Select A System Image is selected and click Next as shown here:

Figure 24: Step 5 of restoring to bare metal
The next page should not show any backups available. The reason is because we've backed up our server to the network (to a file share on our host machine) and not to a local drive on the system or attached USB drive. If you had backed up to a local or attached drive instead of the network, you would continue the restore process starting at Figure 30 below.
On the page shown below, click Advanced:

Figure 25: Step 6 of restoring to bare metal
In the dialog that appears, select the "Search for a system image on the network" option as shown here:

Figure 26: Step 7 of restoring to bare metal
Note:The test environment for this walkthrough has a DHCP server and this is how the Windows Recovery Environment is able to connect to the network share where the backup set is located.
In the Are You Sure dialog that appears next, click Yes:

Figure 27: Step 8 of restoring to bare metal
Note:As the dialog above indicates, restoring a system from a backup stored on the network is not as secure as restoring the system from a local or attached drive, so take this into consideration when planning your disaster recover infrastructure for your servers!
Type the UNC path to where the backup is stored on the network:

Figure 28: Step 9 of restoring to bare metal
Specify credentials needed to access the network share:

Figure 29: Step 10 of restoring to bare metal
Once the Windows Recovery Environment has connected to the network share you should see a list of available backup locations on the share. Select the one you want and click Next as shown here:

Figure 30: Step 11 of restoring to bare metal
Now select the backup set you want to restore from:

Figure 31: Step 12 of restoring to bare metal
Clicking Next brings up the Choose Additional Restore Options page:

Figure 32: Step 13 of restoring to bare metal
If you click Advanced, you can see that the system will automatically restart once the restore process is finished and will also check the disk for errors. We'll leave both of these options selected:

Figure 33: Step 14 of restoring to bare metal
Clicking Next asks us to confirm our selections:

Figure 34: Step 15 of restoring to bare metal
Click Yes to confirm that YES I DEFINITELY WANT TO RESTORE FROM BACKUP:

Figure 35: Step 16 of restoring to bare metal
Now we get an error message:

Figure 36: The restore failed!
Oops, what went wrong? Let's try the restore process again starting from Figure 19 again...
Rats, this time we get a different but even worse error:

Figure 37: The restore failed again!!
We click the Details link in the above dialog box and get this in response:

Figure 38: Thanks a lot for the advice
What could be wrong? A bit of Binging around on the Internet brings up this thread from the Microsoft TechNet Forums.
The person who answered the original poster's question is right on the money because when I open the settings for my Bare Metal System virtual machine in Hyper-V Manager, I see that the virtual hard drive on this machine is in fact smaller in size than the VHD on my original system SEA-FS1.
LESSON LEARNED: Make sure the hard drive of the bare metal system you are restoring to is equal to or larger in size than the hard drive of the system that failed.
To fix this, we detach the VHD file from the Bare Metal System VM, create a new VHD equal in size to the one attached to the SEA-FS1 VM, and restart our restore process beginning with Figure 19 again, and this time the restore process works:

Figure 39: The restore is now working, whew!!
Once the restore to bare metal finishes and the machine reboots, we log on and verify that our recovered server has the same name as our original server (compare the figure below with Figure 1 at the beginning of this article):

Figure 40: The restore is finished.

Sonntag, 28. Oktober 2012

WSUS won’t uninstall or re-install


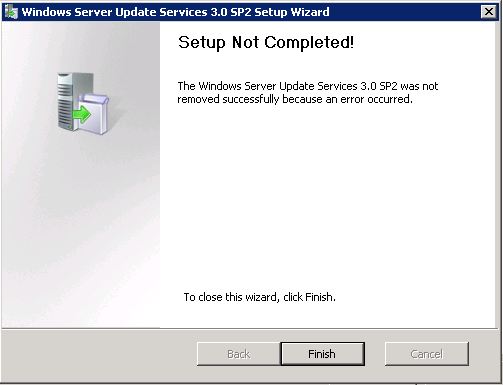
Hat heute ein Problem mit WSUS unter Windows Server 2008 R2 bei einem Kunden. Das Problem - die Clients konnten keinen Verbindung zum WSUS Server herstellen. Die Deinstallation wurde unerwartet beenden mit folgender Fehlermeldung:
Attempt to un-install Windows Server Update Services failed with error code 0x80070643. Fatal error during installation

 Die Lösung:

I don’t like Windows Server Update Services (WSUS), but it’s the free alternative many companies select over the higher cost alternatives like Intune or Systems Center. So, today I had to repair a damaged WSUS installation. Turns out someone uninstalled SQL Server 2005 Express not realizing WSUS was using it. Now firing up the WSUS console just yielded an error complaining about the missing SQL database. So like any good troubleshootin IT guy the first thing I tried was to uninstall WSUS…sadly, however the product would not uninstall or re-install. Here’s how I finally got rid of it:
[the problem]
  • WSUS 3.0 SP2 is missing SQL server Express or has been damaged somehow.
  • When opening WSUS you receive a SQL error when trying to connect.
  • You cannot uninstall WSUS. An attempt to uninstall/re-install fails with an error.
  • The event log shows eventid: 1034 with “Removal success or error status: 1603″
[the solution]
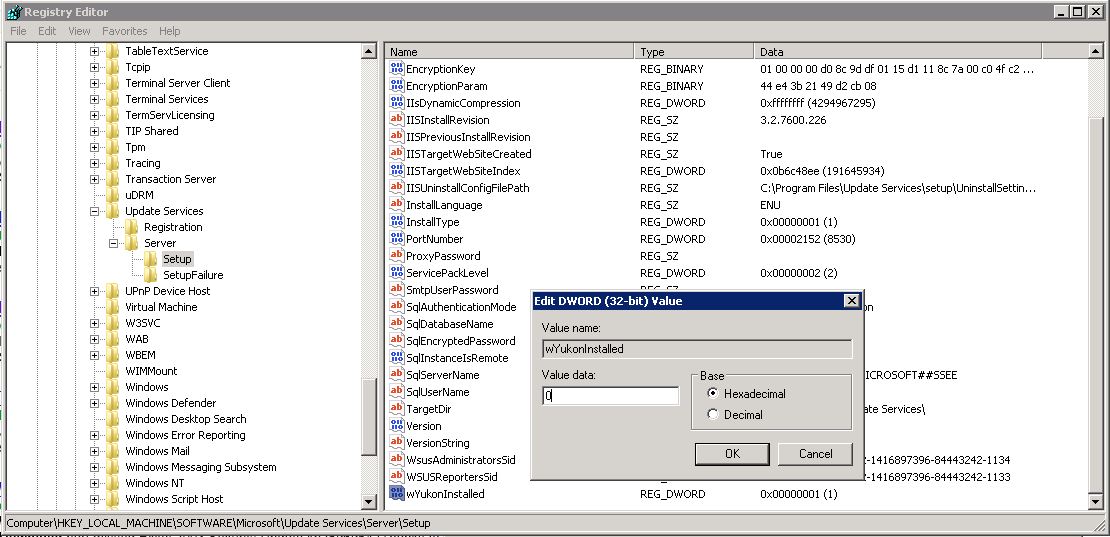
[step 1] Open REGEDIT in and locate: HKLM\Software\Microsoft\Update Services\Server\Setup
[step 2] Change the value of “wYukonInstalled” to 0×0 (zero) and ensure that the value of “SqlInstanceIsRemote” is oxo (zero).
[step 3] Download and run the WSUS 3.0 SP2 installer. You should now be able to remove the product using the installer. Select none of the check boxes (to remove database, logs or updates), we can remove these manually later.
[step 4] Download and install SQL Server 2008 Express R2 (or SQL Server 2005 Express). Make sure you can connect to the instance you create with SQL Server Management Studio.
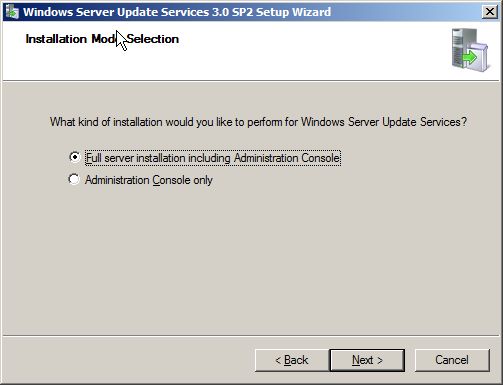
[step 5] Run the WSUS 3.0 SP2 installer again and (this time it should allow you to install). Install the Full product including management console.
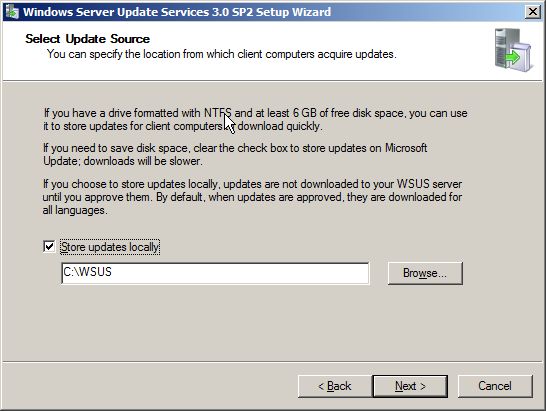
[step 6] Select a location with plenty of space to store the downloaded updates (I recommend at least 20GB of space).
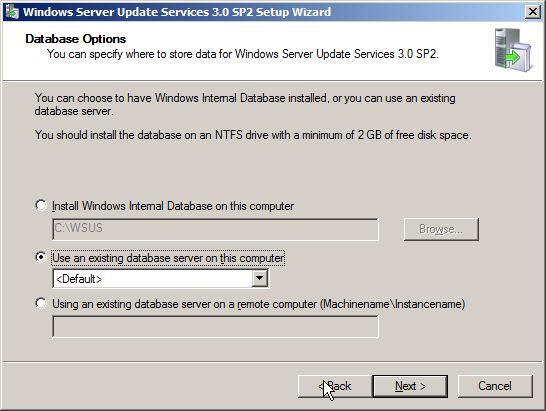
[step 7] Select the option to use an existing database server.
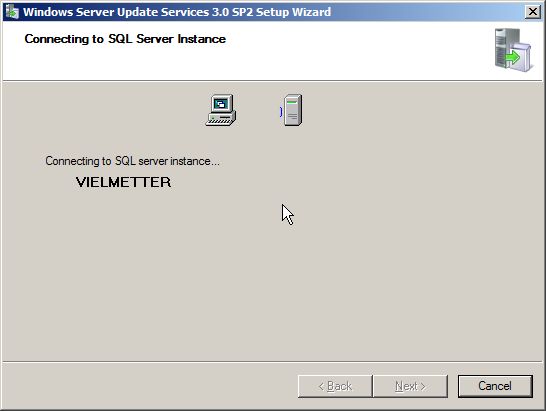
[step 8] It should find the SQL Server 2008 Express instance you installed and tested in [step 4].
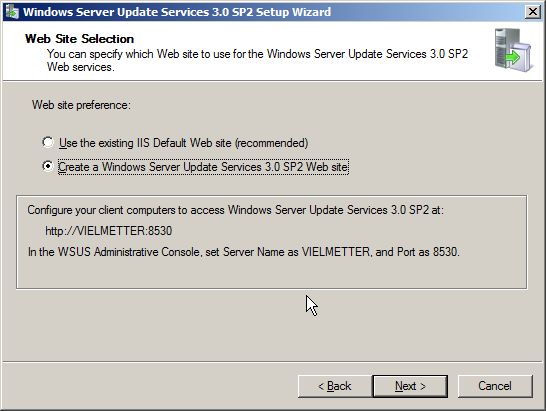
[step 9] Create a separate Windows Update Services website (I don’t recommend using the default IIS website).
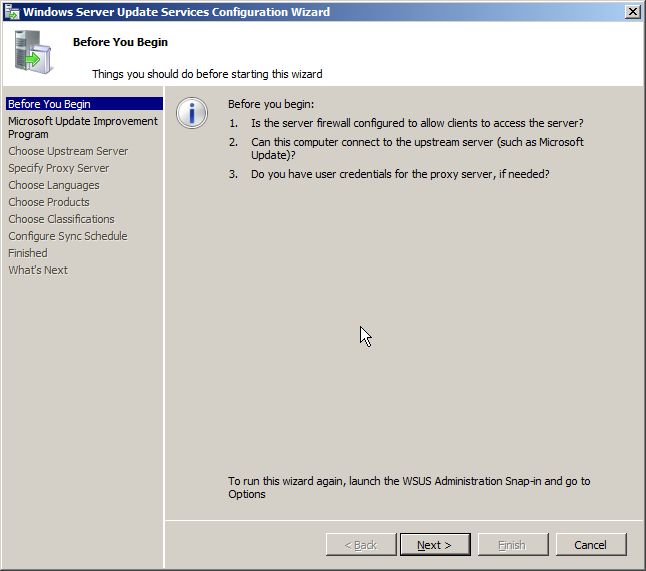
[step 10] Step through the WSUS configuration wizard.
That’s it.

Rename Onedrive Business root folder

Rename Onedrive Business root folder Here is what I remember: In the Office 365 web admin pages, change the organization name to a shorte...