FreeNAS is an Open Source Storage Platform and version 8 benefits not only from a complete rewrite – it also boats a new web interface and support for the ZFS filesystem. It is also worth mentioning that FreeNAS supports Advanced Format drives (something that my Windows Home Server does not).
The features of ZFS are many but it is the data integrity and large capacity support that caught my attention when I first started to ponder alternatives to Windows Home Server (WHS).
The other ZFS contender that has piqued my interest is Nexenta whose community edition has an 18TB limit (although you can run the Nexenta Core version with a community developed GUI without any storage limit). One key difference to be aware of (and these will be moving goalposts) are the versions of ZFS that both of these projects are running. At the moment, for example, it looks like FreeNAS does not support de-duplicationof data while Nexenta does.
FreeNAS is designed to be run from a flash drive which is nice in that all of your hard drives can be dedicated to storage. A 1GB drive is recommended as the minimum requirement and this can hold several FreeNAS images – so you can roll back to a previous installation if you experience troubles during an upgrade for example. I will be installing FreeNAS to a 1GB virtual hard disk instead.
I have yet to decide between FreeNAS and Nexenta yet – but for today wanted to get the ball rolling installing FreeNAS 8 in VMware vSphere 4.x.
First download the FreeNAS 8 .iso and copy it to your vSphere datastore.
Create a new virtual machine and specify the following Guest Operating System properties – Other andFreeBSD (64-bit).
I configured 4Gb of RAM with the default LSI Logic Parallel SCSI controller with a 1GB vitrual hard disk.
Finally point the virtual CD-ROM of the virtual machine to the uploaded FreeNAS .iso and boot the virtual machine:
Press 1 to begin installation:
Press Enter to install to default device:
Press Enter again to install to the VMware virtual disk:
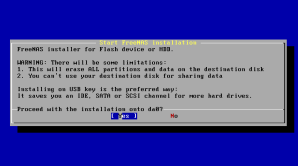
Press Enter again to confirm installation to hard drive (installation to USB is the preferred method for FreeNAS but this is not practical on ESXi):
Wait for FreeNAS to copy the image to the virtual drive:
Reboot the virtual machine:
As you can see there are various options for configuring FreeNAS when it boots. For now I will take a quick look at the Web interface.
Open Firefox and browse to the IP address of your FreeNAS installation (as detailed in the previous screenshot).
Use admin for the Username and freenas for the password.
Welcome to the FreeNAS interface!
As you can see there are plenty of options available to configure FreeNAS and (now that installation is complete) that will be the topic of a later blog-post.


Keine Kommentare:
Kommentar veröffentlichen