OPTION ONE
To Make a Theme Pack
NOTE: If you have not already, then you will need to customize your current Windows 7 theme to how you want the theme pack to be saved as by changing the items you want listed below.
1. Change the Desktop Background picture and settings.
2. Change the Window Color and Appearance settings.
3. Change the Sounds for the Windows 7 sound events to any sound file that you would like instead.
4. Change the Screen Saver and settings to be used for this theme pack.
5. Change, add, or remove any Desktop Icons that you want to with.
6. Change the Mouse Pointers to use pointers of your choice.
7. Save this theme.
8. Proceed to OPTION TWO below to save your customized theme as a theme pack.
OPTION TWO
To Save Current Theme as a Theme Pack
NOTE: This will save the current customized theme you have running now as a .themepack file with any name you like to any location that you select.
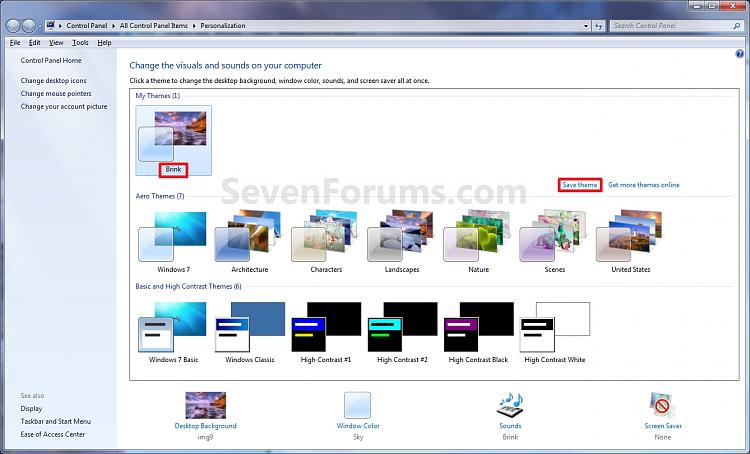
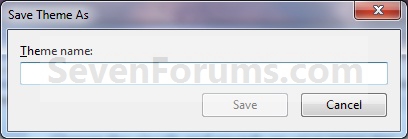
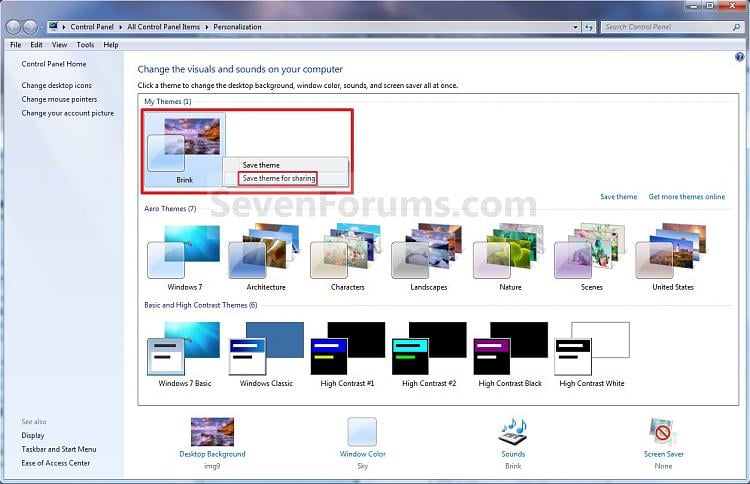
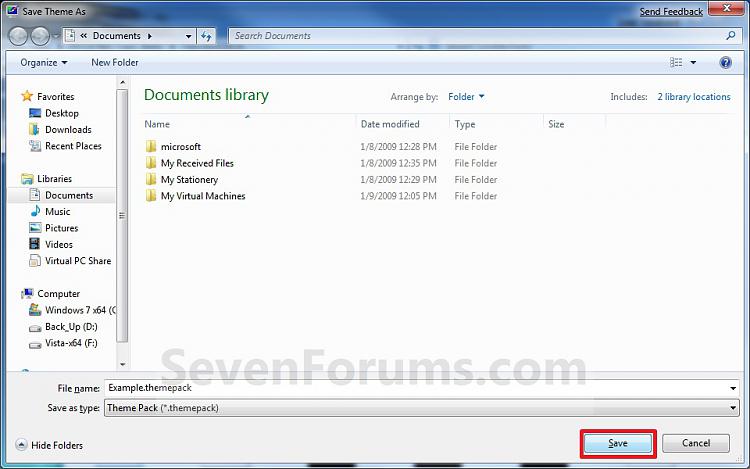
1. Right click on a empty space on the desktop and click on Personalize. (See screenshot below)2. Under My Themes, click on the Save theme link towards the right. (See screenshot above)3. Type in a name you want for this theme, and click on the Save button. (See screenshot below)4. Under My Themes, right click on the current theme and click on Save theme for sharing. (See sceenshot below)5. Navigate to the location that you want to save the .themepack file at, type in a file name for the .themepack, and click on the Save button. (See screenshot below)6. You can now close the Personalization window. (See screenshot under step 2)
OPTION THREE
To Install a Theme Pack
NOTE: This will show you how to install a .themepack file so that it will become your current theme and be available to select in the Personaliztion window under My Themes.
1. Download and save a .themepack file of your choice to your desktop.
NOTE: For example, the Example.themepack file used in OPTION TWO.
2. Double click on the .themepack file to install it on your computer.
NOTE: This will install the .themepack to a folder with the themepack name in the hidden
C:\Users\User-Name\AppData\Local\Microsoft\Windows\Themes folder.
3. You will notice that this .themepack file is now your current theme and has been added to the Personalization window under My Themes. (See screenshot below)
OPTION FOUR
To Delete a Installed Theme Pack
NOTE: This will show you how to delete a theme that you have installed to remove it from the My Themes section in the Personalization windows.
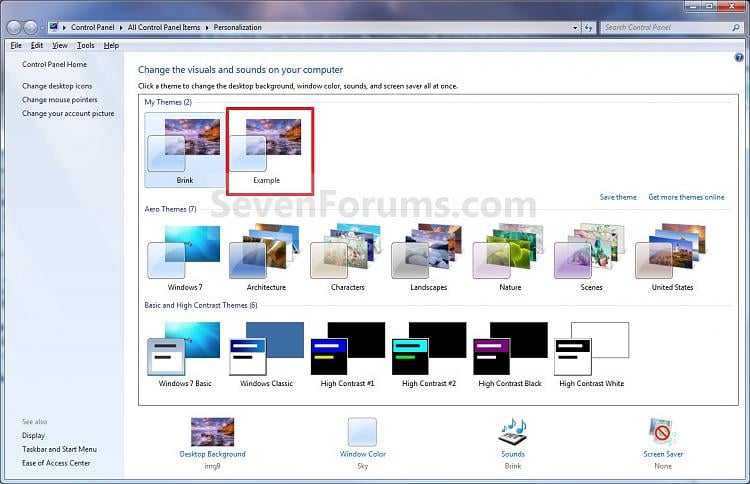
1. Right click on a empty space on the desktop and click on Personalize. (See screenshot below)That's it,2. Select another theme other than the one that you want to delete in the My Themessection. (See screenshot below step 3)
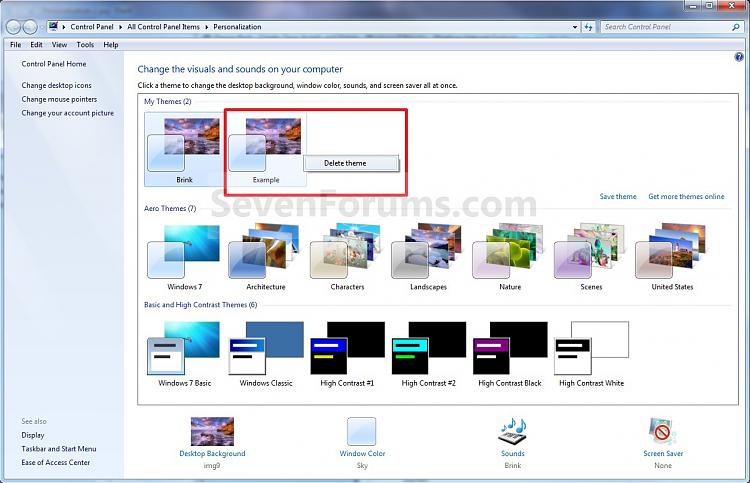
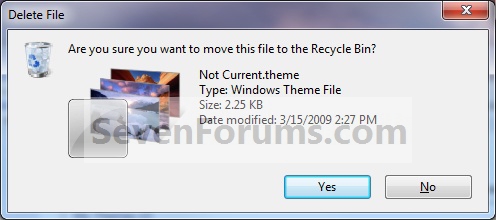
3. Right click on the theme (ex: Example) in the My Themes section that you want to delete, and click on Delete Theme. (See screenshot below)4. Click on Yes to confirm the deletion. (See screenshot below)5. When done, close the Personalization window. (See screenshot below step 3)
Shawn

Keine Kommentare:
Kommentar veröffentlichen