In last two posts of this series I posted about basic configurations needed on AD RMS cluster and Exchange 2010 server. In this post I will show how to test the configured features using an application that has an RMS client.
So, to test the configuration we need to have at least one client computer installed Microsoft Office. I have used Microsoft Office 2010 RTM on a Windows 7 Ultimate computer for demonstration purposes.As we are discussing IRM in terms of its use with Exchange I have limited the scope of client to Outlook 2010 only.
24. Logon to the computer with a user account with a valid mailbox and launch outlook. Point to new message and select New Message. Select the Options tab on the new message window and click the drop down menu on the Permissions button, and select Manage Credentials as shown in the below picture.
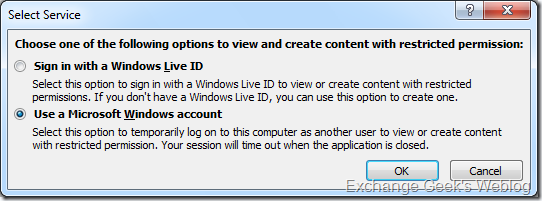
25. Select Use a Microsoft Windows account option on the Select Service dialog box and click OK
26. After you selected the correct option the built in RMS client in outlook will retrieve the SCP from Active Directory and will find out the server name of your AD RMS cluster. You must provide your credentials in order to access your rights.
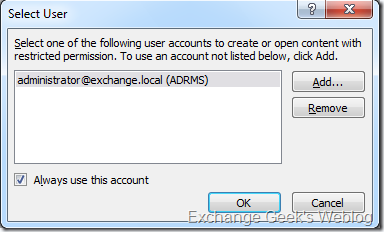
27. Select your user name from the list that appears in the list after you provide the credentials. In case you have been given more than one credentials you can manage those credentials in the following way. Click OK. Now your client knows where to look for the rights you have been assigned in the AD RMS database.
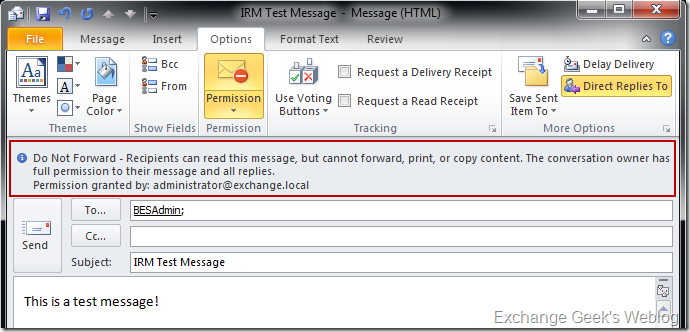
28. Now time to send a protected content in the form of an email. Again, follow step 24 and select Do not Forward from the drop down before you click send. The moment you select Do not Forward from the drop down, outlook shows a message in the windows and lets the user know that recipients of this email will not be able forward this email.
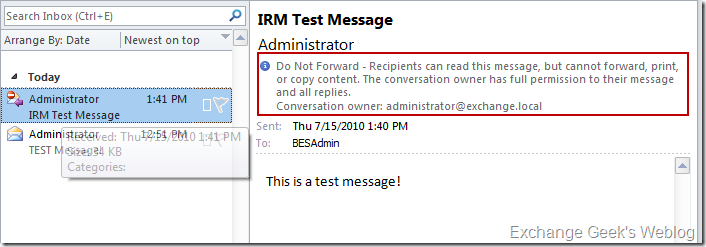
29. Let’s see how it looks like on the recipient end. Again, the recipient is also notified about the restriction that is on the content.
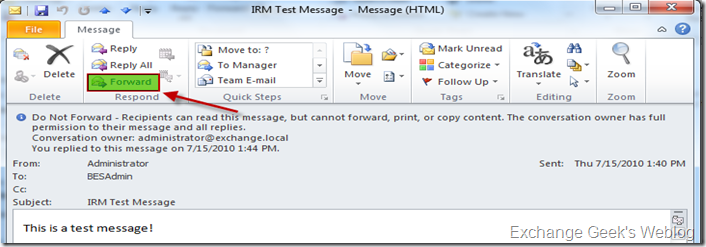
30. If this message is opened by the recipient, the email options for forwarding are disabled automatically.
31. One can also view the permissions that he or she has on a restricted email that they received by clicking on the information bar highlighted in step 29.
Now if you see the last figure correctly the recipient has permissions like saving the file and editing the file. In some cases even these additional permissions may be dangerous. In the next post I will show how to configure additional templates and assign them to specific group of people so that these permissions can be used correctly.



Keine Kommentare:
Kommentar veröffentlichen