In previous three posts of this series I showed the procedures to install and do initial configurations for AD RMS and Exchange 2010. In this part of the post I will show how to configure desired permissions for each set of users using AD RMS policy templates. Like said in the third part of this post, the permissions assigned by default policy templates may not be enough sometimes; or you may need more rights be assigned to some users. To achieve this a functionality of AD RMS known as Rights Policy Templates comes into play. We will see how to configure these templates.
32. To create a new policy template: Select Rights Policy Templates from the left hand side pane and then click Create Distributed Rights Policy Template.
33. Create a folder named RMS_Templates at desired location. Share this folder and add Authenticated Users to View the folder content. After that add RMS Service account to give full control of this folder. Right click the Rights Policy Template node in above figure and then select properties. Read more at Creating an AD RMS Rights Policy Template
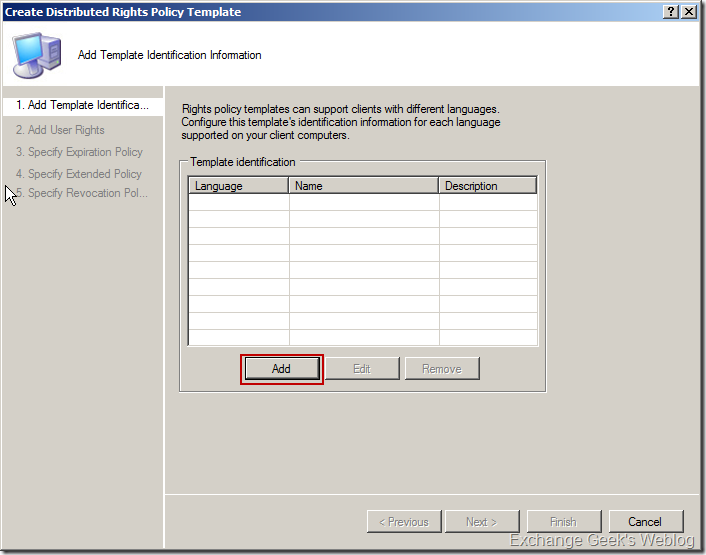
34. This will pop up Create Distributed Rights Policy Templates wizard on the screen. Click on the Add button on the wizard.
35. Provide a meaningful name and description to the new template that you are going to create and click on Add button.
36. Click Next button the wizard page that is shown in step 33.
37. Let’s us consider that you have a group of people where these people should only be able to view certain emails and should not be able to forward, reply or print these emails. You need to create a distribution group for such people using EMC and add all of them as members of it. After you have completed creating a group and adding appropriate people into it, you can now specify this group of individual users in AD RMS wizard that is open. Now you can select the ONLY View rights front the rights list box. If you want to configure the expiration, revocation or extension in policies you can do so using the wizard or can simply click to Finish.
38. You can set the expiration polices on the next page. Expiration policy settings are totally dependant of your company requirements.
39. On the next page you can specify the extended policies as shown in figure below. When you have OWA users it is recommended that you choose this setting. Click to Finish the wizard.
40. After you have completed the wizard you will see a new template in the AD RMS management snap in. To review the rights configured in this template you can simply right click it and select View Rights Summary.
41. Now the next and important steps are to deploy this template to the clients. There are few more steps to be configured and are beautifully explained in Technet article Configuring the AD RMS client.
42. Once you have configured the templates please do follow Configuring the AD RMS client for configuring clients. You can use group policy or Systems Centre Configuration Manager for deploying the settings to the whole organization.
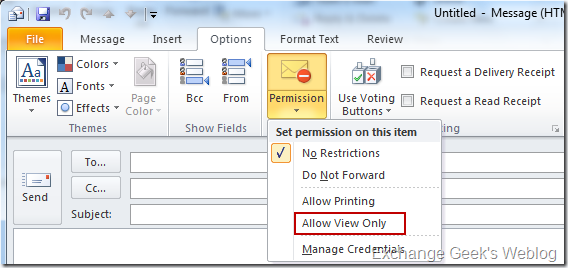
43. If you have followed the article Configuring the AD RMS client correctly, you will be able to see the newly created templates in your AD RMS aware application. For an instance; outlook.
44. You will also see the XML templates downloaded the to %LocalAppData%\Microsoft\DRM\Templates folder of the currently logged on user.
- If you do not see the content of this folder or the folder itself you must create this folder hierarchy manually.
- Also, the registry key HKEY_CURRENT_USER\Software\Microsoft\Office\12.0\Common\DRM does not exist then it should be created manually to specify the value of AdminTemplatePath expandable string value.
- The registry key for Office 2010 would change to HKEY_CURRENT_USER\Software\Microsoft\Office\14.0\Common\DRM
Again, you must follow the article Configuring the AD RMS client.
In the next part of the post I will show how to use Microsoft Exchange 2010 rules to use these templates and automate the email protection to email messages and office attachments.


Keine Kommentare:
Kommentar veröffentlichen